The Perfect Road Trip Out West Itinerary (2024)

Want to know the perfect road trip out west itinerary? We’ve got you covered with everything you need to know!
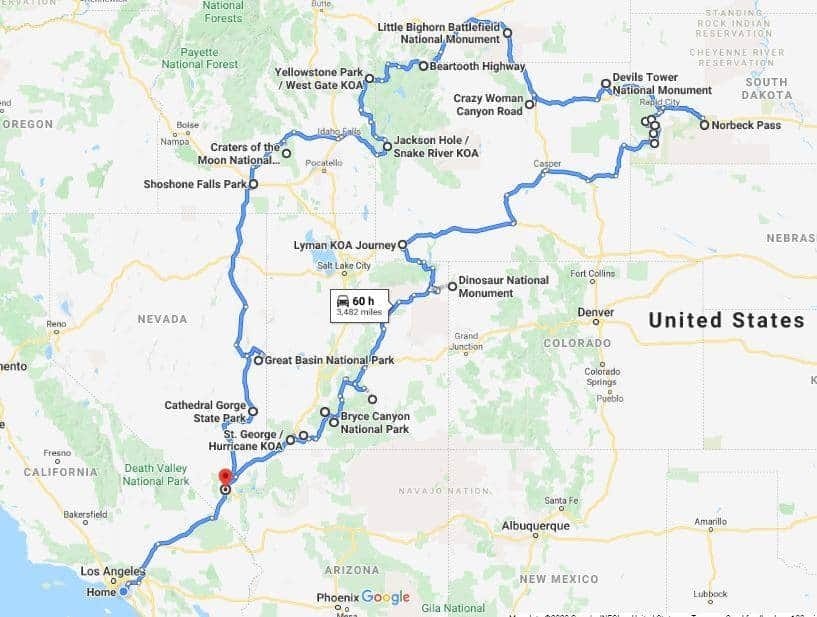
The perfect road trip out west itinerary takes you to popular sites like Mount Rushmore, Yellowstone National Park, Devil’s Tower, and more.
The beauty of this road trip is that you can start and end this itinerary at any point since it essentially makes a loop.
If you’re driving out from the midwest area, we have several road trip itineraries from Ohio to California and several road trip itineraries highlighting various cross country driving routes.
Planning A Trip? Use Our Favorite Resources Below!
👉🏼 Accommodations
👉🏼 Tours/Experiences
👉🏼 Flights
👉🏼 Car Rentals
Short On Time? Here’s A Day By Day Summary
- Drive from LA to Zion National Park
- Hike the Narrows at Zion + Drive the Scenic Byway to Bryce Canyon
- Hike Bryce Canyon + Drive the Scenic Byway to Capitol Reef
- Dinosaur National Monument
- Casper, Wyoming + Drive to the Black Hills
- Mt Rushmore, Wind Cave National Park, + Other Black Hills Spots
- Badlands National Park + Deadwood
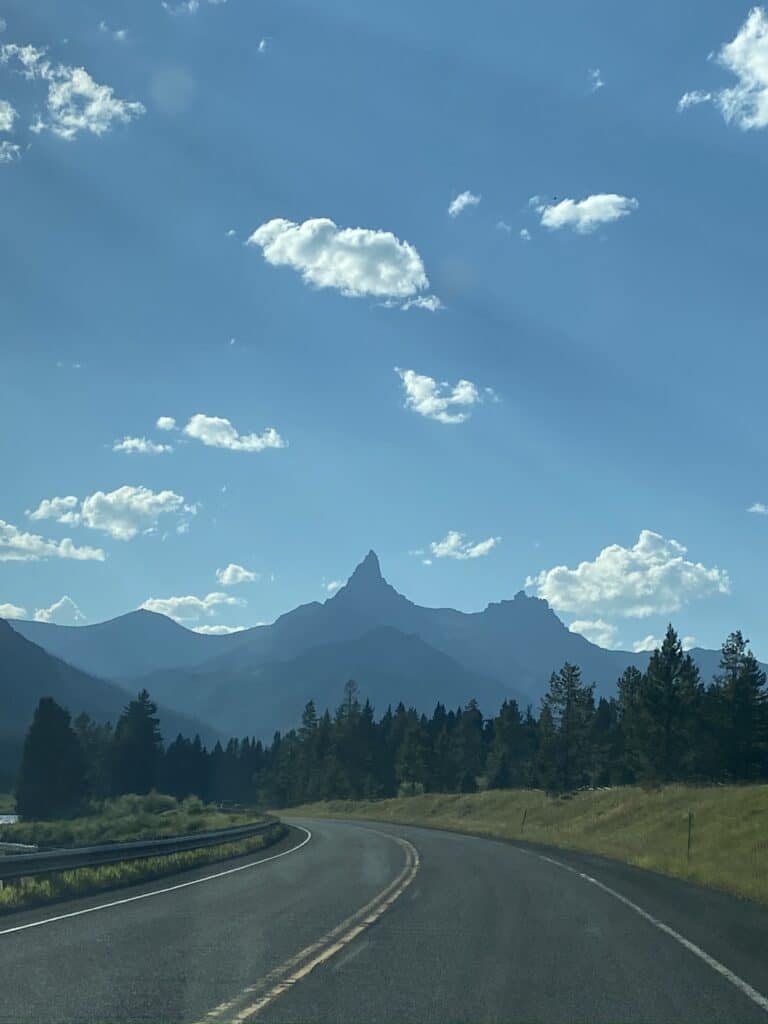
- Devils Tower + Little Bighorn
- Yellowstone National Park
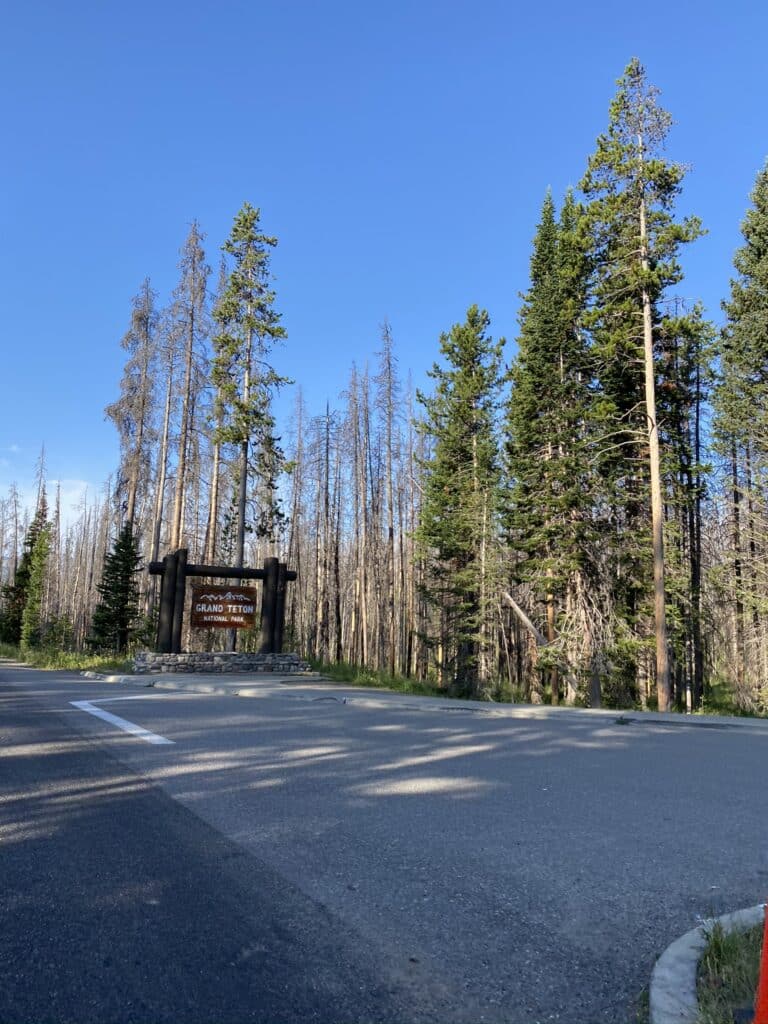
- Grand Teton National Park
- Craters of the Moon
- Shoshone Falls + Great Basin National Park + Las Vegas
The Perfect Road Trip Out West Itinerary
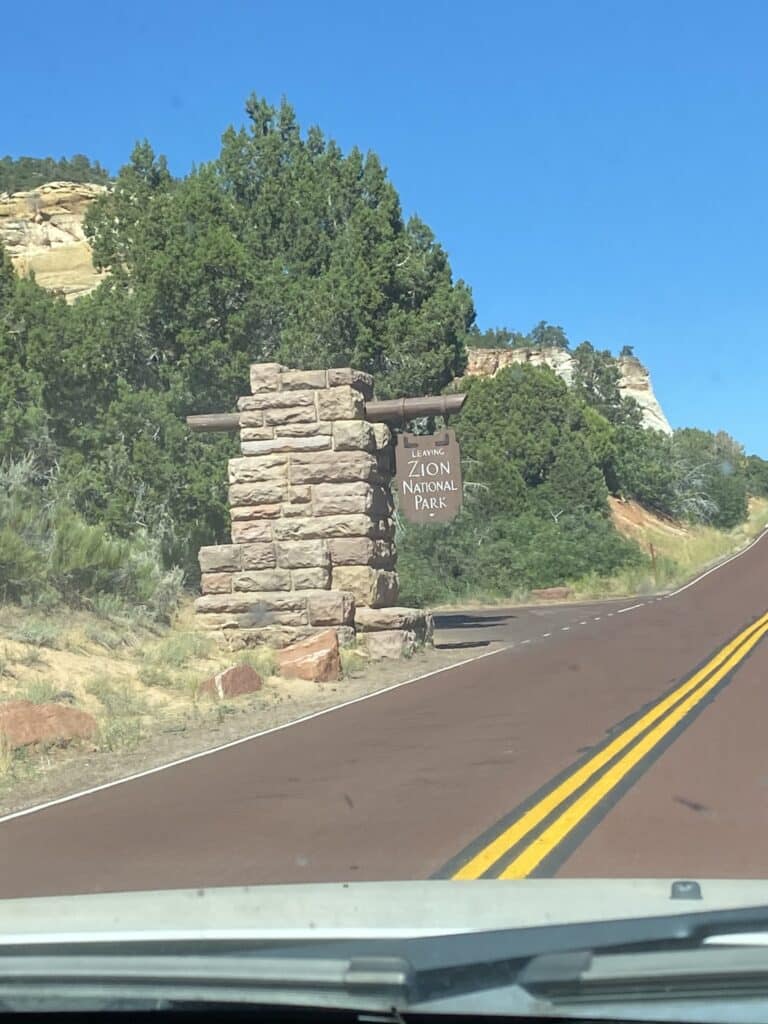
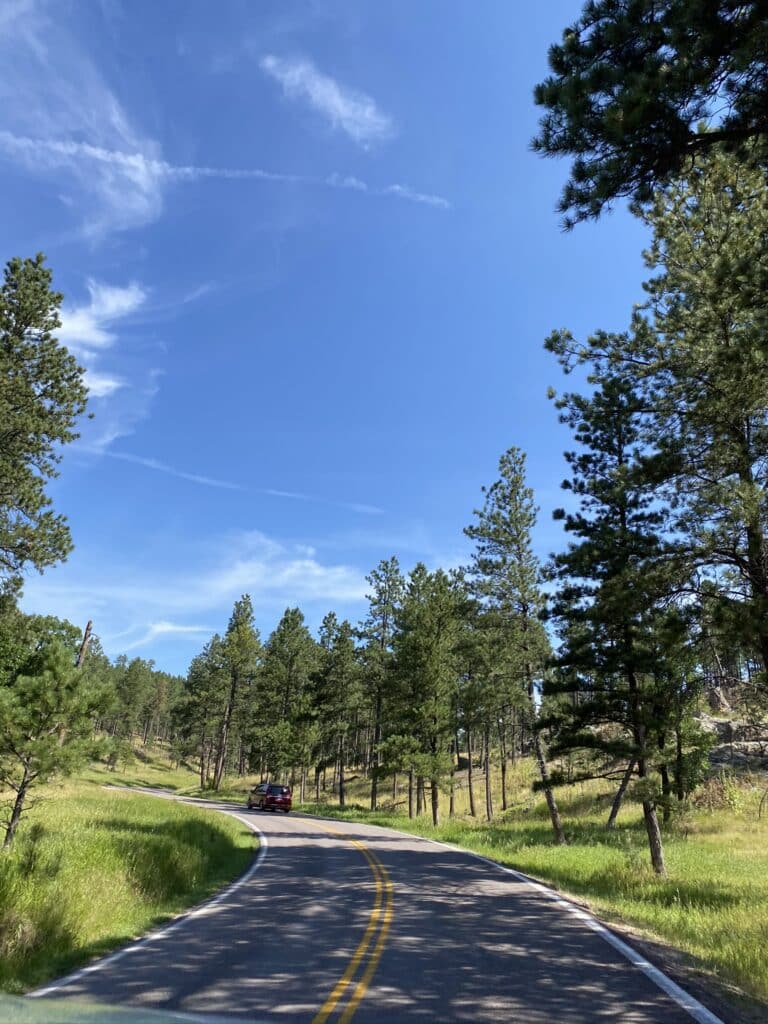
Since we live in Orange County, this itinerary starts in LA, but the first major stop is in Zion National Park.
You can watch this video on our YouTube Channel highlighting our drive from LA to Zion.
Day 1: Driving From Los Angeles To Zion National Park
You want to try get on the road by about 9 am to make the most of your day.
Depending on the time of year you’re taking the road trip, your daylight hours might differ greatly.
I recommend doing this road trip in the Summer, late Spring, or early Fall.
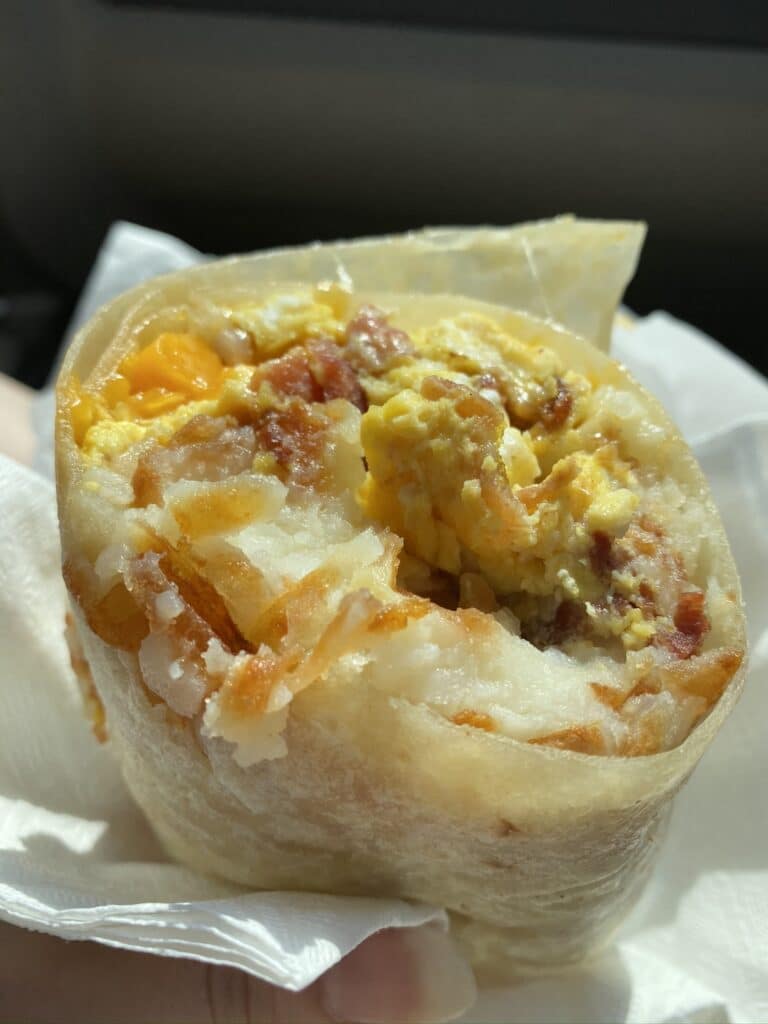
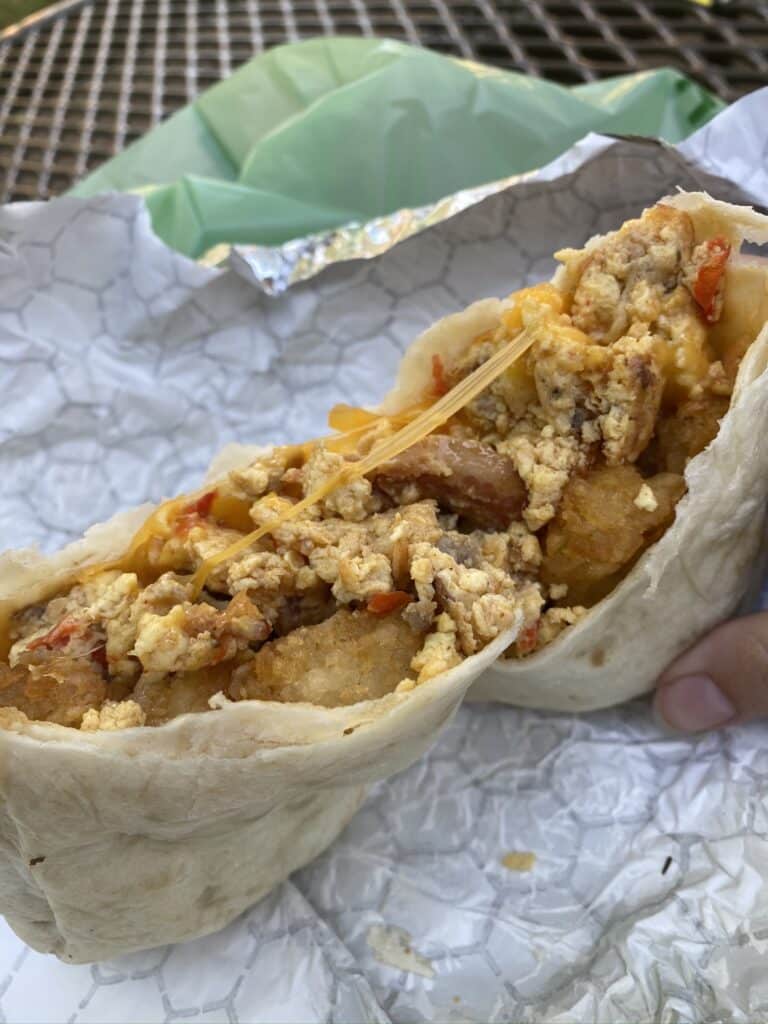
Breakfast From Paul’s Place
To save time, getting breakfast on the go is highly recommended.
Our favorite breakfast spot is Paul’s Place, which is a small chain in Southern California.
We love their bacon breakfast burrito and it’s the perfect size for 2 people to share.
Your car may be able to drive as far as Las Vegas before filling up, which is about a 4 hour drive without traffic.
However, if you need to make some stops along the way, there are only a couple places.
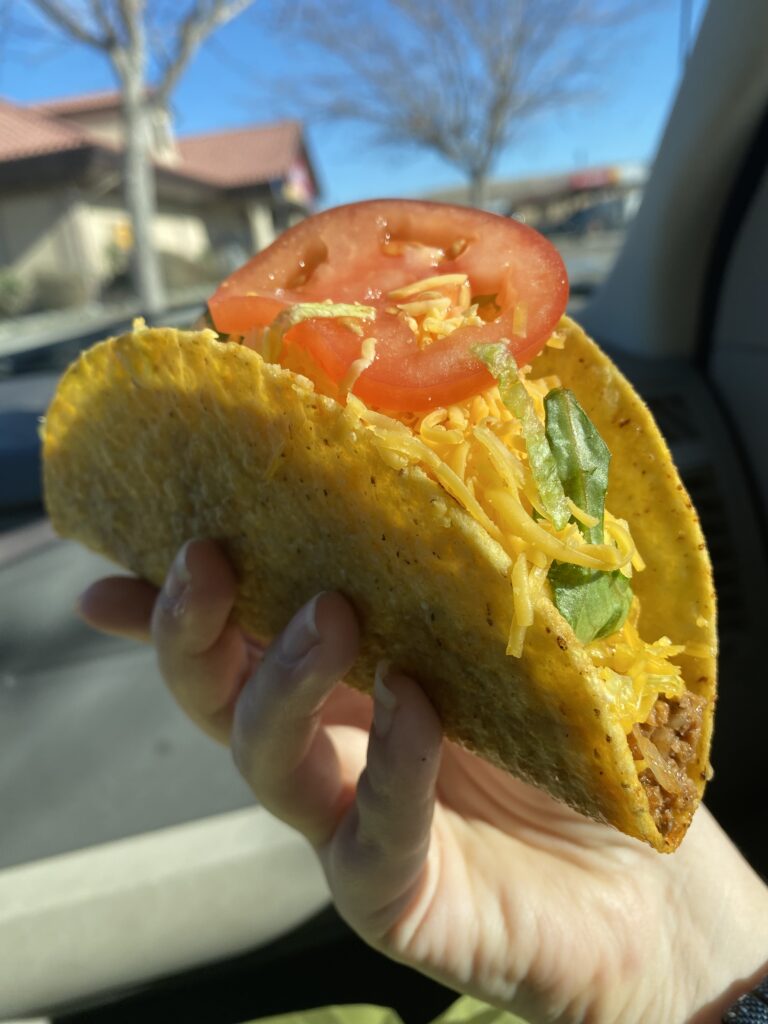
Stop For Gas + The Original Del Taco In Barstow
Barstow is about the half way point when driving to Vegas and it has the most options for food and gas.
The original Del Taco is here in Barstow and I highly recommend trying the Barstow Del Taco when you’re here.
This location in particular loads up their tacos way more than others, so you really get your money’s worth.
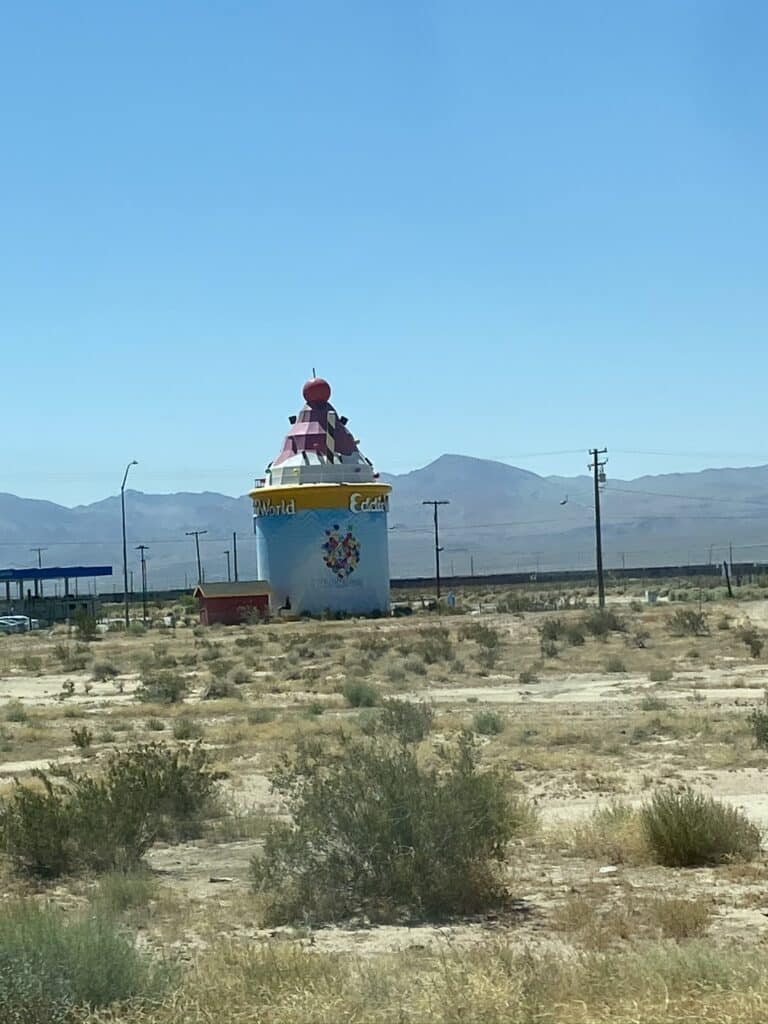
Stop At Eddie’s World For A Sweet Treat
Another option, if you can make a little further past Barstow is Eddie’s World.
It’s a large gas station that also has an ice cream shop and a huge convenience store with every type of novelty snack and drink possible.
It’s not a bad idea to get a few snacks here that you can enjoy at your camp sites throughout your trip.
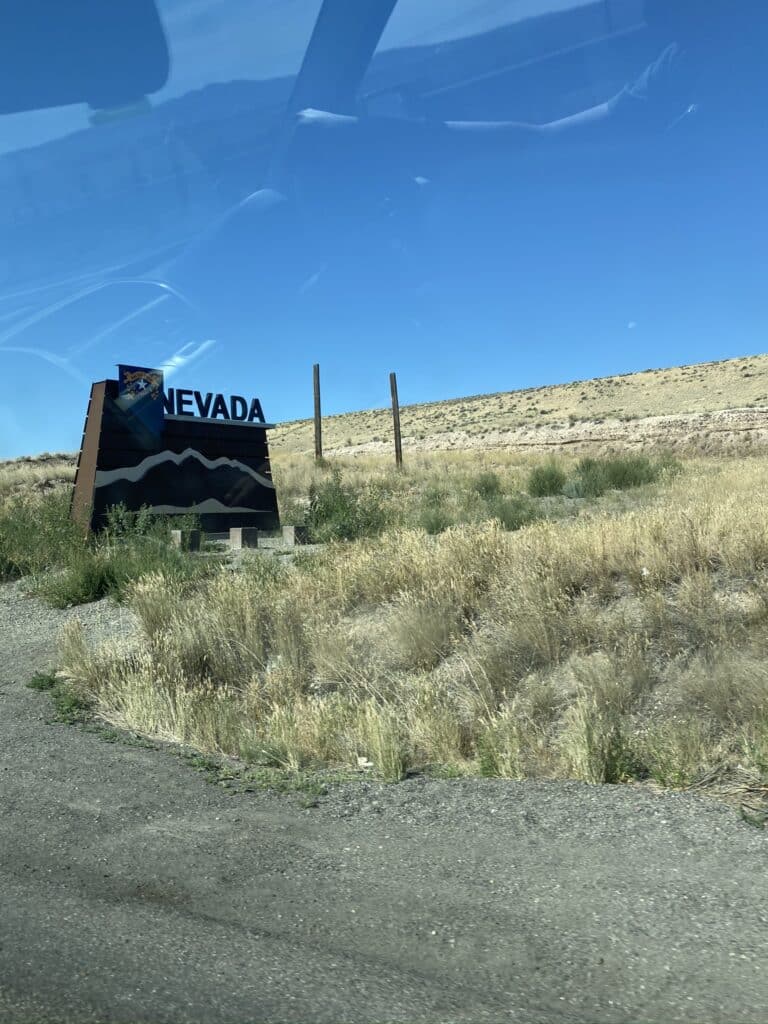
Stop In Primm, Nevada
Primm is a little town you’ll come across when you cross the state line into Nevada.
There’s a couple casinos, a mall, and some fast food.
If you need to stop for anything, it’s your last stop before getting to Las Vegas.

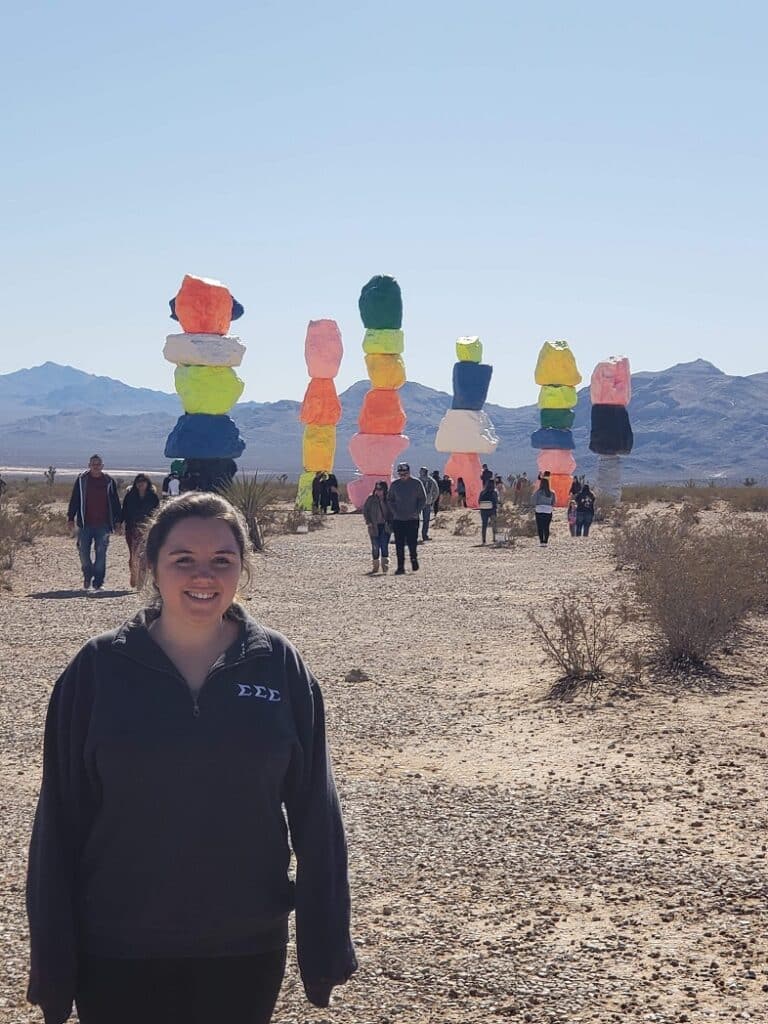
Visit Seven Magic Mountains
Seven Magic Mountains is a cool art installation in the middle of desert outside of Las Vegas.
It’s just off the highway and free to visit.
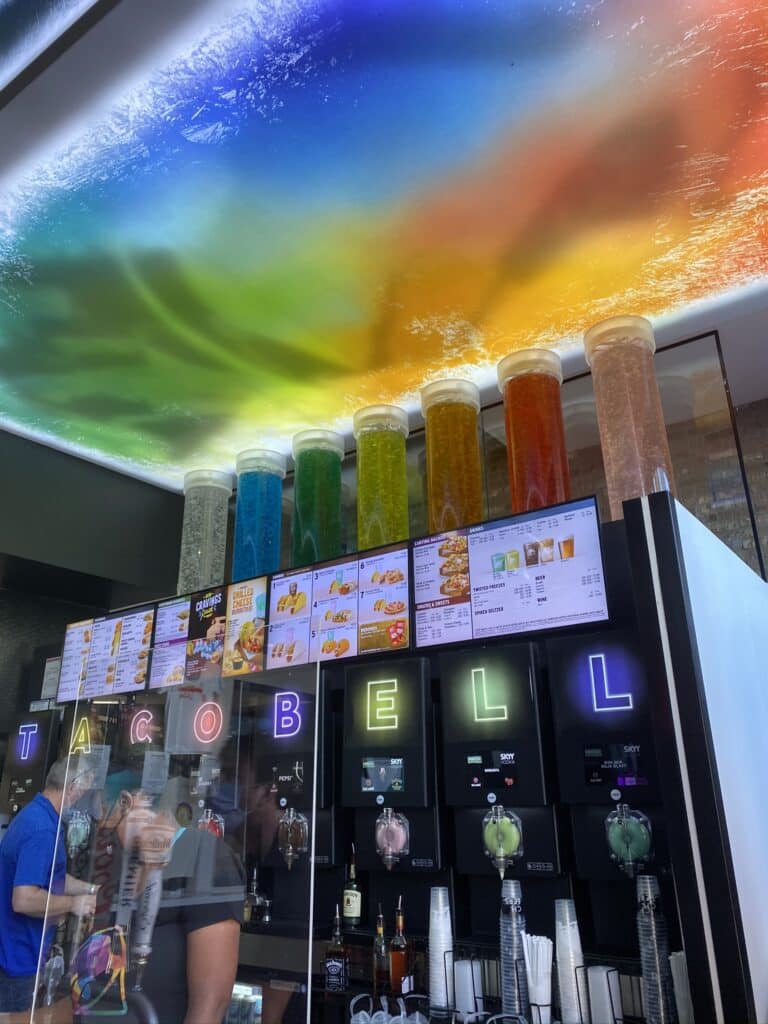
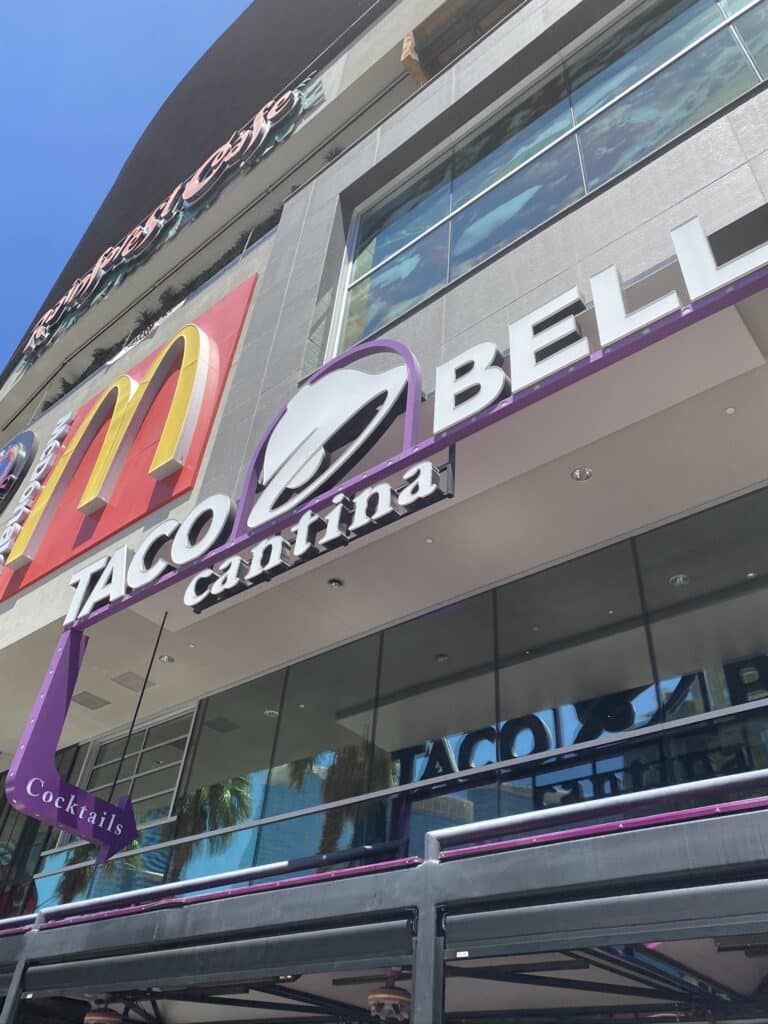
Have Some Fun In Las Vegas
If you’ve never been to Las Vegas, the best way to see it is at the end of this road trip because that is where it circles back to.
On this day, you’ll just want to be out of the car for a couple hours to get some fresh air and walk around.
On this trip, we stopped at the Taco Bell Cantina because it was new at the time, but really any place in Vegas that interests you is fine to stop at.

Continue On To Utah
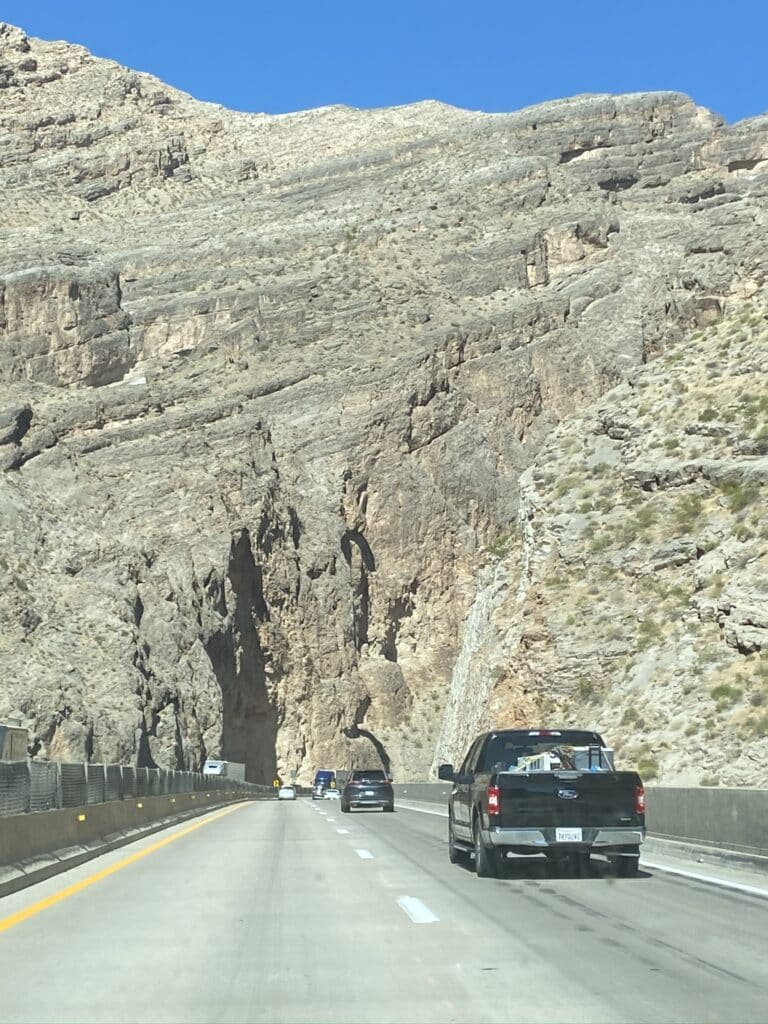
After leaving Las Vegas, you’ll continue on I-15 North toward Utah.
A short section of this highway actually dips into Arizona briefly and you’ll drive straight through some mountains.


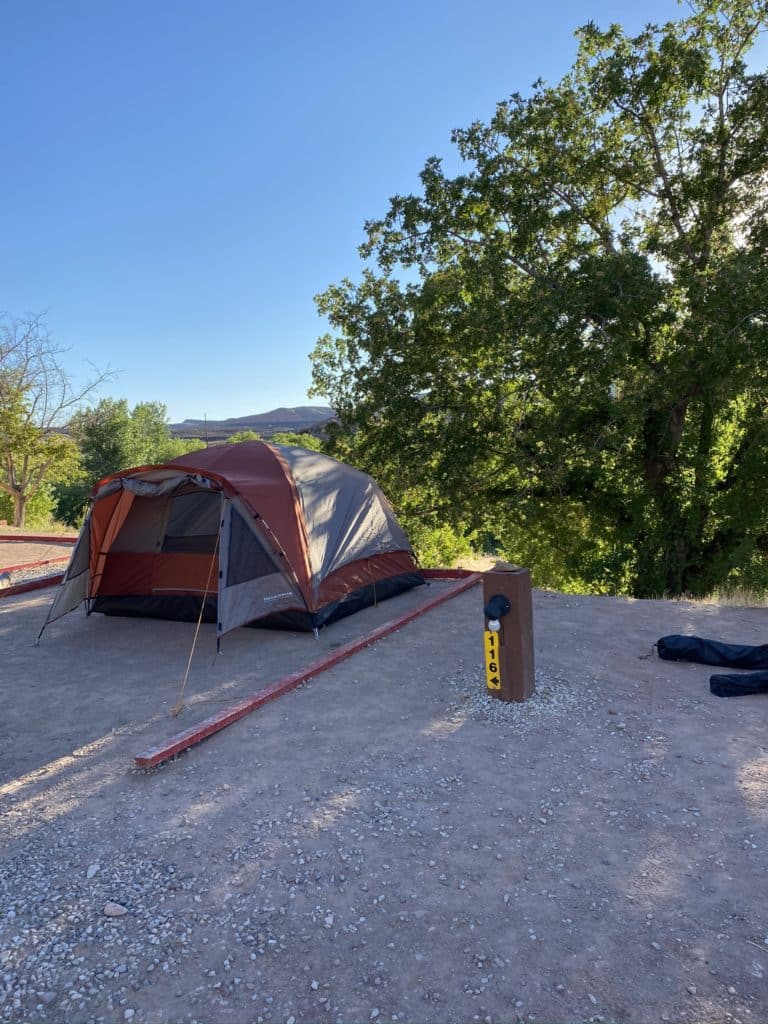
Where To Stay: Hurricane KOA
Hurricane, Utah is a city just before you reach Zion National Park.
If you don’t plan in advance, the Zion campsites can be completely booked out for months in advance, so this is a great alternative that also has more amenities.
Also, if you’re doing this road trip in the Summer like we did, it could be 100+ degrees outside when you get here.
So what we did was park our car at our campsite and hang out in the pool until the sun started to set and the weather cooled off.
Our favorite part of this trip was cooking at our campsite each night.
We didn’t want to deal with having to keep anything on ice or refrigerated, so we went with super basic pre-packaged foods.
I don’t recommend this as a long term diet, but on a trip like this, it’s good enough.
We cooked the Knorr Rice and Pasta Sides a few times on this trip and enjoyed a few bottles of wine while we went.


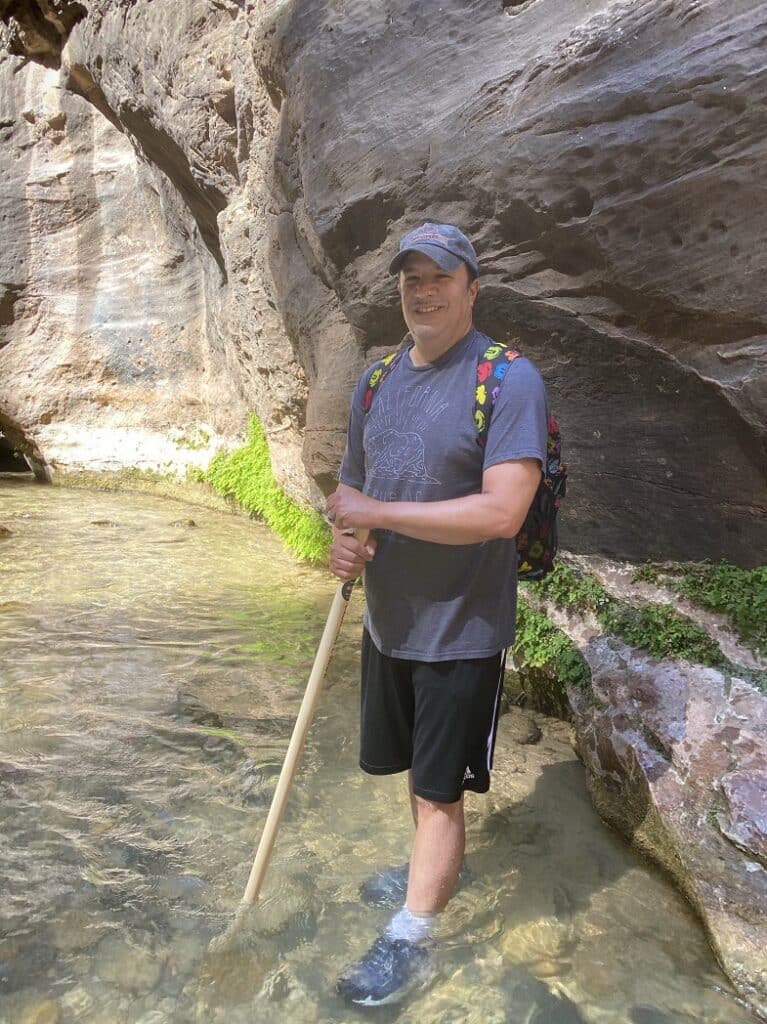
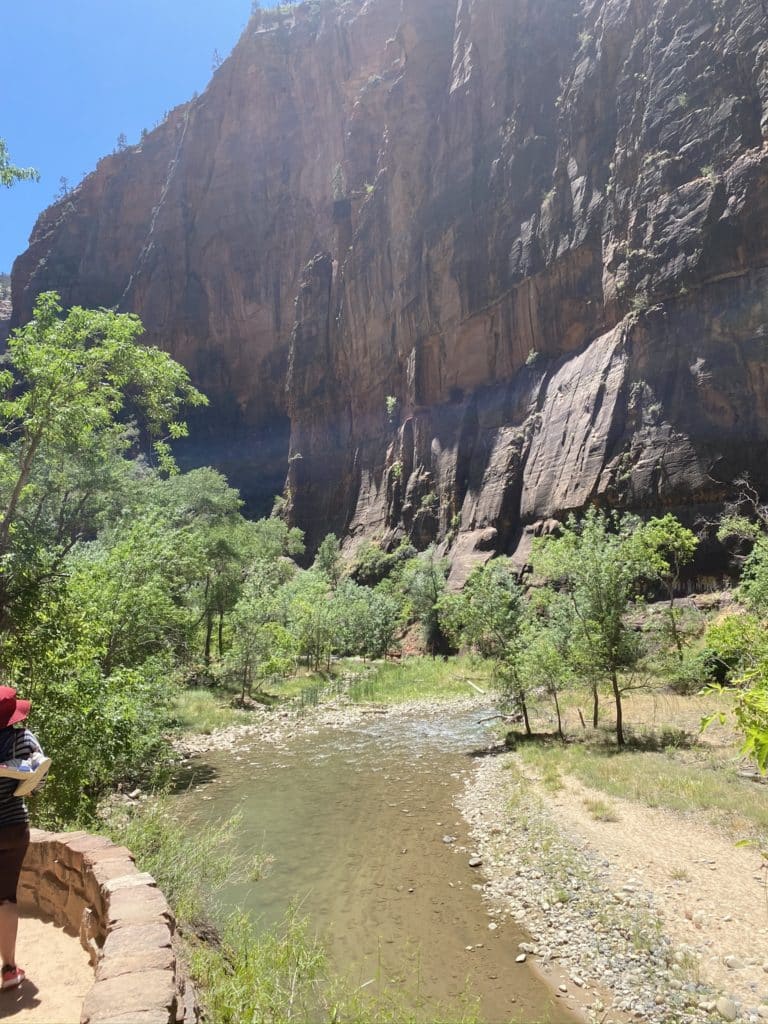
Day 2: Hike The Narrows At Zion National Park + Drive The Scenic Byway To Bryce Canyon National Park
The drive from the Hurricane KOA to Zion National Park is about 30 minutes.
With visiting Zion in the Summer, you want to arrive early, before 9 am because the parking lot can fill up and there can be long lines to get into the park.
From there, you’ll have to take a shuttle to The Narrows.
If you don’t already have hiking sticks, you’ll want to get off the shuttle at the lodge to buy one for each person.
I can pretty much guarantee you will fall at least once, if not way more if you don’t have a walking stick for balance.
There are a lot of uneven rocks and sometimes with the glare of the sun on the water you can’t really see where you’re stepping.
Some other things you’ll want to bring with you on this hike are an extra pair of socks and shoes, plenty of water, and food or snacks.
To get an idea of how to hike the narrows, you can check out this video on our YouTube Channel of our experience.
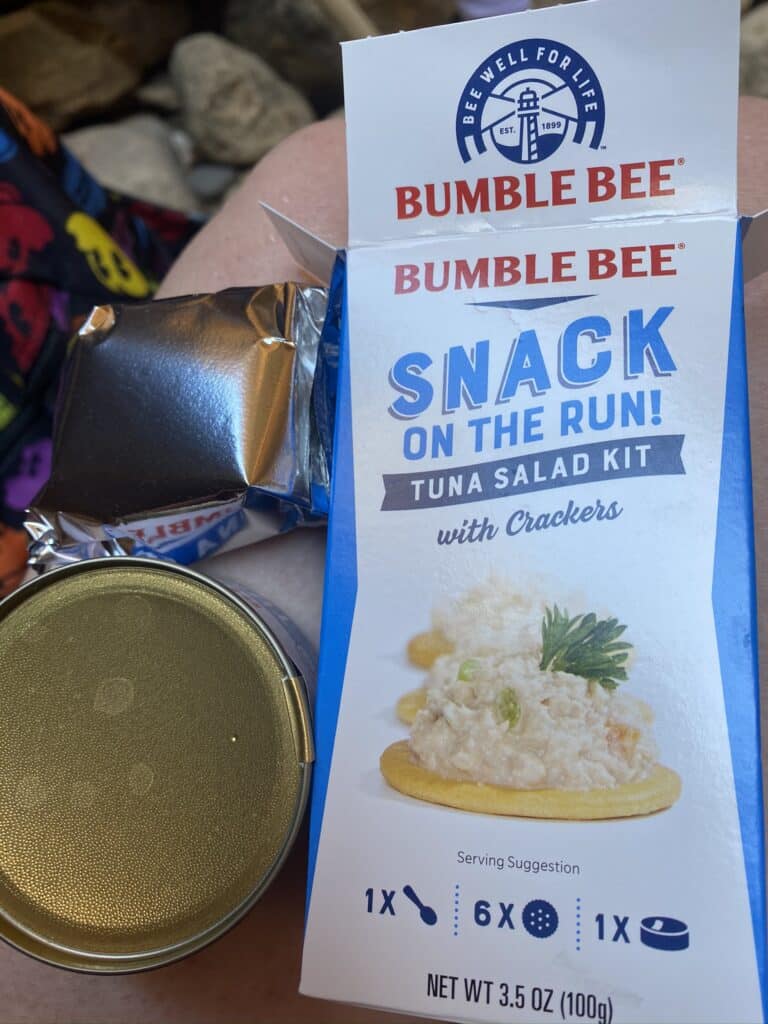
Prepare For Hiking The Narrows At Zion National Park
We didn’t have a set distance that we wanted to hike, we just brought 5 water bottles, chips, and a tuna salad and crackers kit for lunch if we stayed long enough to be hungry.
This worked out perfectly because once we reached the farthest point we wanted to walk we took a break and had lunch before heading back.
You don’t really need the special socks and shoes that are recommended on a lot of blogs.
But if you can afford them, then I say go for it.
Our shoes and socks dried out easily.
Once we finished the hike we changed into sandals.
It wasn’t as hot as we thought it would be even though it was over 100 degrees outside.
The water was nice and cold and we never had any direct sunlight on us because of how high the rocks are on both sides.
It can be a little strenuous walking against the current, which is what made us thirsty more than anything else.
Wear compression shorts or anything to keep your thighs from rubbing together because you spend most of the day in water and you’ll get a huge rash if you don’t.
When we went there was a deadly bacteria or something in the water so there were many signs saying not to swim in it, not to put your head in the water, and not to let it get into your eyes, nose, or ears.
This was fairly easy to do, though sometimes a little bit of water did splash up.
So when you go, make sure you’re aware of any advisories.
Lastly, this hike can only be done seasonally, so check before you plan your trip because it’s pretty much inaccessible in the winter.

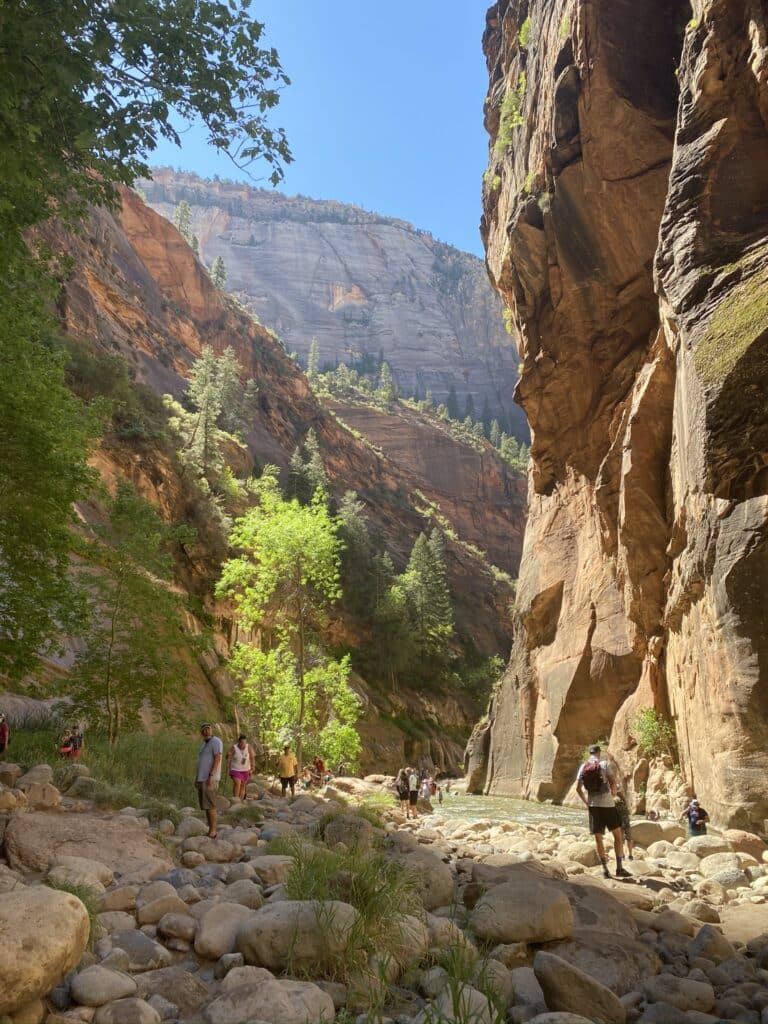
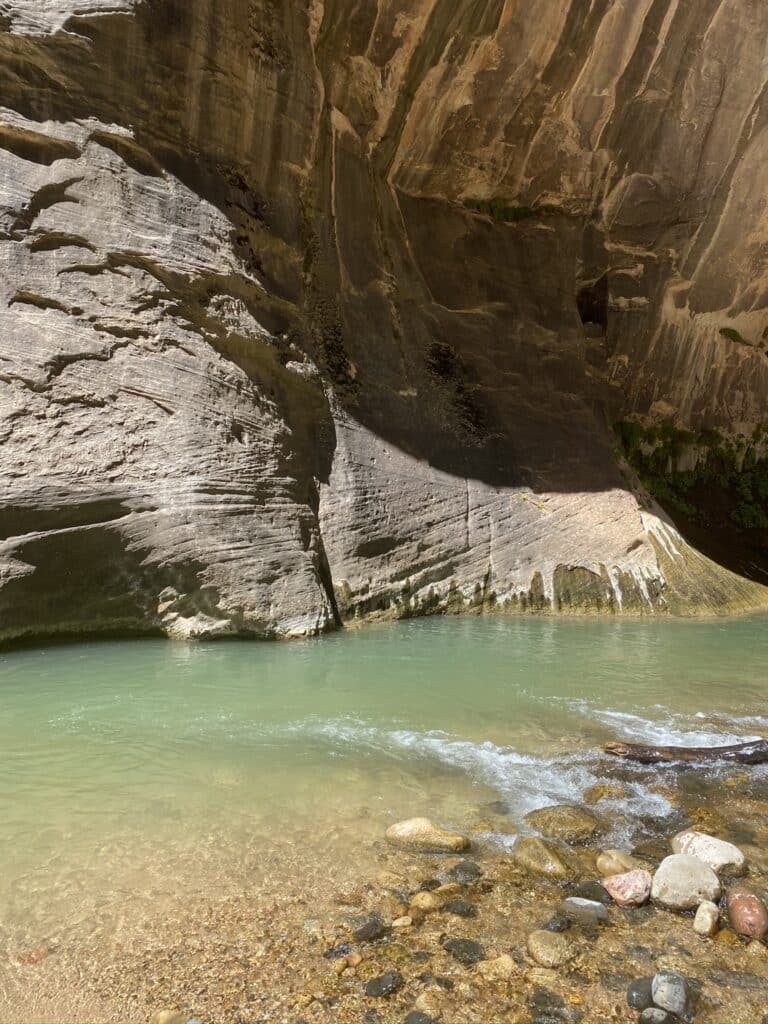
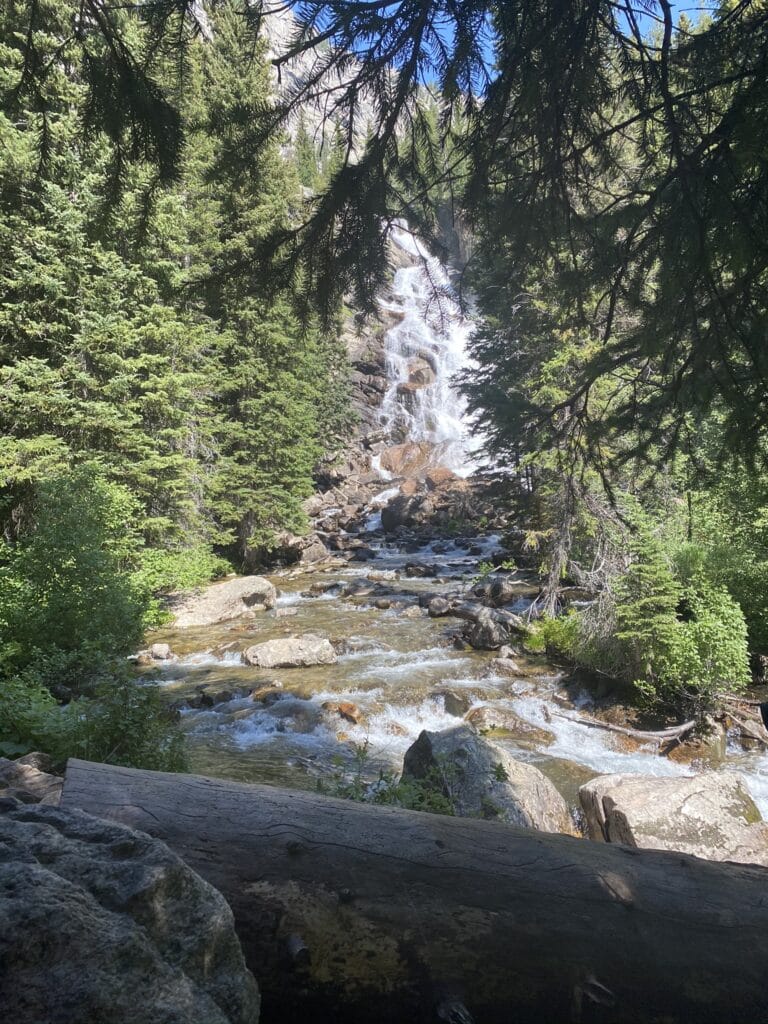
Hike The Narrows At Zion National Park
We got there around 9:30 am and it was about a 20-30 minute walk to the river.
Once in the water, our hike officially started around 10 am and we didn’t make it back out until about 1:30 pm.
You can see in the photos how high up the water got in some spots.
It went above my belly button and almost up to my ribs.
It took a little bit of getting used to at first, but after that it was fun to see how deep the water would get each time.
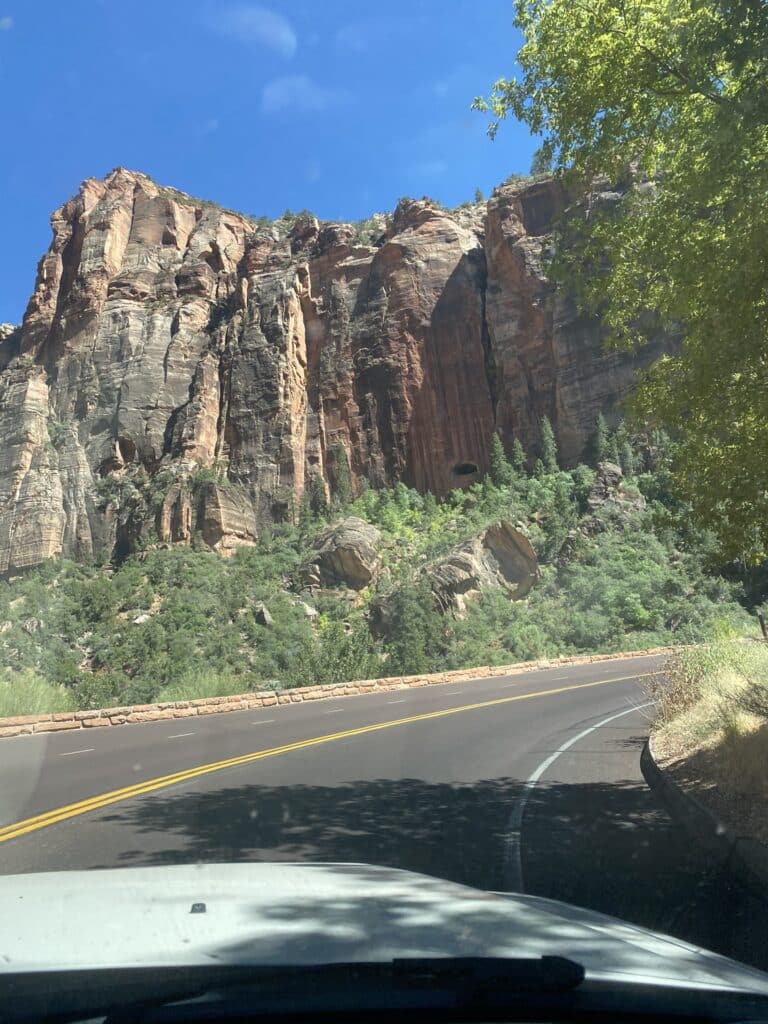
Drive The Scenic Byway From Zion To Bryce Canyon
The Scenic Byway from Zion to Bryce Canyon is a 122 mile long state route.
It winds through a beautiful area that connects Zion National Park to Bryce Canyon National Park and beyond.

Stop For Lunch At Thunderbird Restaurant In Orderville/Mt. Carmel
Thunderbird Restaurant is the “Home of the Ho-Made Pies”.
The backstory of this is that back around WWII they were creating this sign and didn’t have enough space to write out “homemade” so they shortened it to “ho-made”,.
When you say it out loud it kind of sounds the same, especially depending on the accent, so it was a reasonable compromise for them.
It wasn’t until recent years that the sign started getting a lot of attention, so they decided to just go with it.
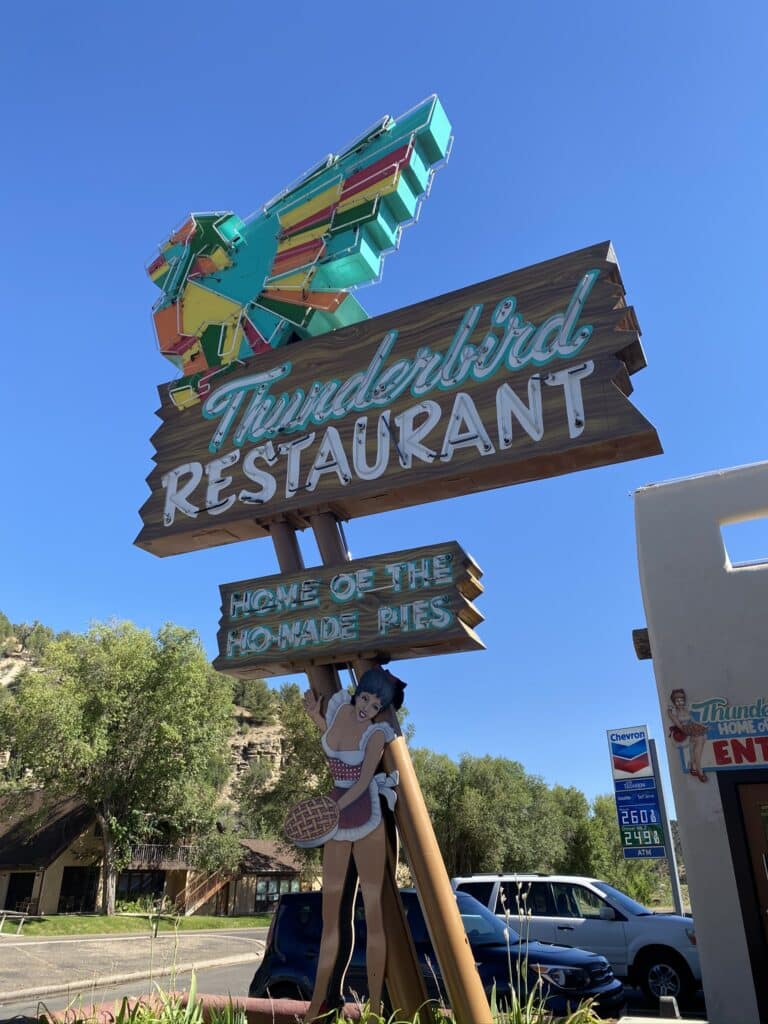

It’s a very cute old-school kind of restaurant and there was so much on the menu that it took awhile to decide what we would do.
We decided to share an appetizer, entree, and dessert, which even still ended up being too much food and we ended up not even cooking dinner at our campsite that night because we were too full.
I highly recommend the Cowboy Corn Bites as an appetizer, though they’re a little bit spicy.
For dinner, a big plate of Cajun Shrimp Alfredo is amazing after a long day hiking.


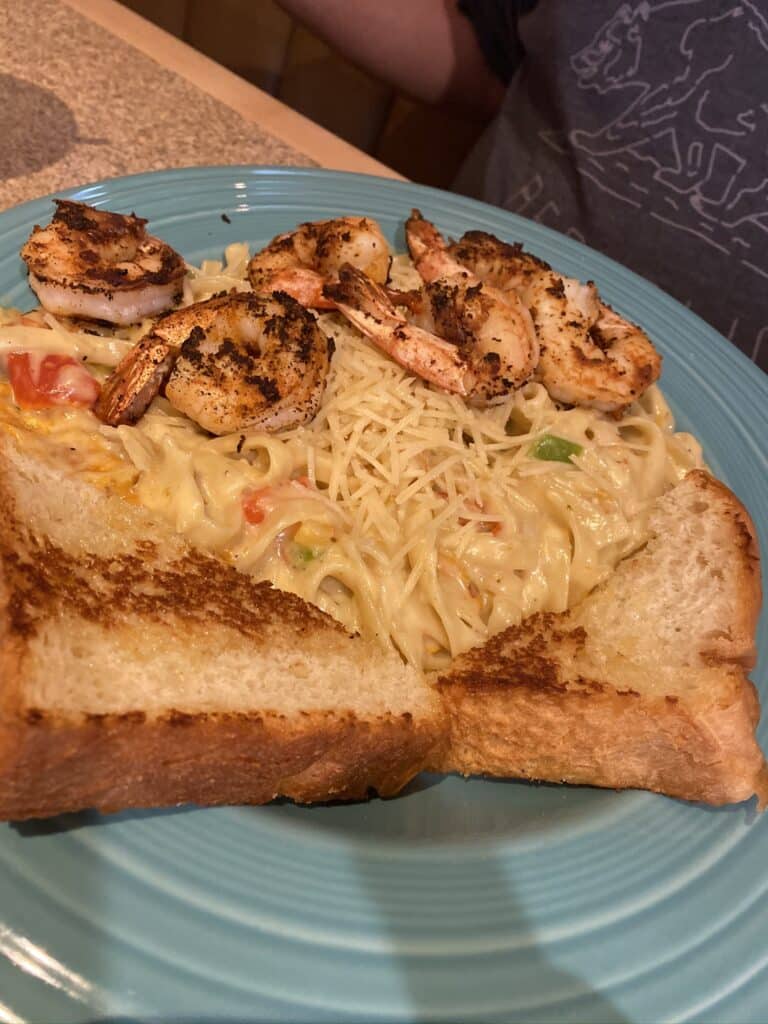
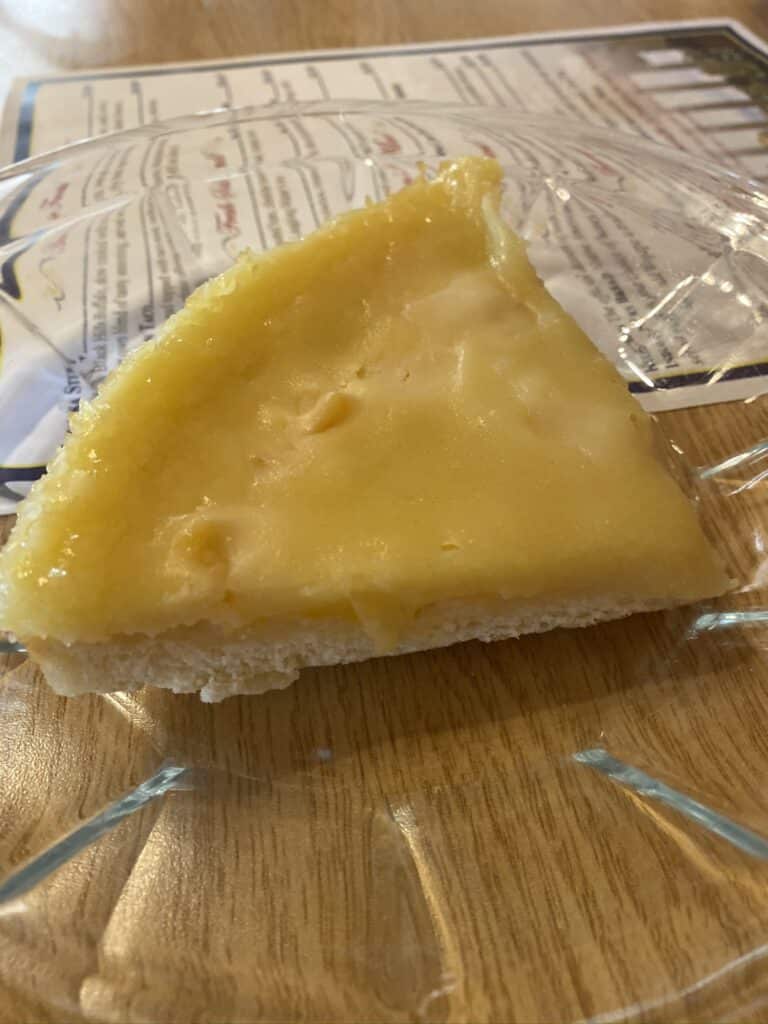
Lastly, you deserve a dessert after a long strenuous day, so I recommend one of their “ho-made pies”.
Our favorite is the Hot Apple Pie with Buttered Rum Sauce.

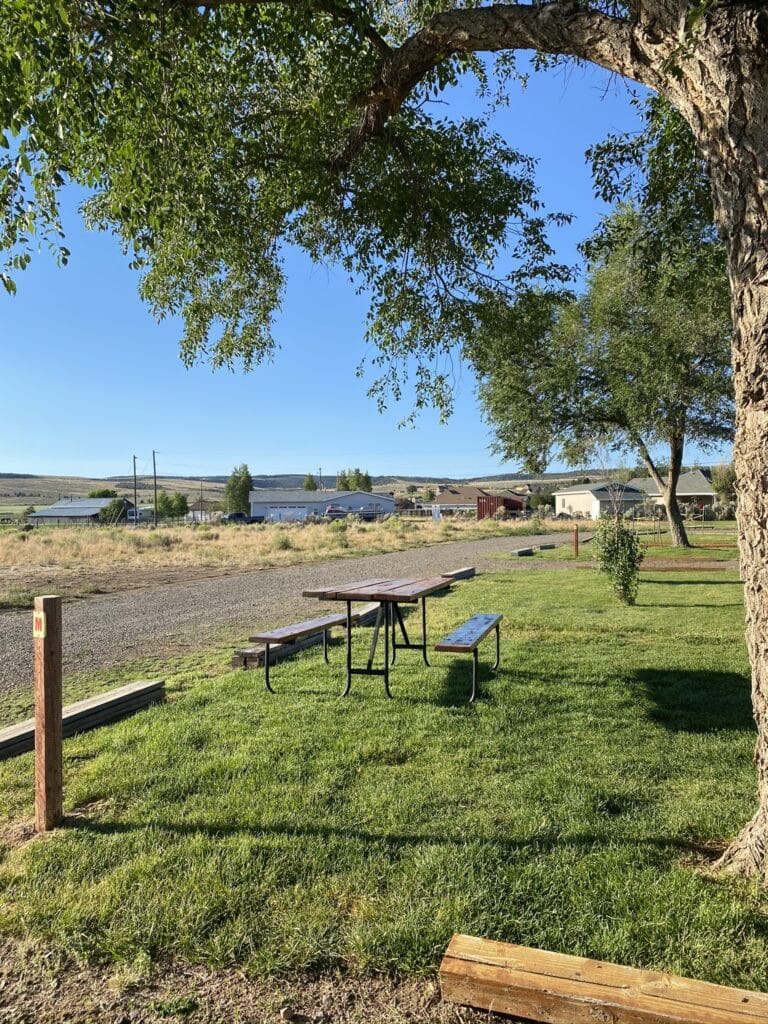
Where To Stay: Panguitch KOA
The closest KOA campground to Bryce Canyon National Park is the Panguitch KOA.
It backs up to a field, so it’s in a nice, quiet area.
They have all the same amenities as the Hurricane KOA, but it was definitely full of more families than the other one.
We set up this nice campsite under a tree and played card games in the tent all evening while resting up from our hike.
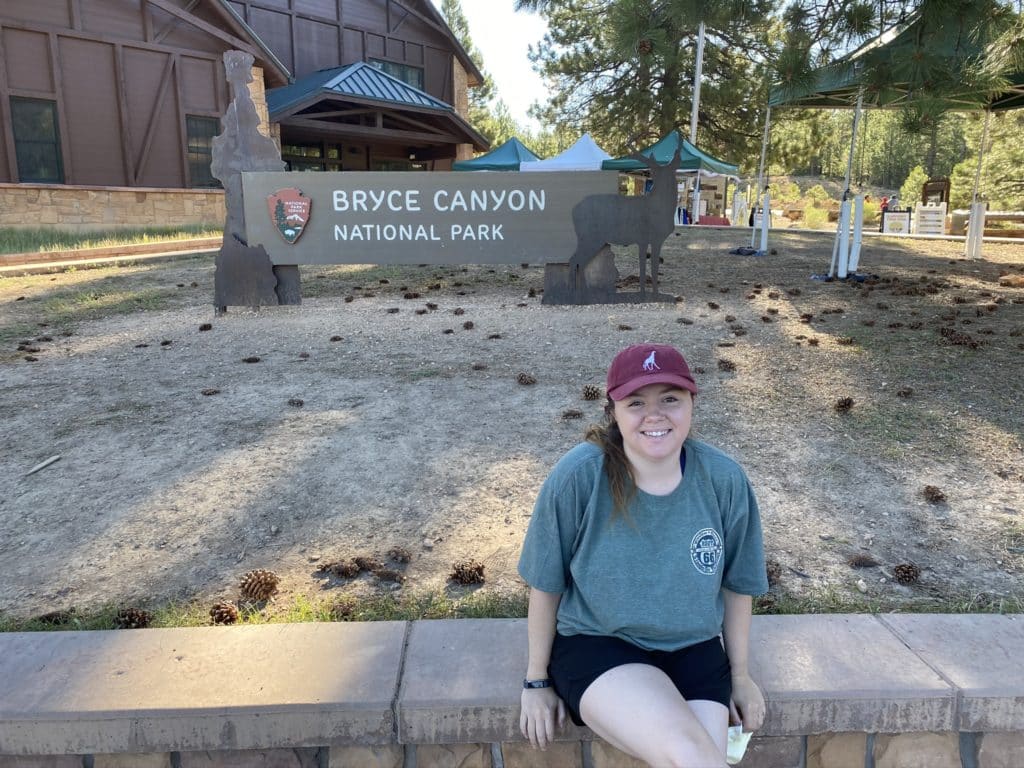
Day 3: Bryce Canyon & Capitol Reef National Parks
The drive into Bryce Canyon from Panguitch KOA is about 30 minutes and it becomes increasingly scenic as you go.
Bryce Canyon and Capitol Reef are also close enough where you can see both in the same day.
You can see our full itinerary from this day in this video on our YouTube Channel.
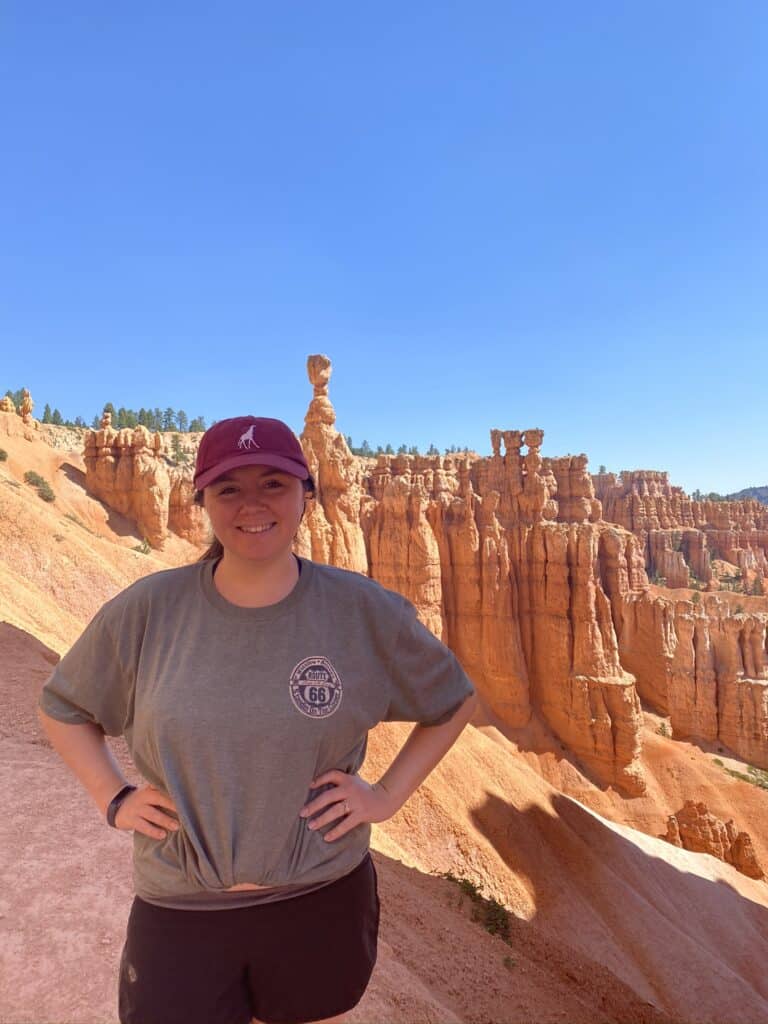
Hiking At Bryce Canyon National Park
Plan to arrive between 8 am and 9 am so that you get a parking spot before it fills up and you can do your hike before the hottest part of the day.
Park at Sunset Point because this is where your hike will end and walk along the rim over to Sunrise Point.
You can also do this trail in reverse.

Queen’s Garden Trail
Once you reach Sunrise Point, take Queen’s Garden Trail down into the canyon.

Navajo Loop Trail
Eventually the Queen’s Garden Trail will intersect the Navajo Loop Trail and you’ll take that trail the rest of the way out of the canyon.

As you make your way back up to the top of the canyon, you’ll come across Thor’s Hammer.
Take A Lunch Break
If it’s after noon, you can eat at the lodge.
If it’s before noon, you can eat a picnic lunch.
We had peanut butter and jelly sandwiches and some snacks before moving on to the next place.
Continue On The Highway 12 Scenic Byway To Capitol Reef
Just like how we took the Scenic Byway from Zion to Bryce Canyon, we also continued on this road from Bryce Canyon to Capitol Reef.
This stretch of the drive is a little less than 3 hours.
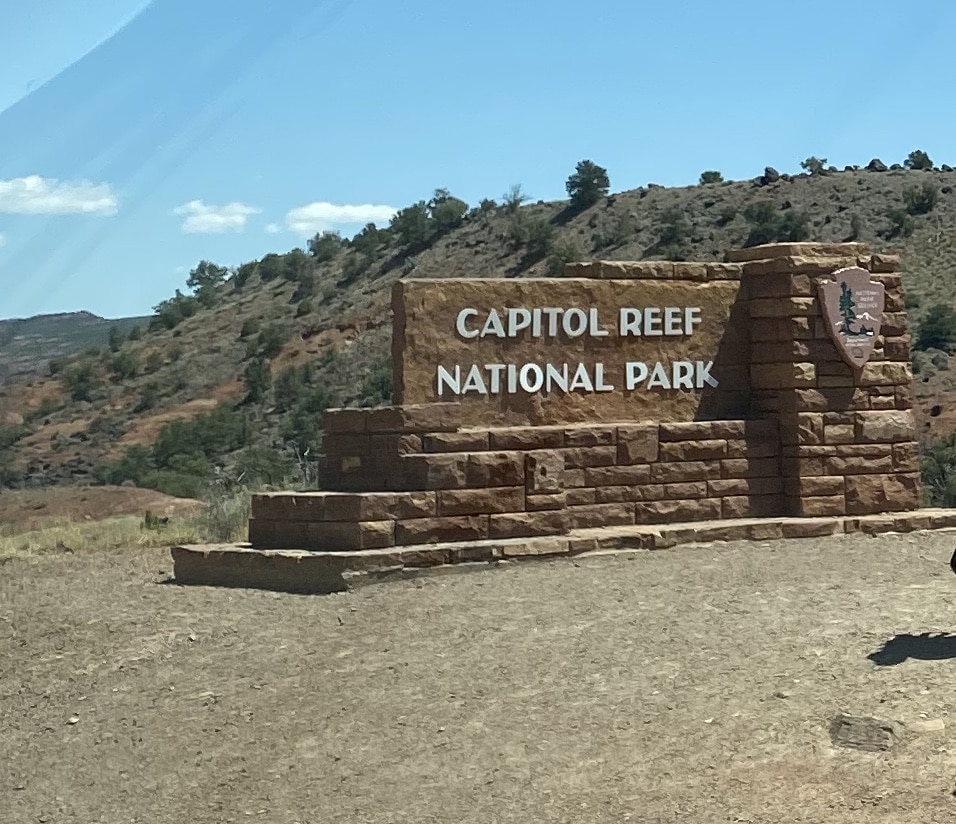
Capitol Reef National Park
We arrived at Capitol Reef around 2:30 pm and stopped at the visitor’s center for maps and a souvenir.
This park in particular has virtually no cell service anywhere, except for a little bit at the visitor’s center.
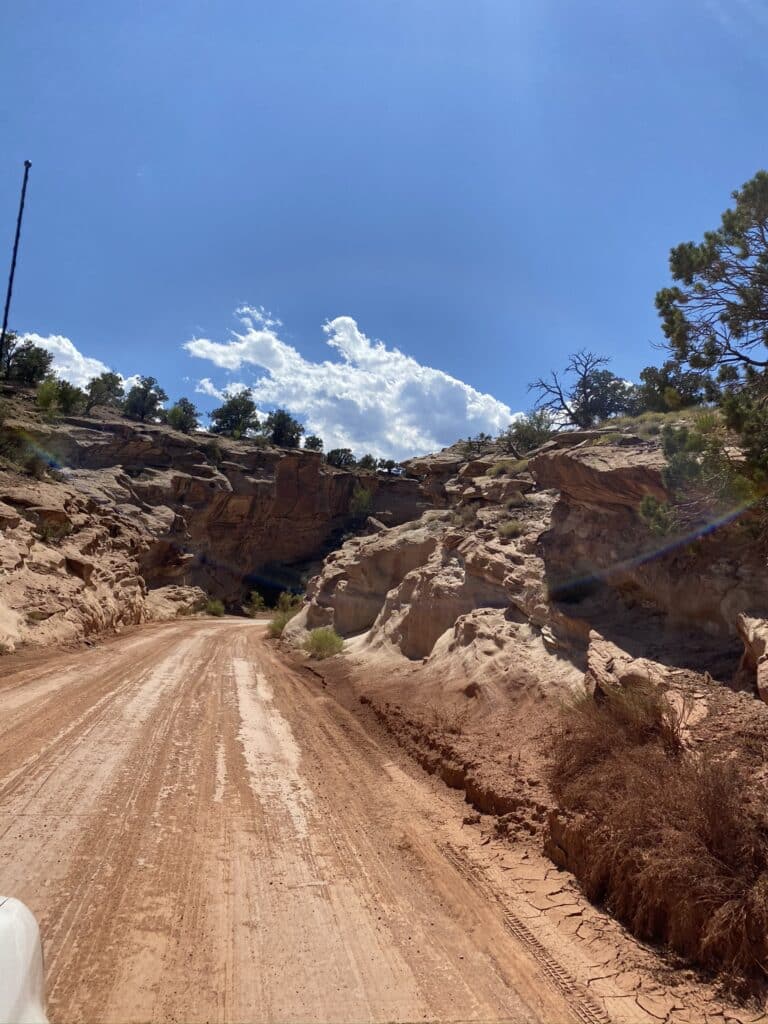
Take “Scenic Drive” Through Capitol Reef
This is an 8 mile loop road through Capitol Reef.
It took us about 30 minutes, but no other cars were on the road when we were there, so it may take longer if there are more visitors.
Where To Stay: Fruita Campground At Capitol Reef
Fruita Campground is right in the middle of Capitol Reef National Park.
If you’re visiting between March 1st and October 31st you can make a reservation in advance for only $20.
There’s no electric or water at the site like KOA campsites tend to have, but there is a shower house and sinks.
We made dinner early since we had a small lunch and decided to make tuna and noodles.
This was a perfect camping meal because none of the ingredients need to be refrigerated and it can all be cooked in one pot.
All you need is egg noodles (half a bag), a can of cream of celery, and a can or bag of tuna.
You just have to boil water and cook the egg noodles until they’re as soft as you want them.
Then drain the water and add in the cream of celery and tuna.
Mix it all together and add as much salt and pepper as you need and that’s it!

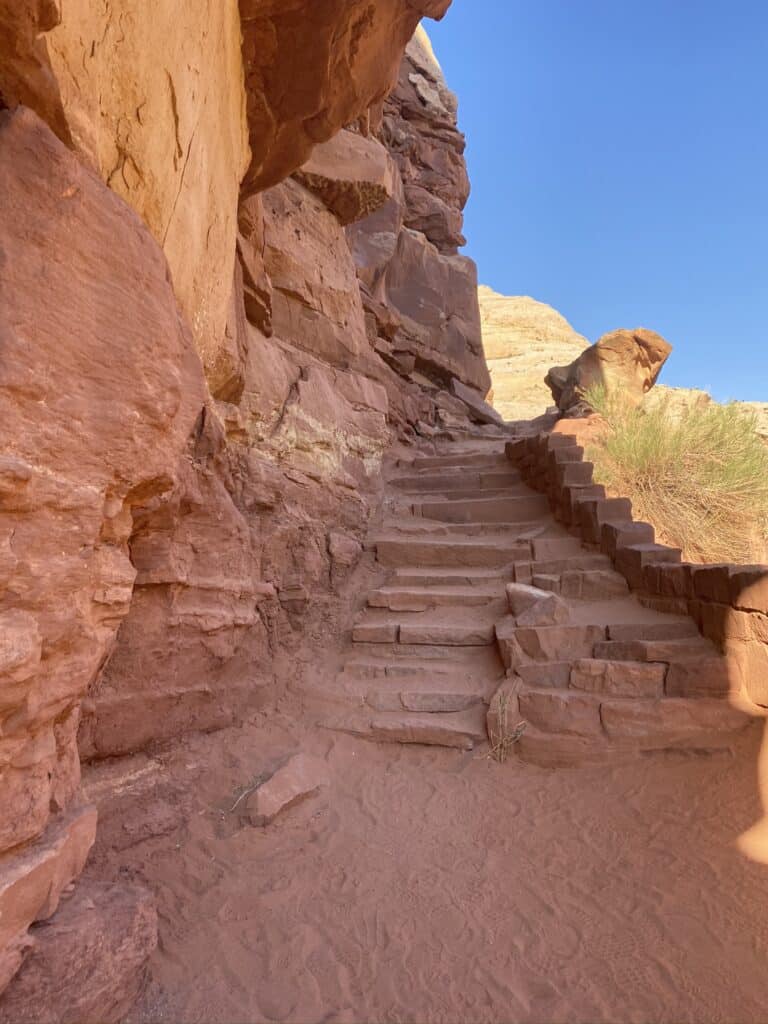
Petroglyphs At Capitol Reef National Park
This is about a quarter mile boardwalk trail along the side of some rocks where some ancient petroglyphs still remain.
Depending on where the sun is shining, you’ll be able to see some petroglyphs easier than others.

Hickman Bridge Trail
You want to do this trail before the sun sets, because it sets perfectly through the Hickman Bridge.
You also don’t want to be on the trail too late after this because there could be some danger with the wildlife.
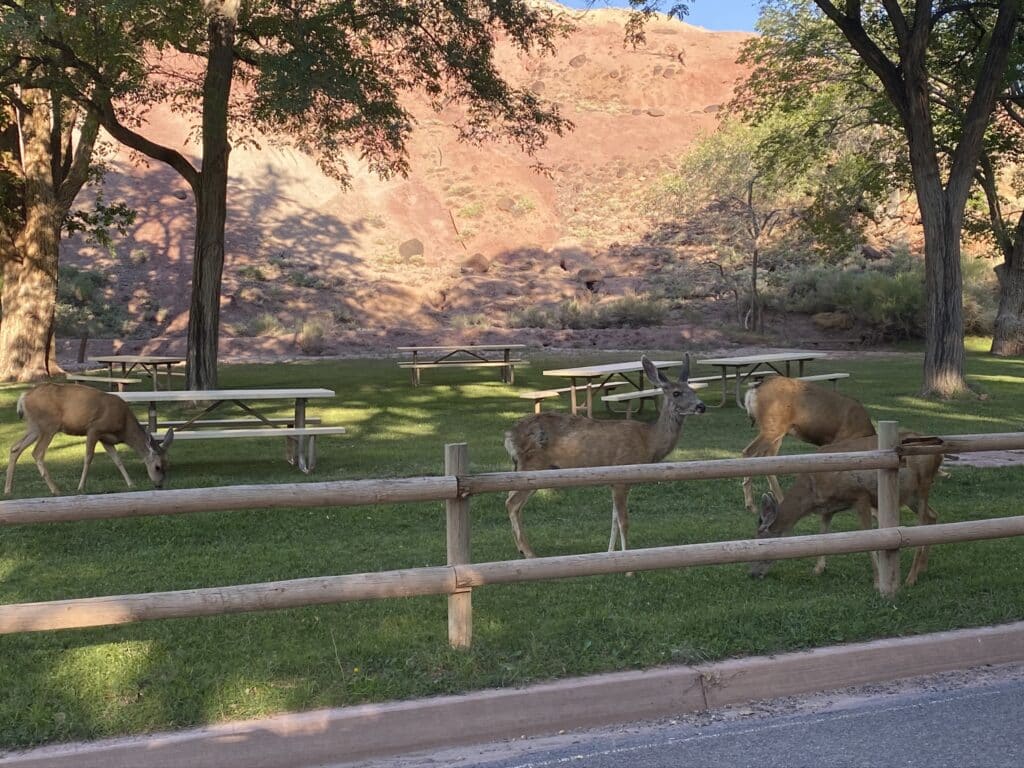
See The Deer In The Apple Orchards
After about 8 pm in the summer time, the deer will be all over.
Don’t approach them or bother them, but you can watch from a distance.
You will probably even see them from your own campsite.
Day 4: Dinosaur National Monument + Flaming Gorge Dam
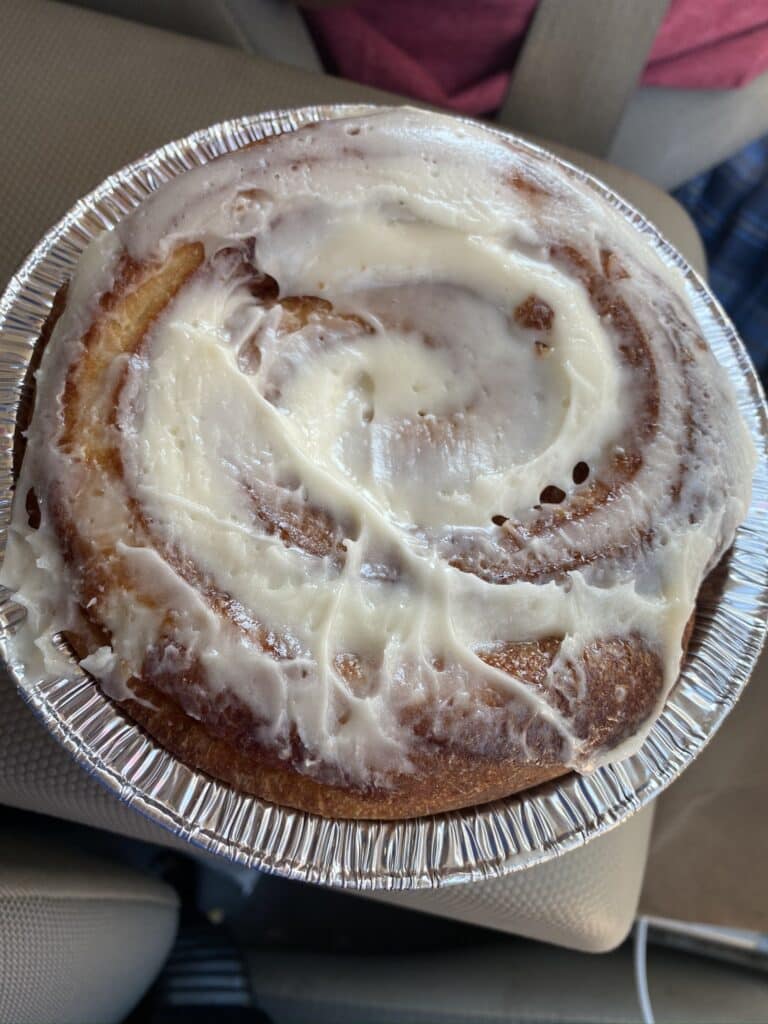
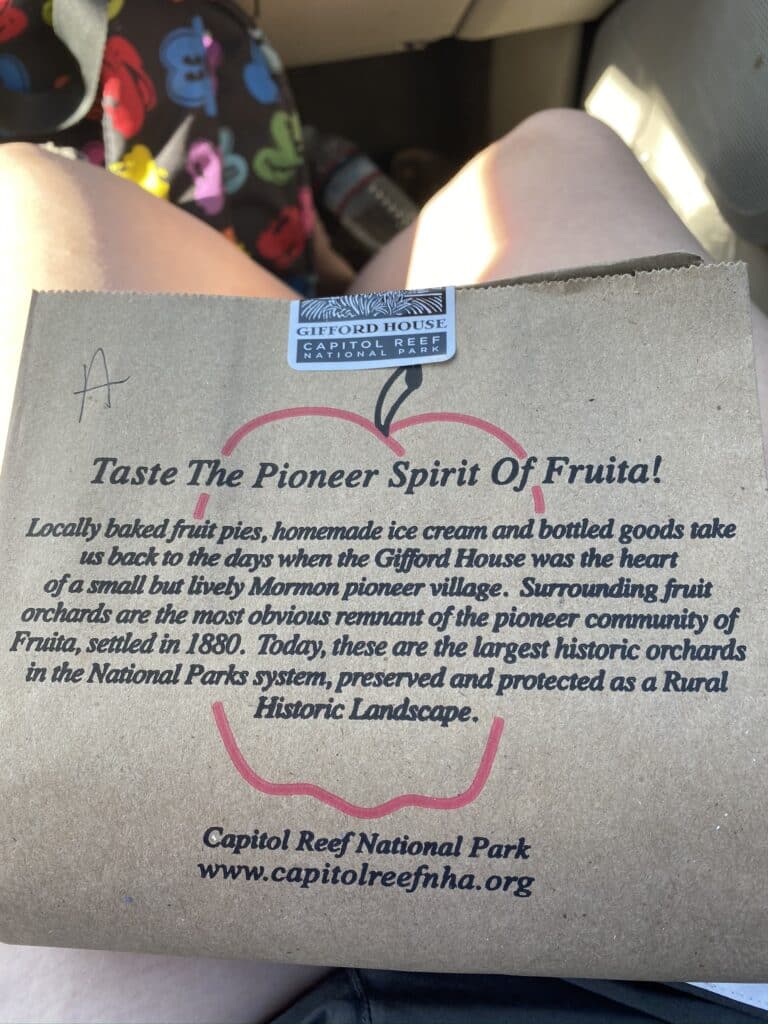
You’ll want to have your campsite packed up and be ready to go by about 9 am to get to Gifford House before they sell out of their famous home made pies and cinnamon rolls.
Gifford House
Gifford House sells out of their homemade treats every single day.
You always want to do this first thing in the morning because if you wait until the afternoon there will be nothing left.
For breakfast we shared a homemade cinnamon roll and then got an apple pie to take for later.
Just after 9 am we were on the road.
We stopped at a gas station at the first town we came across so we could have a minute to check our messages and emails since we didn’t have phone service for close to 24 hours.
Even though our families knew our itinerary and what we were doing, they were still concerned when we were unable to be reached for so long.
We also got some more ice to keep our water cold and filled up the gas tank so we wouldn’t have to stop again on our drive.
Drive To Dinosaur National Monument
It took us about 4 1/2 hours to get to Dinosaur National Monument.
We had peanut butter and jelly sandwiches again for lunch while we were driving and shared a protein bar.
JP just can’t get by without fast food though, so we eventually went through a Burger King drive thru when we passed through a town.
Be sure to set your GPS to the right place, because originally our map told us it would be a 6 hour drive because it was taking us deep into the park, but the visitor center we were actually going to was only a 4 1/2 hour drive.

We ended up arriving at Dinosaur National Monument at 2 pm.
While we waited for our boarding time, we roamed the visitor center and picked out our souvenir ornament.
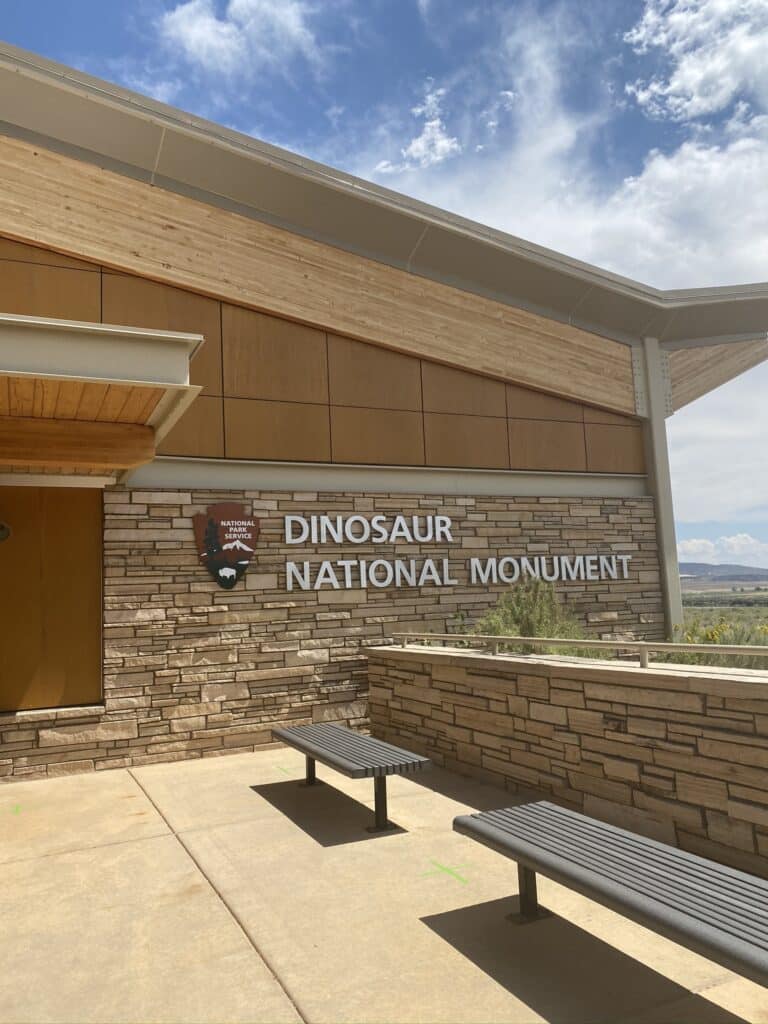
Quarry Hall Exhibit At Dinosaur National Monument
The main purpose of visiting Dinosaur National Monument is to visit the Quarry Hall Exhibit, which requires a 5 minute or so tram ride from the visitor center.
The Quarry Hall is really cool because it is built around where a ton of dinosaur fossils were found.
They didn’t full excavate the area, so all of the fossils are in the exact same spot they were originally found.

Once we got to the Quarry, we were able to explore it for as long as we wanted.
The trams run continuously all day, so you can spend 5 minutes or 2 hours if you want.


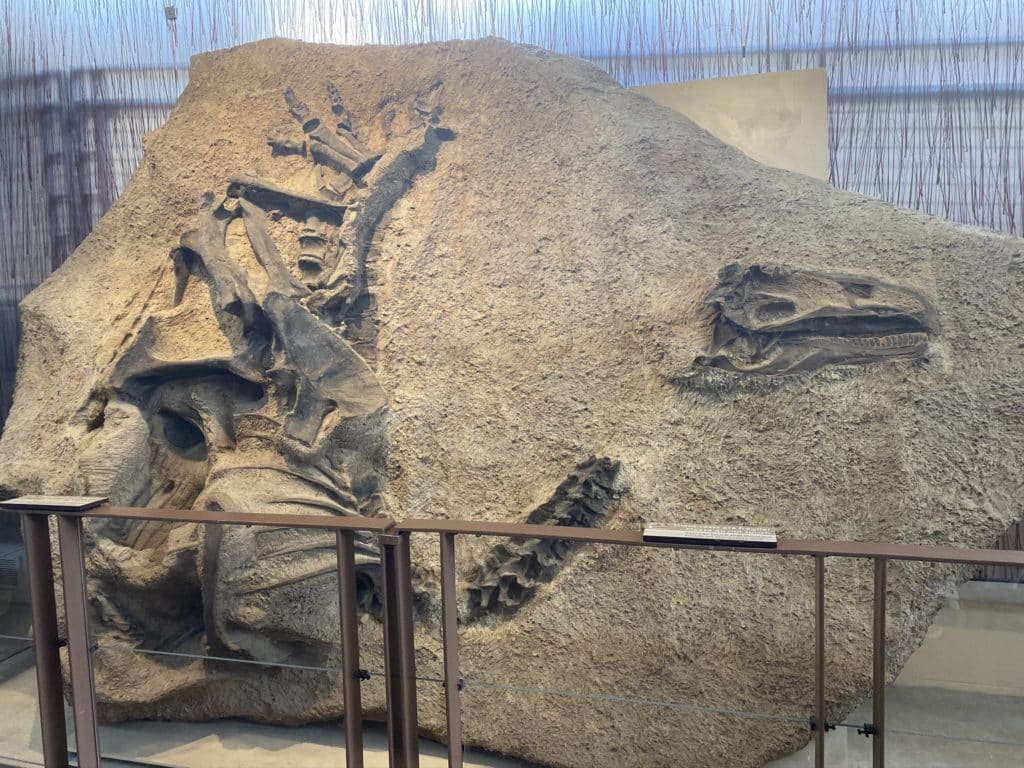
We ended up spending about 45 minutes looking at all of the fossils and we were back out on the road by 3:30 pm.
You can see our full experience at Dinosaur National Monument in this video on our YouTube Channel.
Flaming Gorge Dam National Recreation Area
Since we were only a few hours away from our campsite for the night, we decided to take a short detour to Flaming Gorge National Recreation Area.
Their website said the visitor center would be open, but when we got there it was closed.
There was still an area to get out and look around, so it definitely wasn’t a wasted trip.
It took about an hour to get there.
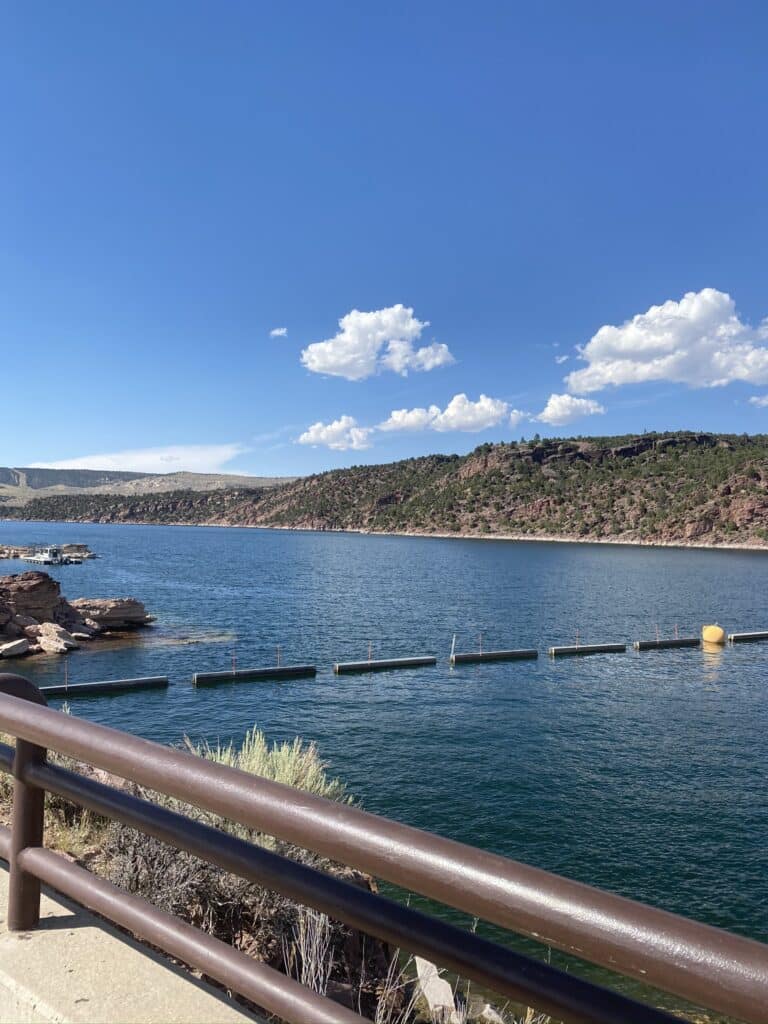


We ended up staying in the area for about 30 minutes and also stopped to make some phone calls before getting back out on the road.
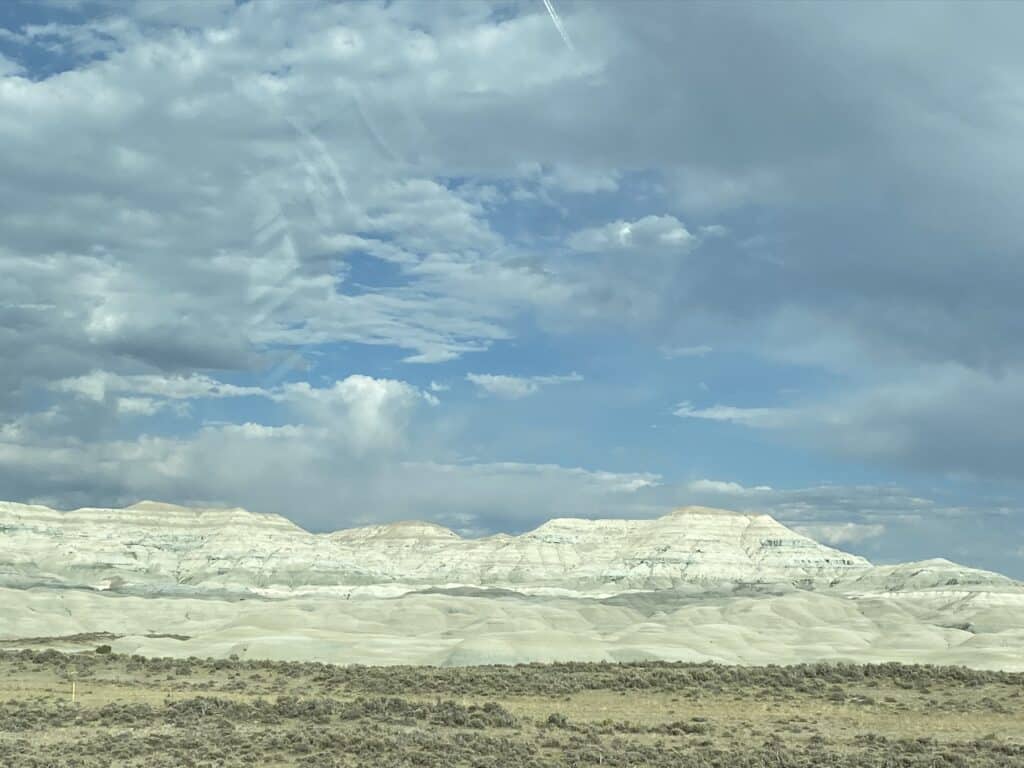
Drive To Wyoming
About 45 minutes into the last portion of our drive we finally crossed the state line into Wyoming for the first time!
Neither of us had ever been.
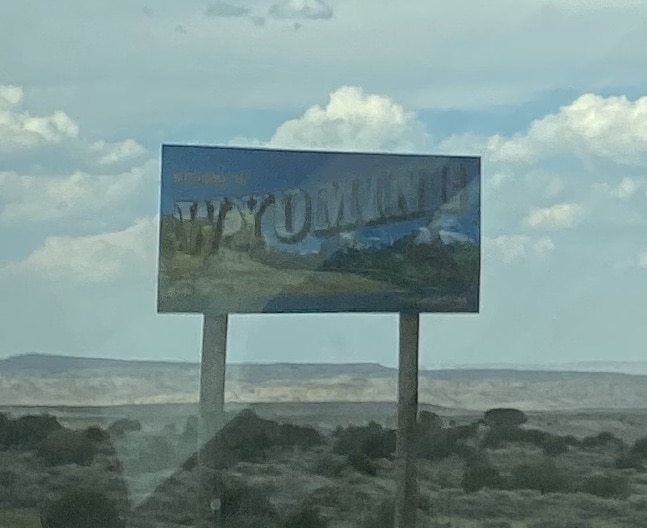
Wyoming looked as we expected.
At least this portion of it.
Where To Stay: Lyman KOA
I think it was only about an hour or so until we made it to the Lyman KOA.
There was hardly anything around it and there were only a couple other tent campers.
Everyone else had RV’s, but it was still mostly empty.
We got an awesome spot all the way in the back away from everybody.
The wind was blocked too which made it much easier to set up the tent and not worry about any noises outside overnight.

We were still kind of full from stopping at Burger King in the afternoon, so for dinner we shared one Ramen packet and shared the pie we got from the Gifford House.
It was only about 7 pm when we got to the campsite, so we also charged our laptops and phones before going to bed and we took some time to get some work done.


Day 5: Casper, Wyoming + Mammoth Site
Today is a 500 mile drive, taking about 7-8 hours depending on how long you stop along the way and how many times you stop along the way.
You can see this day’s sites in this video on our YouTube Channel.
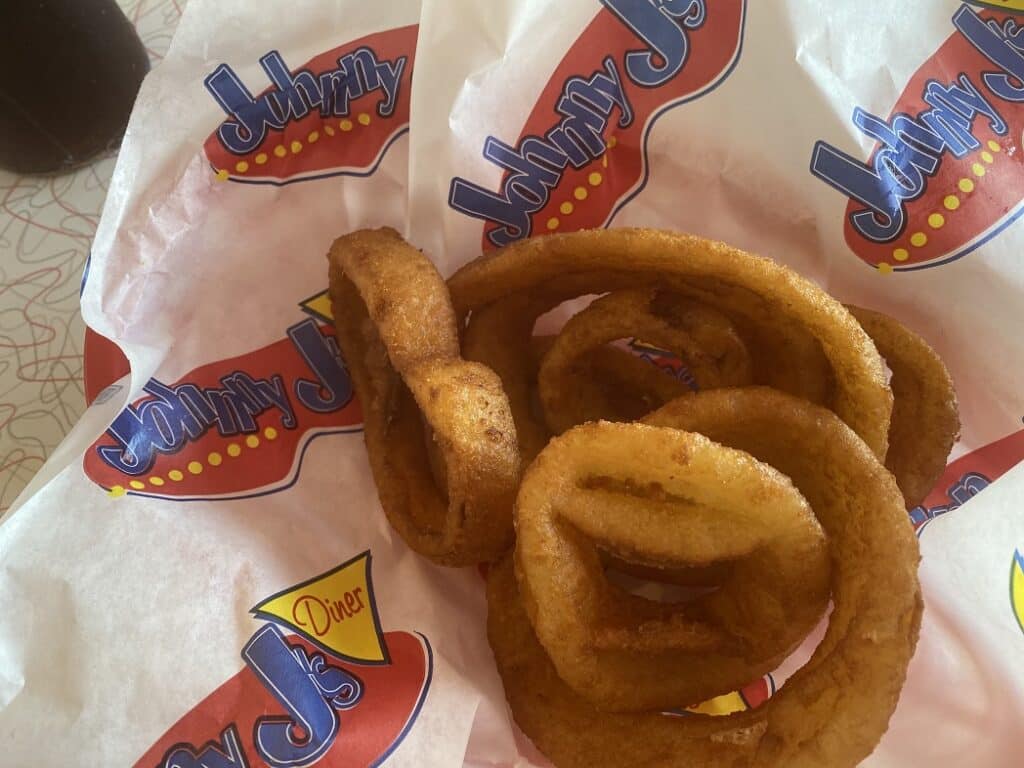
Lunch In Casper, Wyoming At Johnny J’s Diner
Johnny J’s Diner was the CUTEST retro diner. It was completely decked out and had lots of great menu options.
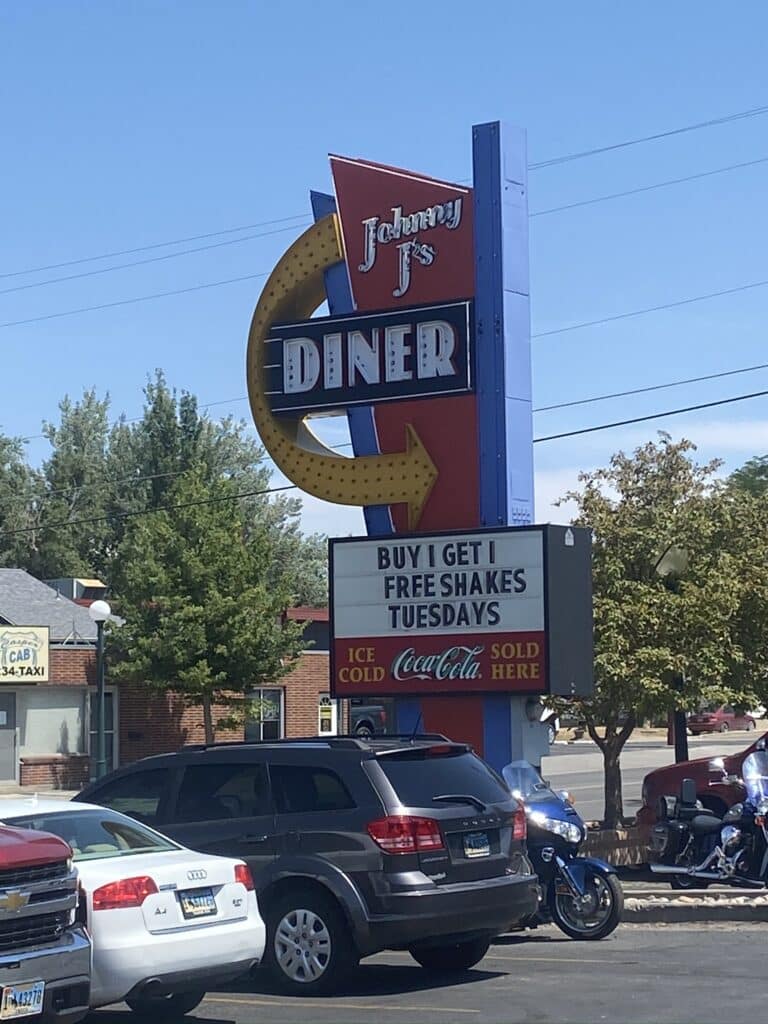
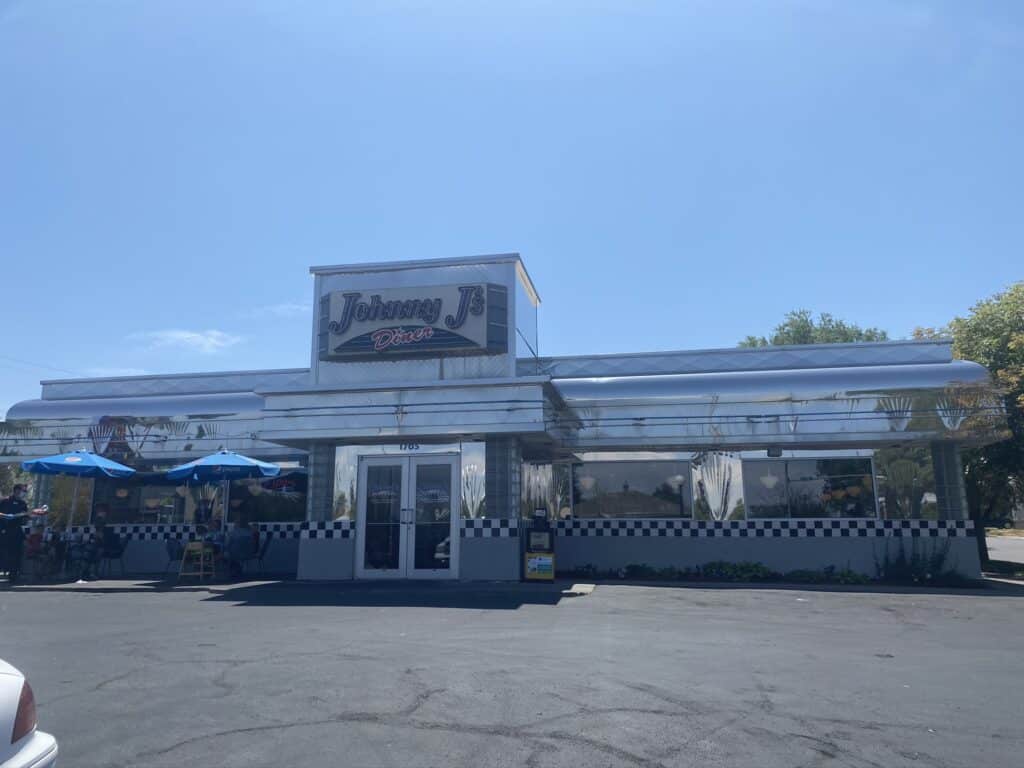
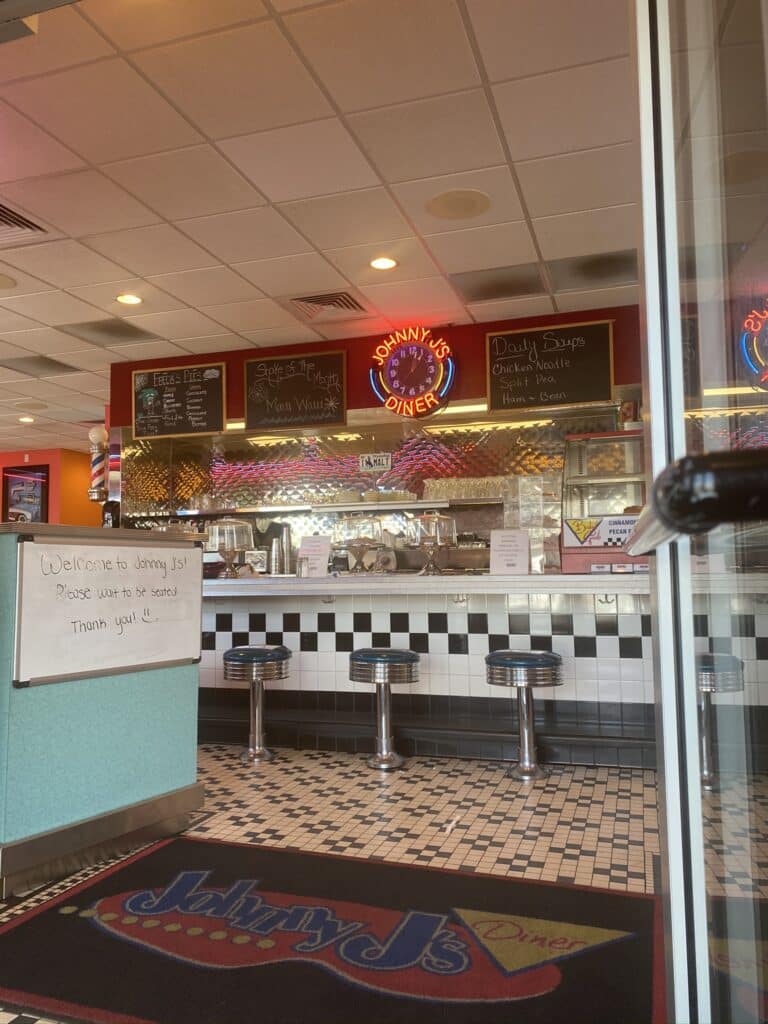
There are dozens of burger options on this menu and I prefer the more traditional toppings like cheese, lettuce, tomato, onions, and ketchup, so this burger is more on the plain side.
But they have nearly limitless burger topping options all named after icons of the 50s and 60s.
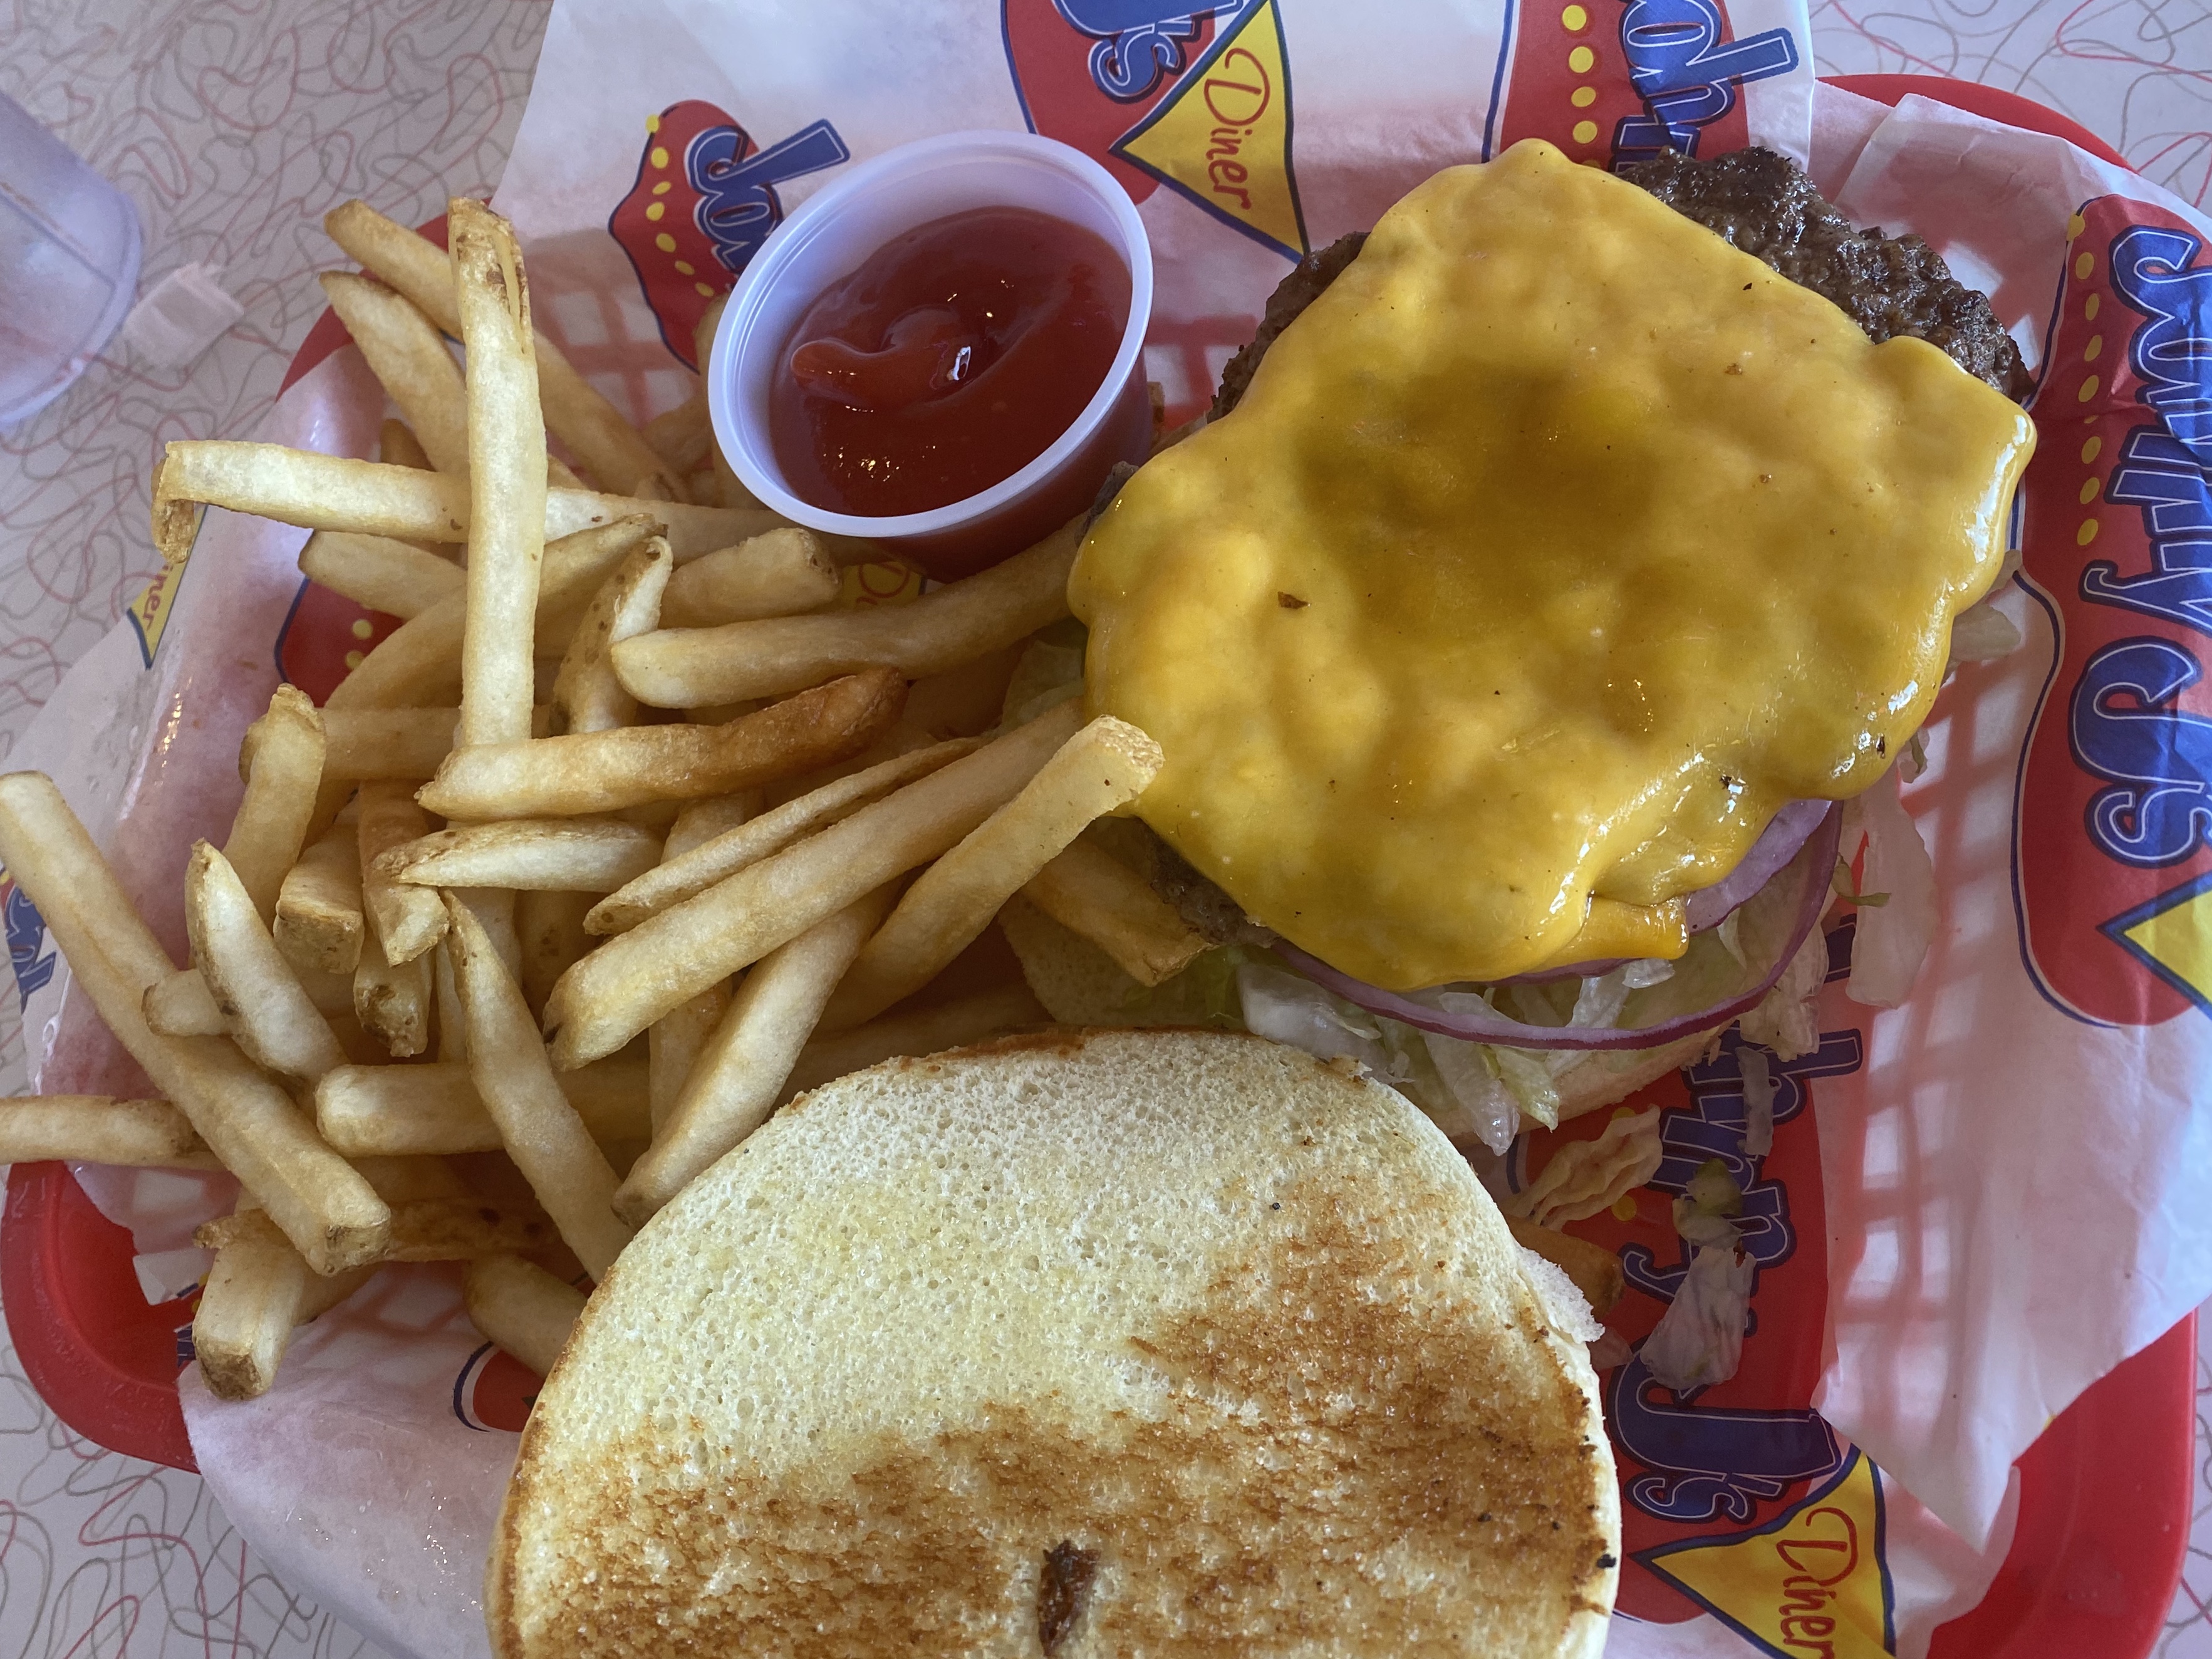
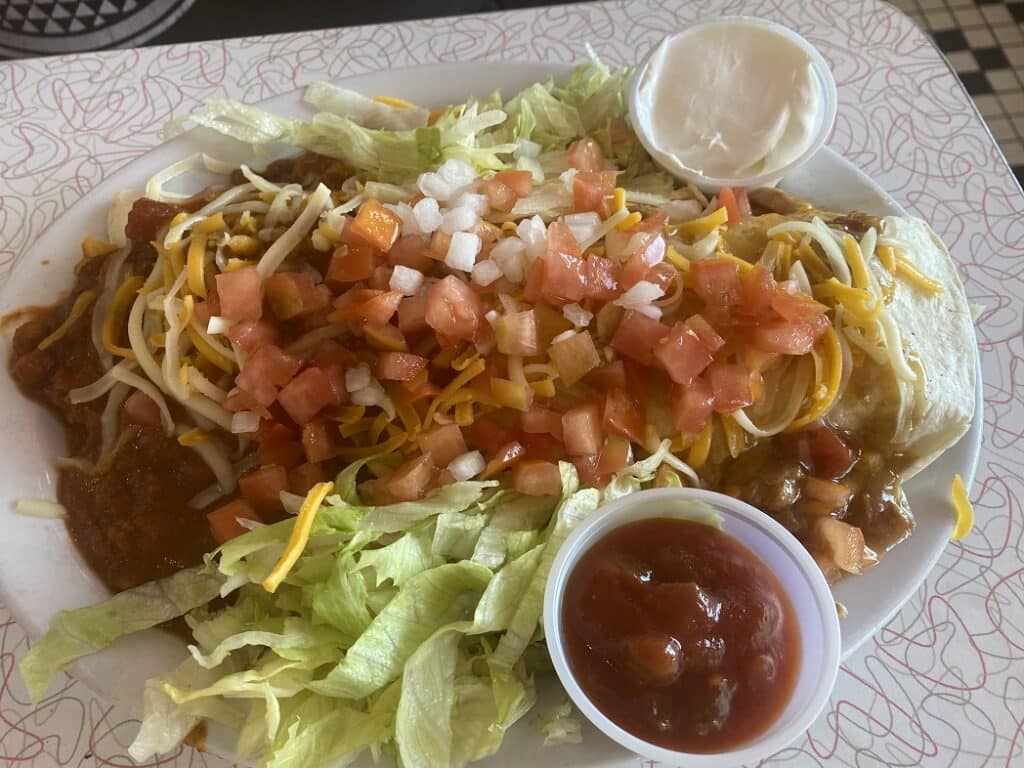
They also had a burrito special the day we were there, so JP was in heaven.
It was huge and we didn’t finish everything, but we still took a dessert to go because we couldn’t pass up the opportunity for a diner dessert.

Continue Driving To South Dakota
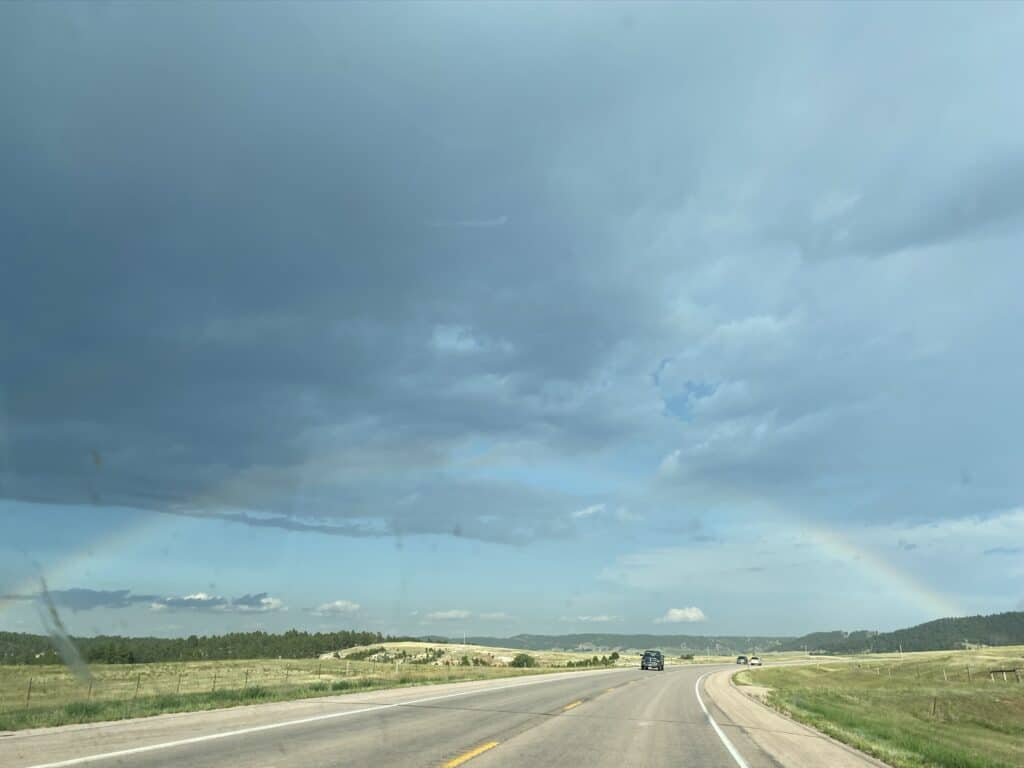
As we drove into South Dakota, it began to storm and at one point we were able to see both ends of a rainbow.
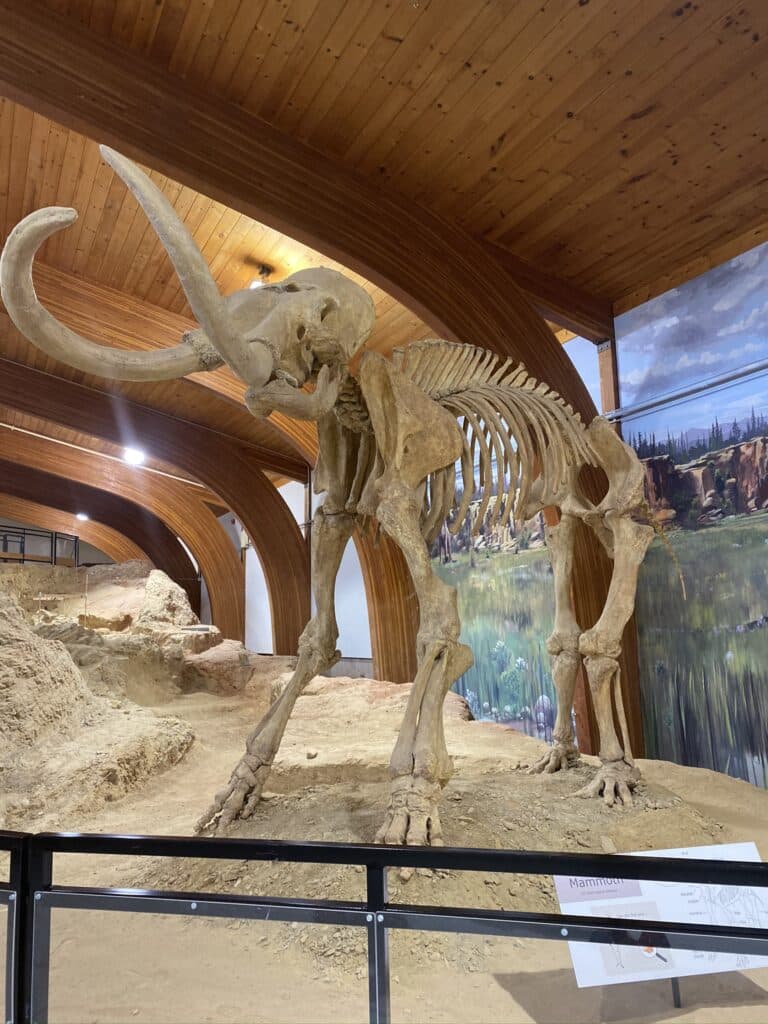
The Mammoth Site
We were there for the last couple hours that it was open and only a couple other families were there.
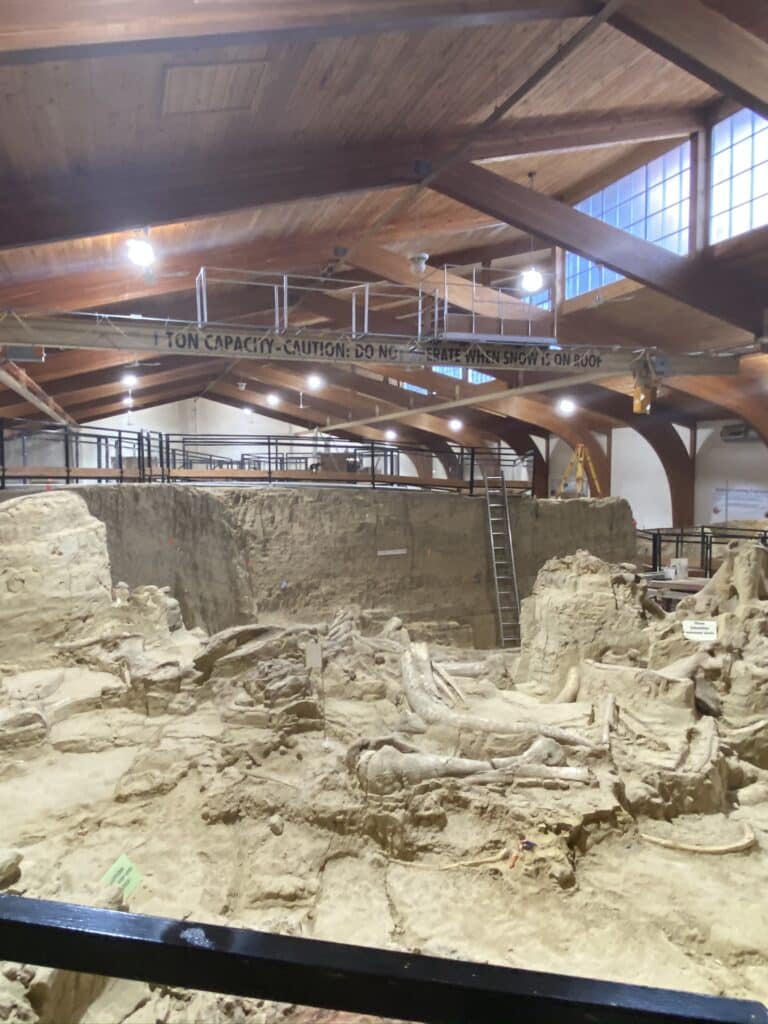
It started with a video about how the mammoth site formed and then opens up into the dig site.
Basically that site was a sinkhole that the mammoths couldn’t tell was a sinkhole until they got stuck and by then it was too late.
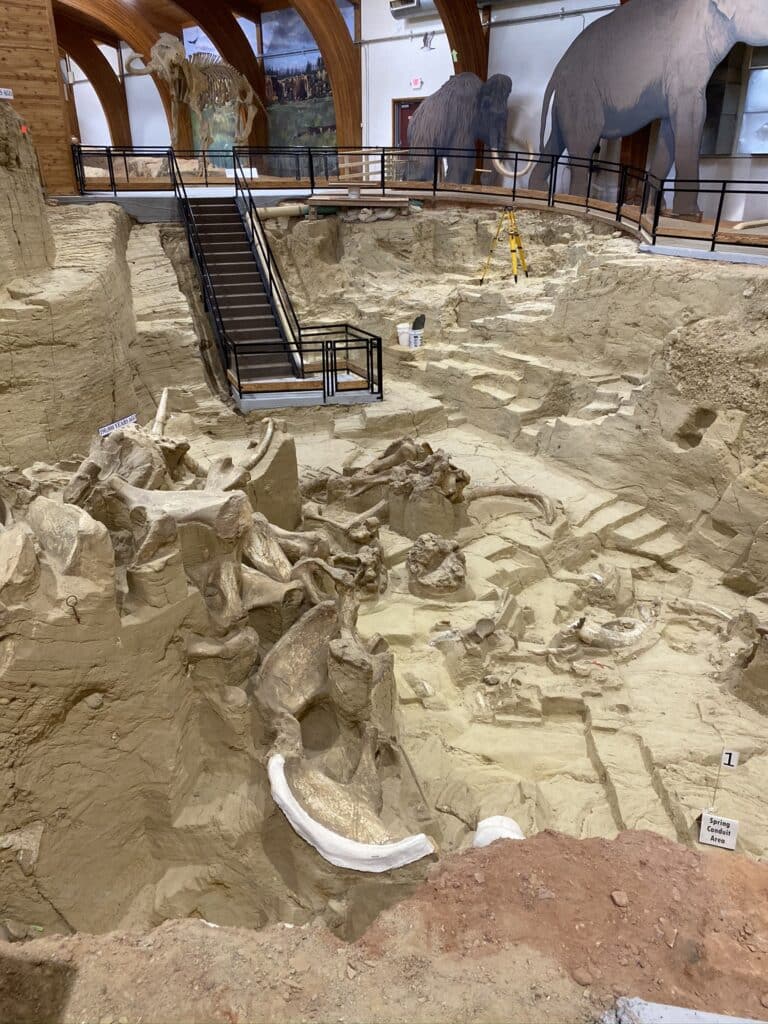
Because of this, there is a large concentration of fossils in a small area and the mammoth site building is just built all around it, just like with the Dinosaur Monument we visited yesterday.
It is still an active dig site today and visitors can join in on special tours, which I highly recommend.
We arrived too late to do it, but I’m sure it’s awesome.
Where To Stay: Hot Springs/Black Hills KOA
After visiting the Mammoth Site, we finally drove to our campsite for the night which was at the Hot Springs/Black Hills KOA.
It was a pretty big KOA compared to most that we’ve stayed at, but it was very woodsy and cozy.
We didn’t cook a dinner at this site since our lunch was on the later side, but they had a quick service window for meals and we got a little bit of pizza before going to bed.
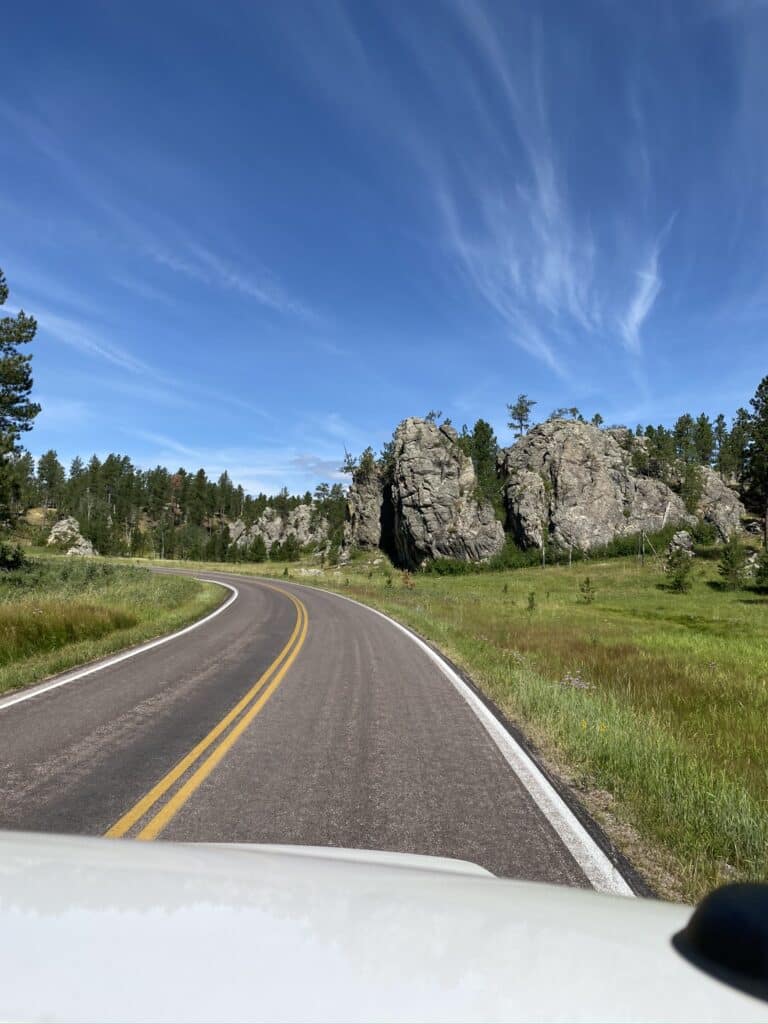
Day 6: The Black Hills – Wind Cave + Custer State Park + Needles Highway + Mt. Rushmore + Crazy Horse
Today is one of the best days of the entire road trip because there are so many cool things to do in such a small area.
You can see every place we went this day in this video on our YouTube Channel.
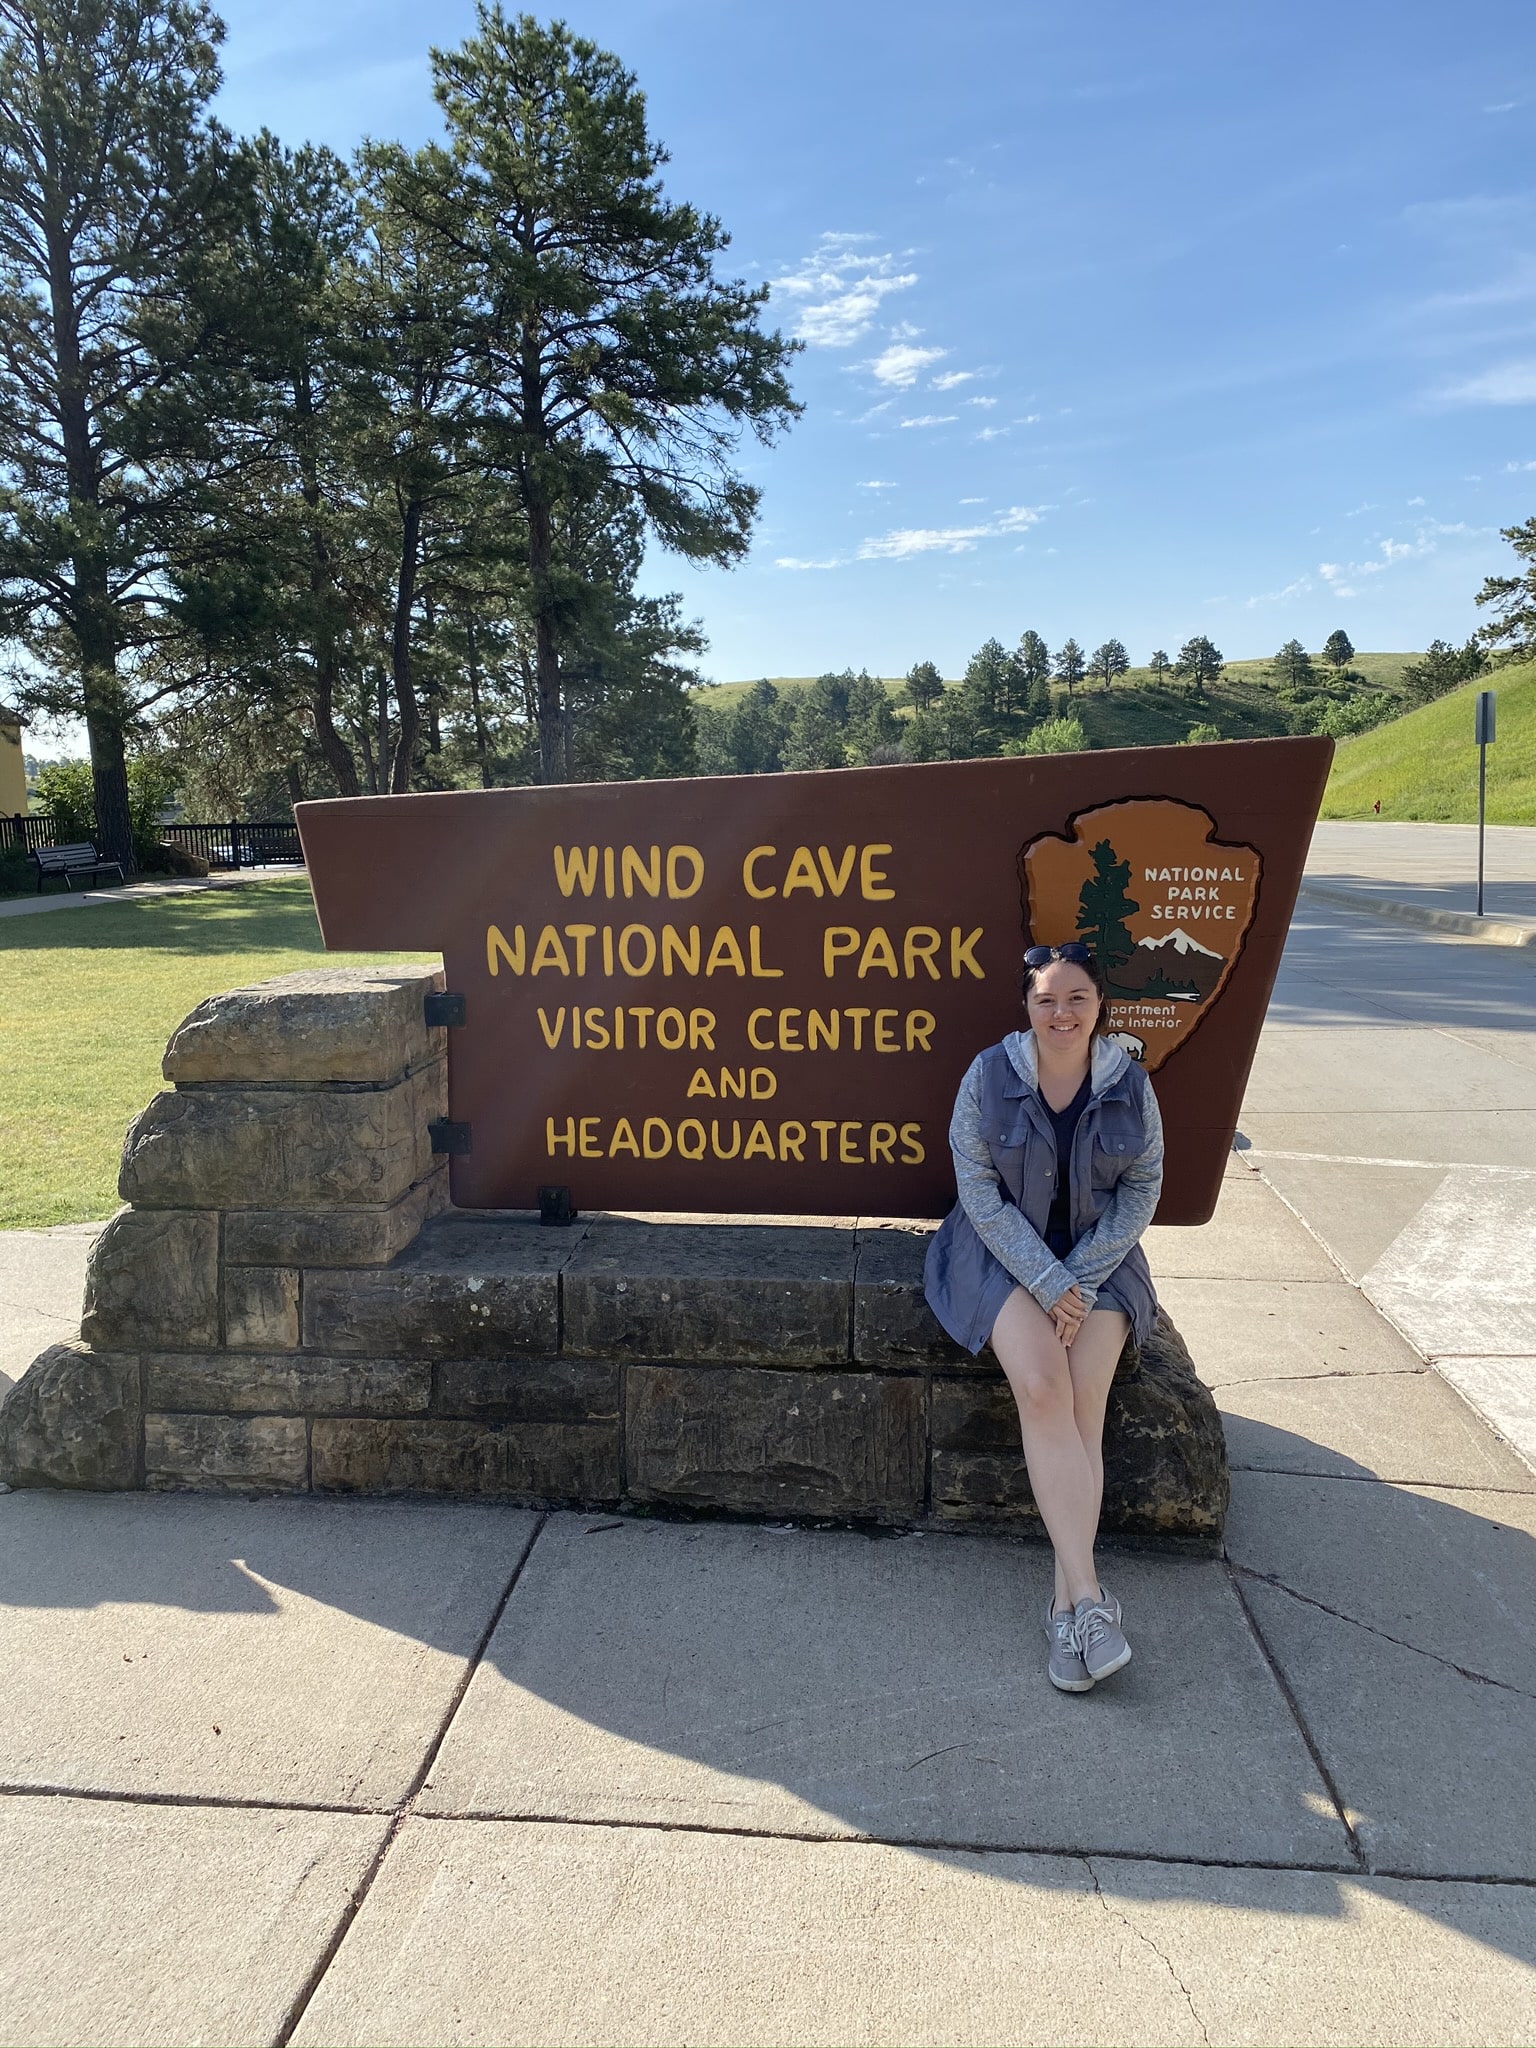
Wind Cave National Park
I recommend leaving the campground around 8 am to start your day to make sure you fit everything in.
We drove through the cutest old downtown district as we passed through Hot Springs, South Dakota.
It only took about 20 minutes to get to Wind Cave from the campground.
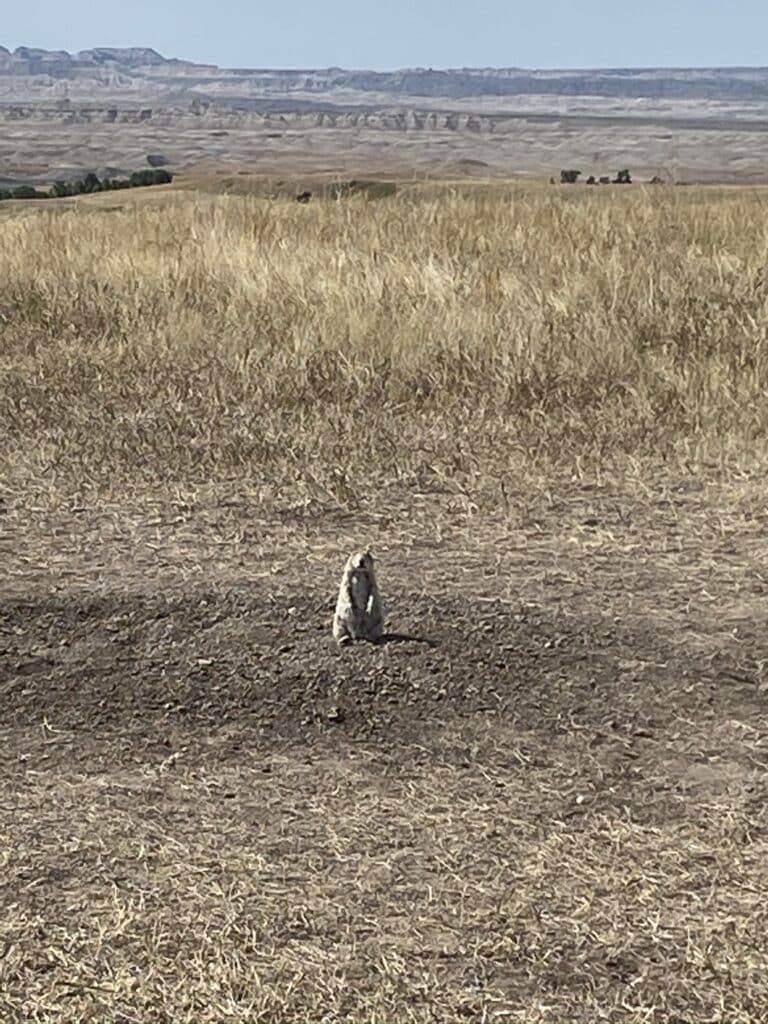
We saw lots of little prairie dogs on the side of the road on our way and they are the cutest!
They’re so hard to get good photos of though while moving because they are so little.
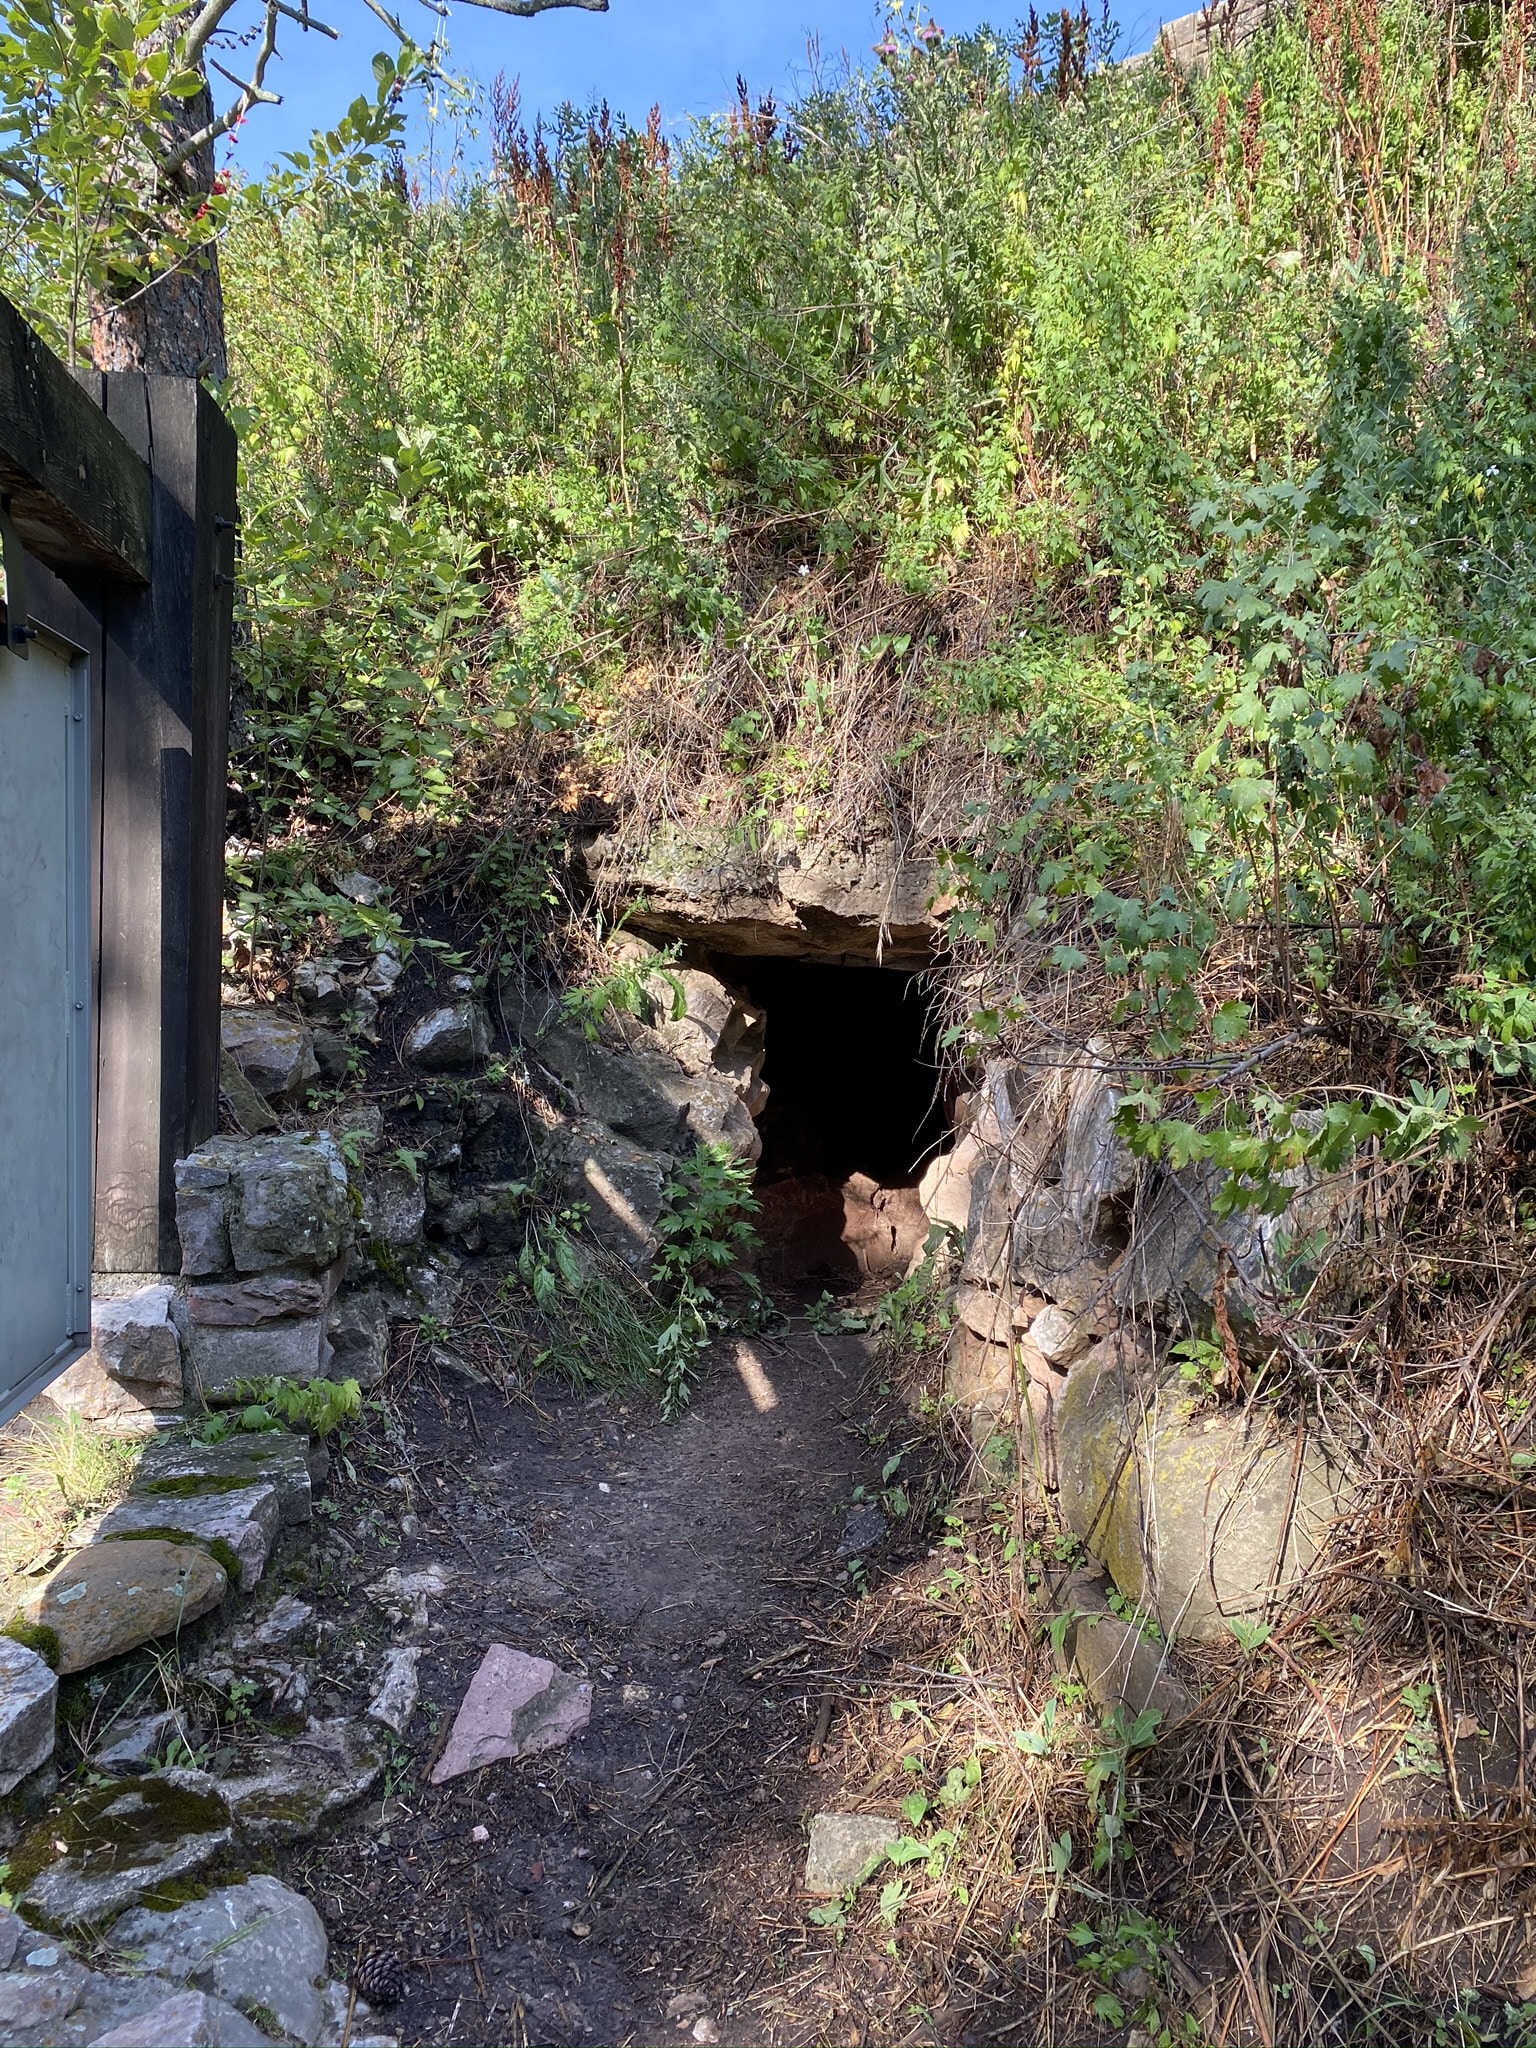
To go into the cave, you have to go on a guided tour.
I recommend the Garden Of Eden Tour if you have smaller kids or older adults in your group because it’s the less strenuous tour.
It’s a 1 hour tour that goes about a quarter mile into the cave.
For all other visitors, I recommend the Natural Entrance Tour.
This tour is about an hour and 15 minutes, goes about 2/3 of a mile into the cave and takes you to see the natural entrance to the cave pictured above.
Whichever tour you choose, you’ll want to book it in advance because they do sell out.
Custer State Park
After we left Wind Cave National Park, we made our way toward Custer State Park.
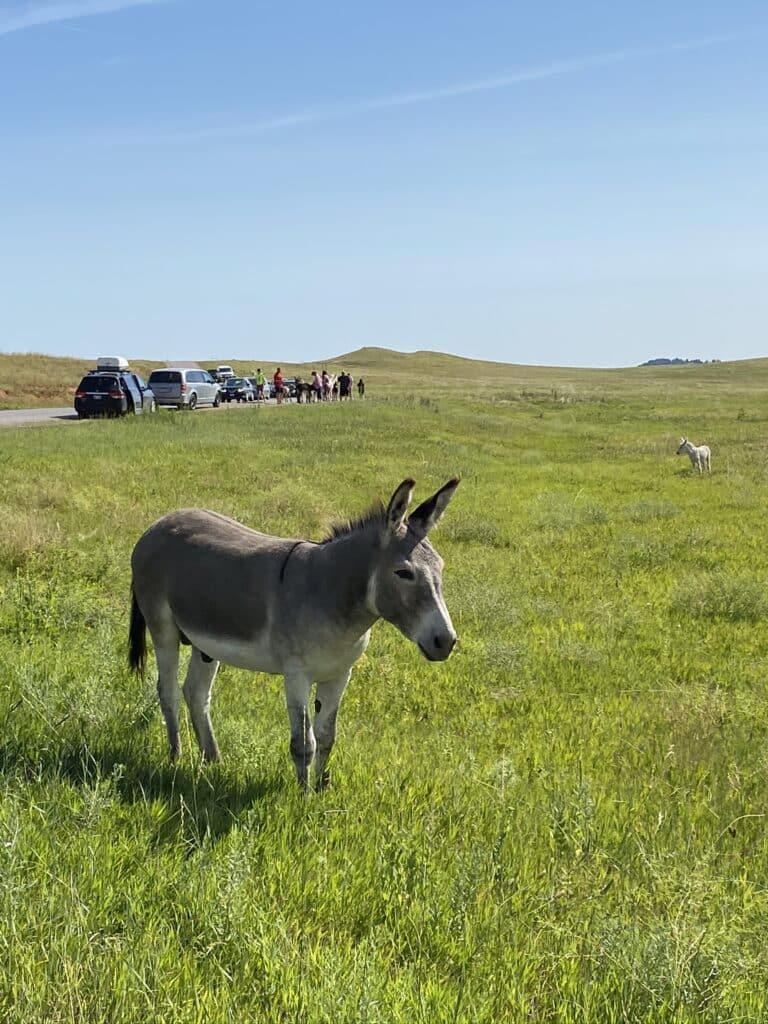
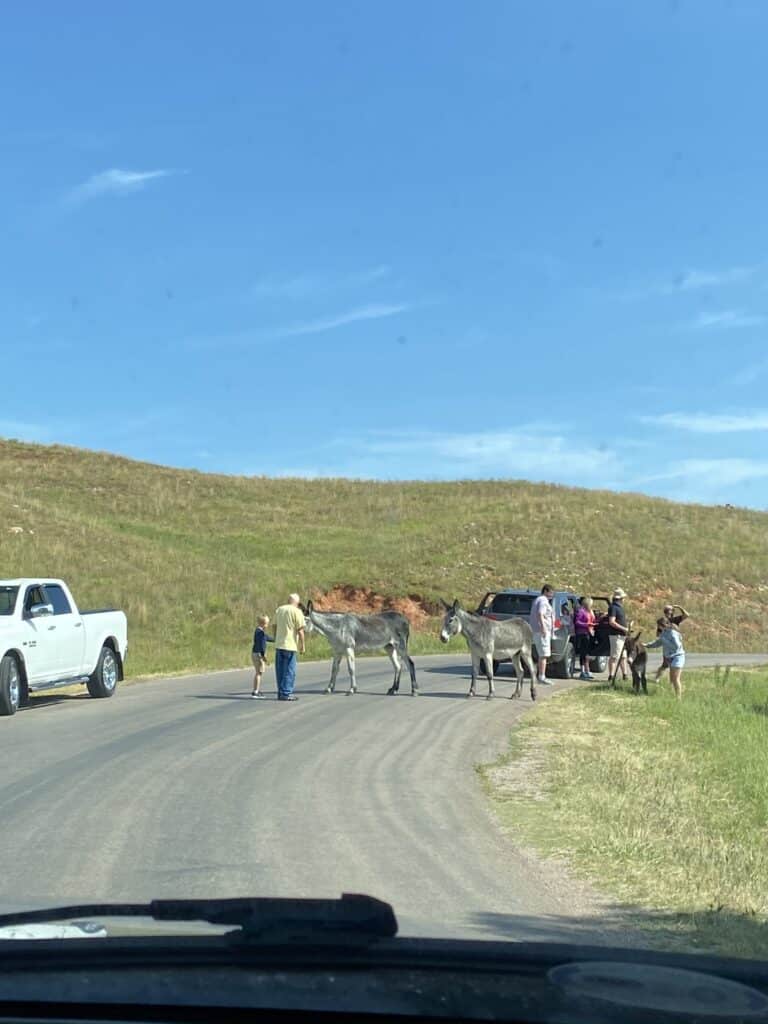
It was about a 15 or 20 minute drive and we saw LOTS of bison along the way.
They weren’t too active in this area but this was our first real bison sighting so we were excited.

Since this is a State Park and not a National Park there was a fee of $15 to get a vehicle pass for the day.

Custer State Park has a great scenic loop that takes about 45 minutes or so to drive through.
But you can always take as much time as you want.
It wasn’t too crowded when we went, but on a normal Summer day there is probably more traffic.
It was about 9:30 am when we arrived and probably became busier throughout the day.
Needles Highway
After the scenic drive, we made our way to Needles Highway.
We had heard SO many good things about this drive which still didn’t prepare us for how amazing it was!
It is part of Custer State Park, so even if you don’t do the scenic loop, you’ll still need the park pass for Needles Highway.
The YouTube video above at the beginning of today’s itinerary has some great video footage of the drive through Needles Highway.

We started the Needles Highway drive at around 10:30 am and we drove it toward Crazy Horse Memorial first.
It took almost exactly an hour.
It was a little slow at some points because there were a lot of bikers.
We happened to be there the weekend before Sturgis.
Also the narrow tunnels get backed up, but we never had to stop for too long.
Overall it was an amazing drive and I would do it again in a heartbeat.
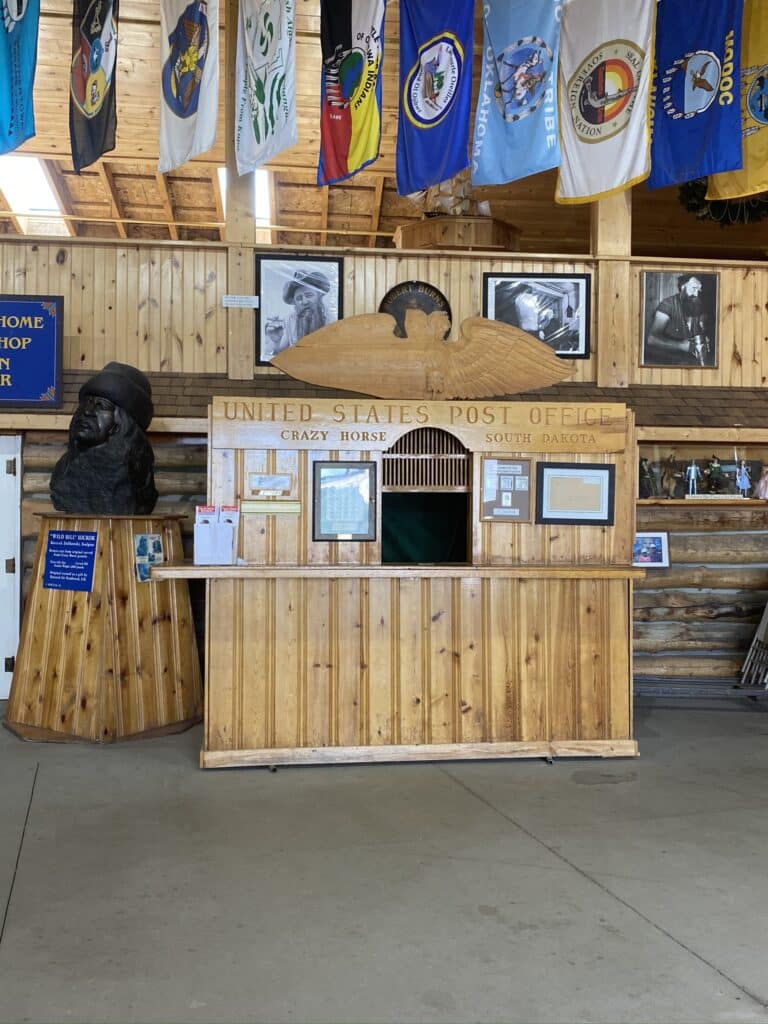
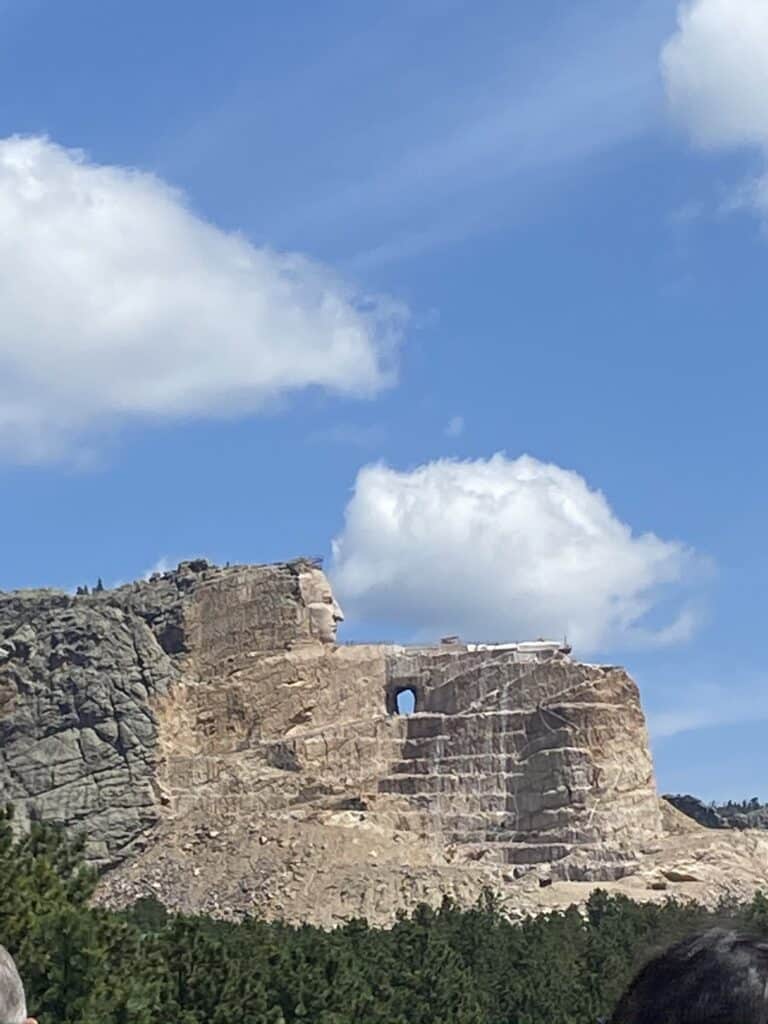
Crazy Horse Memorial
By 11:30 am we had arrived at Crazy Horse Memorial.
They have a Native American museum with tons of artifacts and a great gift shop when you first enter.

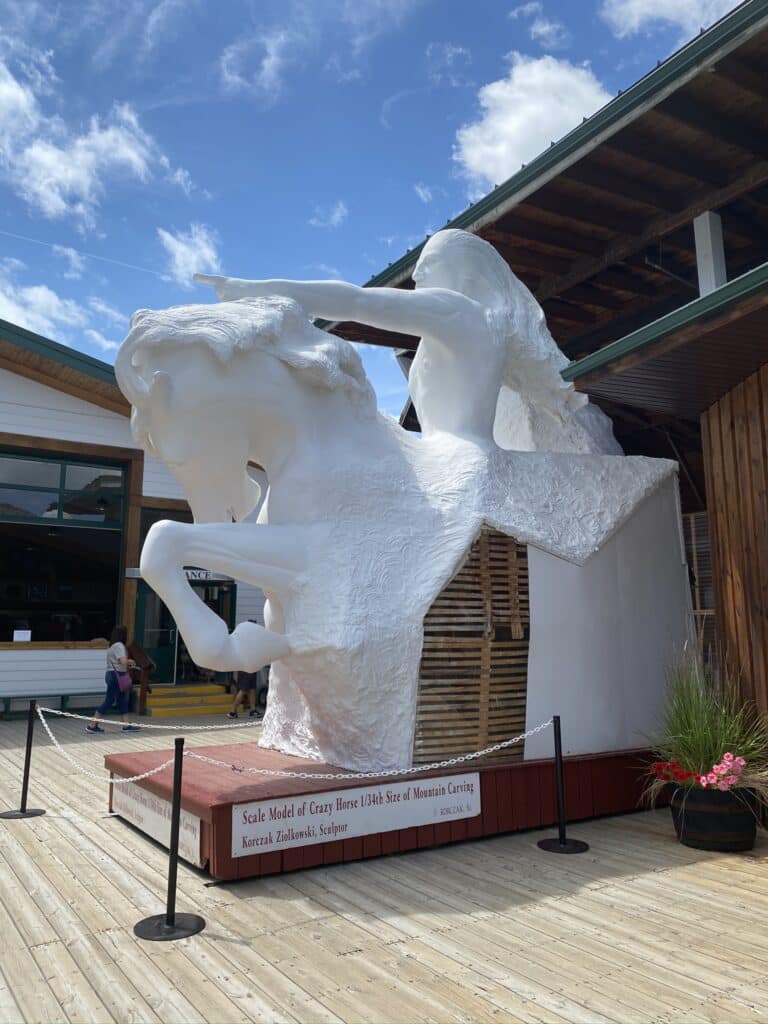
Outside they have a small outdoor theater where they have some performances from local Sioux Indians.
Admission here is $12 per person.
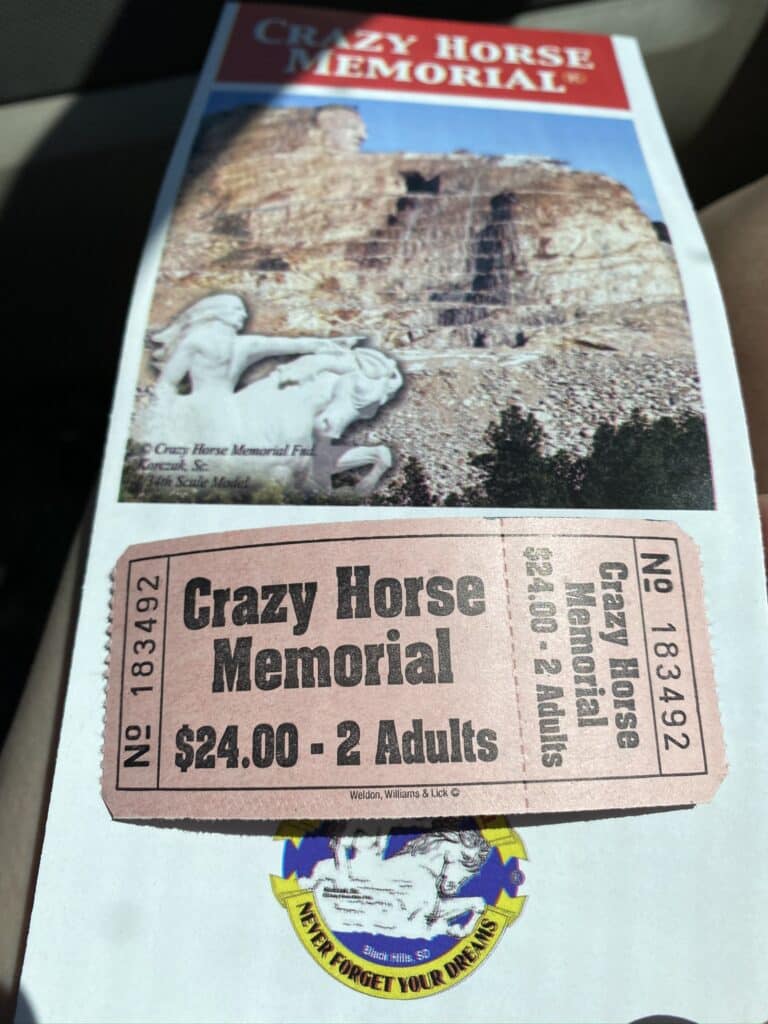

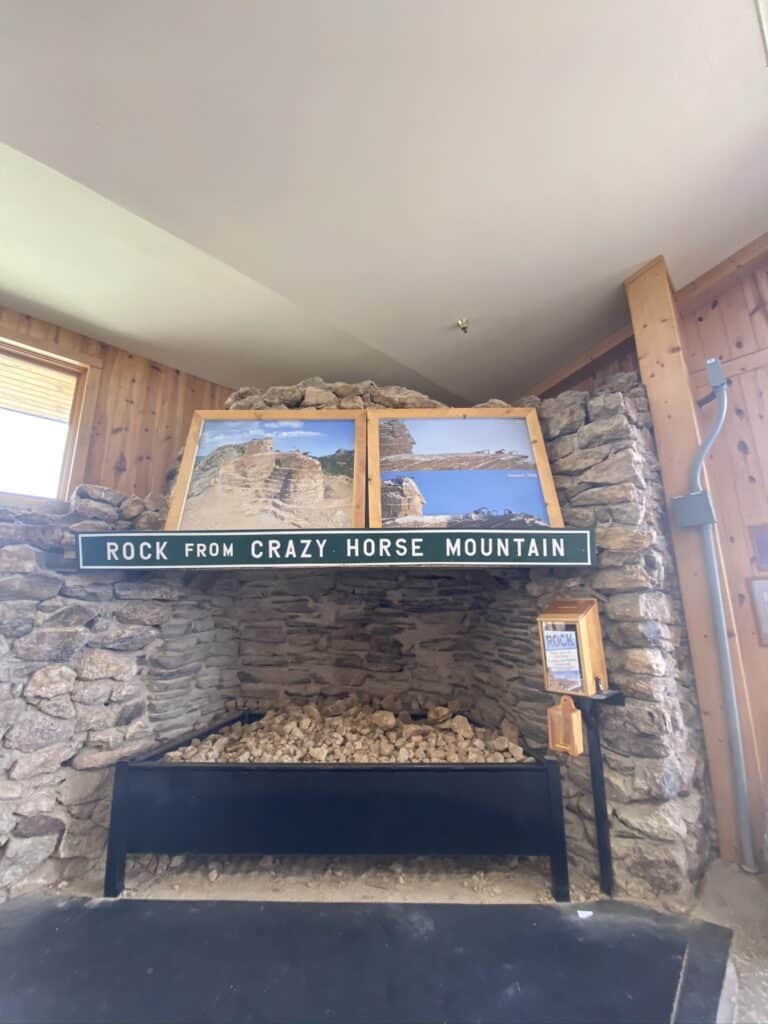
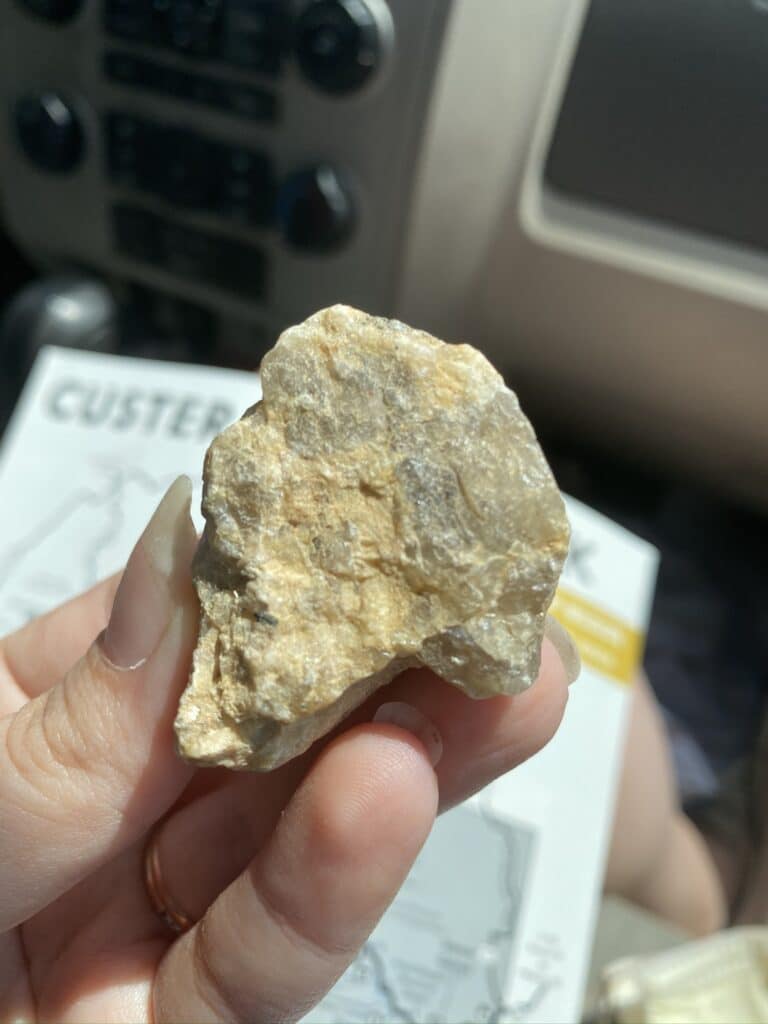
You can also take home a rock from the Crazy Horse Memorial for free on your way out.
Where To Eat Lunch: Crazy Horse Restaurant
I recommend sharing an Indian Taco and the “official” dessert of South Dakota called “kuchen”.
It’s a German pastry with a custard filling.
We had such a pleasantly surprising lunch here and I HIGHLY recommend it.

Iron Mountain Road
We didn’t leave Crazy Horse until about 1:15 pm, so we were there for almost 2 hours.
Our next stop was driving back into Custer State Park to take Iron Mountain Road to Mt Rushmore.
It’s another scenic drive in the same area, but what is cool about this one is that when you pass through one of the tunnels, you can see Mt Rushmore perfectly framed through the other side.
This drive also had parts of the road where it split into narrow one way winding roads which was super fun too.
I forgot to mention earlier that on Needles Highway and Iron Mountain Road that the tunnels are so narrow that any sort of oversized vehicle or RV cannot drive these roads.
We were driving a Ford Escape and it BARELY fit through some of these tunnels.

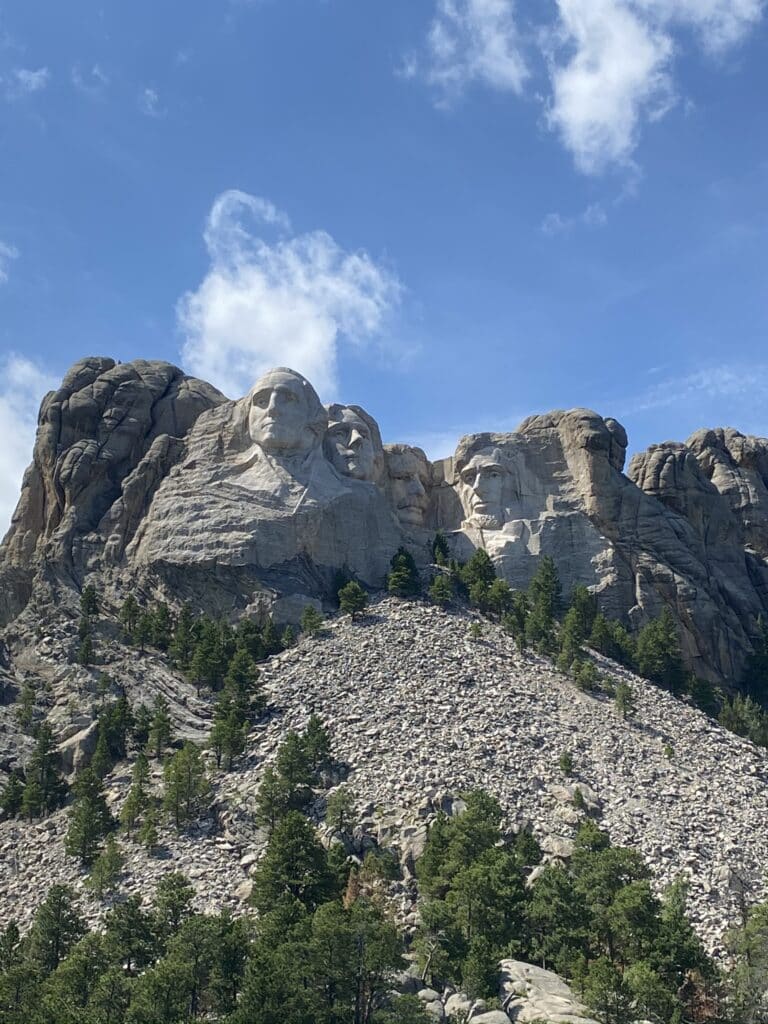
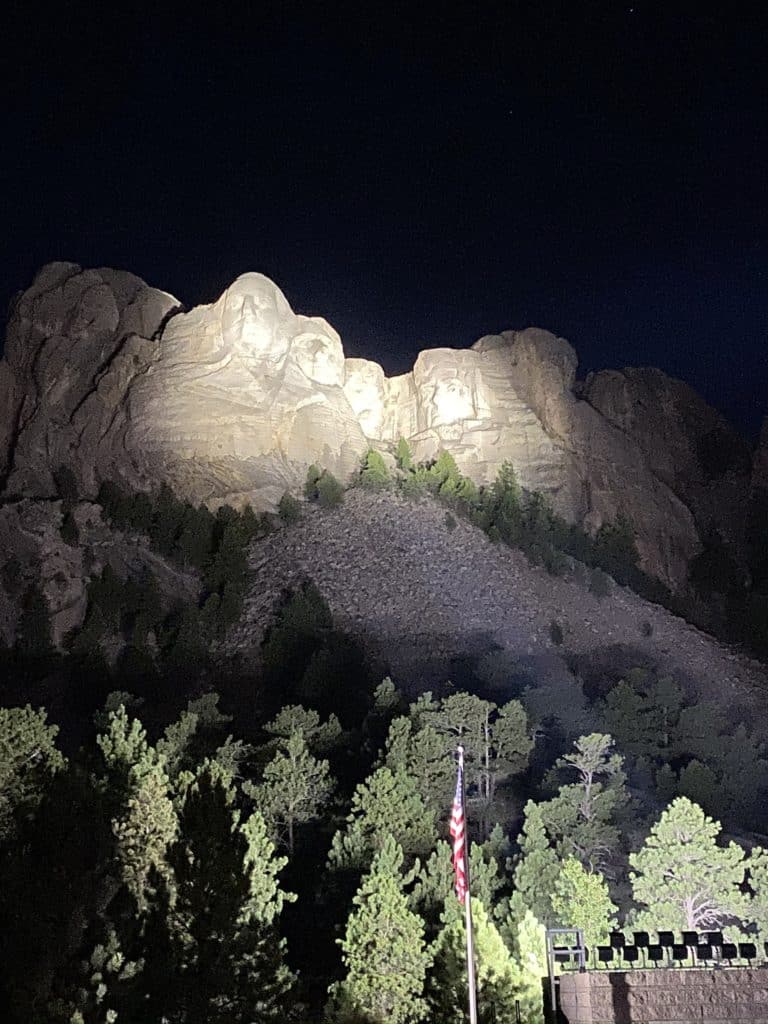
Mount Rushmore
We finally arrived at Mt Rushmore around 2:30 pm, so this drive took us about an hour and 15 minutes.
A side note about Mt Rushmore – even if you have the National Park pass, you are required to pay $10 for parking.
BUT the good news is that the parking pass is good for an entire year.
So you can go in an out of the lot without having to pay for parking again.
Mt Rushmore was super exciting to visit.
It was pretty crowded, but I think part of it was because the main walkway in was under construction so half of it was blocked off.
They have a nice museum, theater, cafeteria, and gift shop, so you could spend quite a bit of time here if you wanted.
Here in the gallery they show some of the models that were used to build Mt Rushmore.
The theater had a nice short video about how it came to be and how it was built.
It runs continuously so you can check it out any time during your visit.
We stayed for about an hour and 45 minutes, leaving at 4:15 pm.


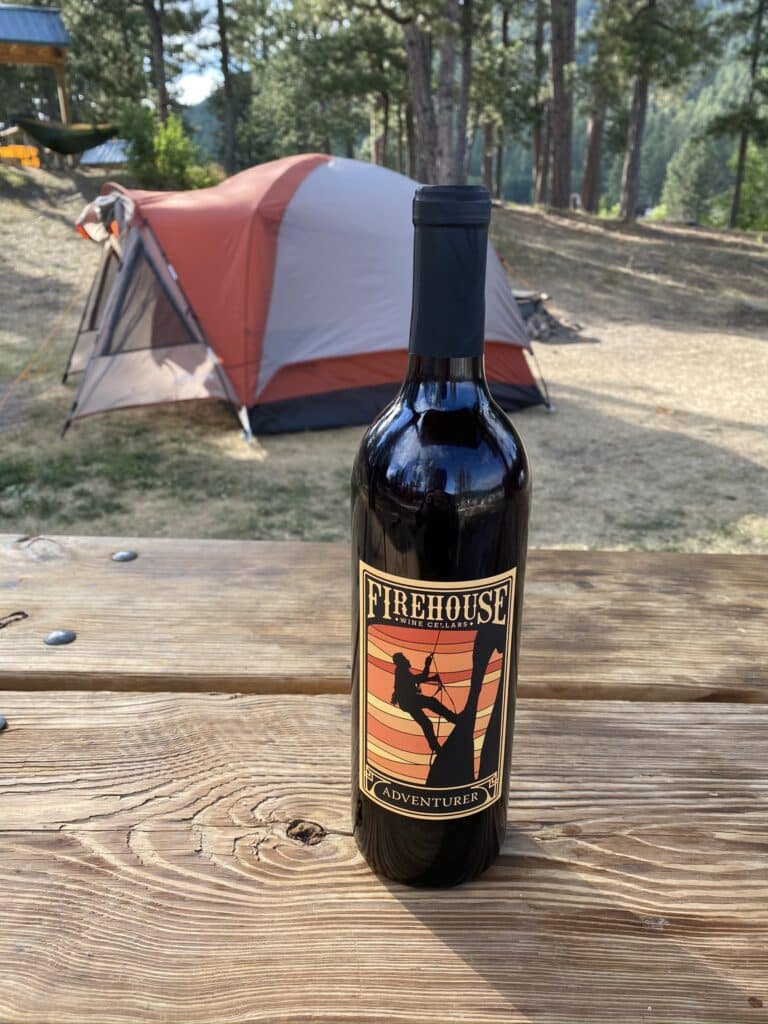
Grab A Bite Of Thomas Jefferson’s Original Vanilla Ice Cream Recipe
We noticed that a ton of people were eating ice cream and we have a really hard time saying no to novelty treats.
Once we found out they were serving Thomas Jefferson’s original vanilla ice cream recipe we just had to get it!
They also had cool wines for each of the presidents represented at Mt Rushmore.
We were tempted to get each one, but we decided to save a little money and just buy one wine that sounded like it would taste the best.


Where To Stay: Mt. Rushmore KOA At Palmer Gulch
This was one of the biggest KOA resorts we have ever stayed at and it’s only about a 15 minute drive from Mt. Rushmore.
Most of the KOAs we visit are pretty small and aren’t really resorts.
They just have the basic amenities.
But this place had to have had hundreds of RVs there.
It has a waterpark and mini golf and restaurants.
It’s not really our “scene” but it was super convenient and we got a pretty good spot.

We arrived at the KOA around 4:30 pm and we were completely set up and ready to go by 5:30 pm.
Since we didn’t need to leave to head back to Mt Rushmore until about 7:45 pm, we decided to have a glass of wine and play UNO while we waited.
We also charged up our phones and laptops, checked emails, and checked in with family.
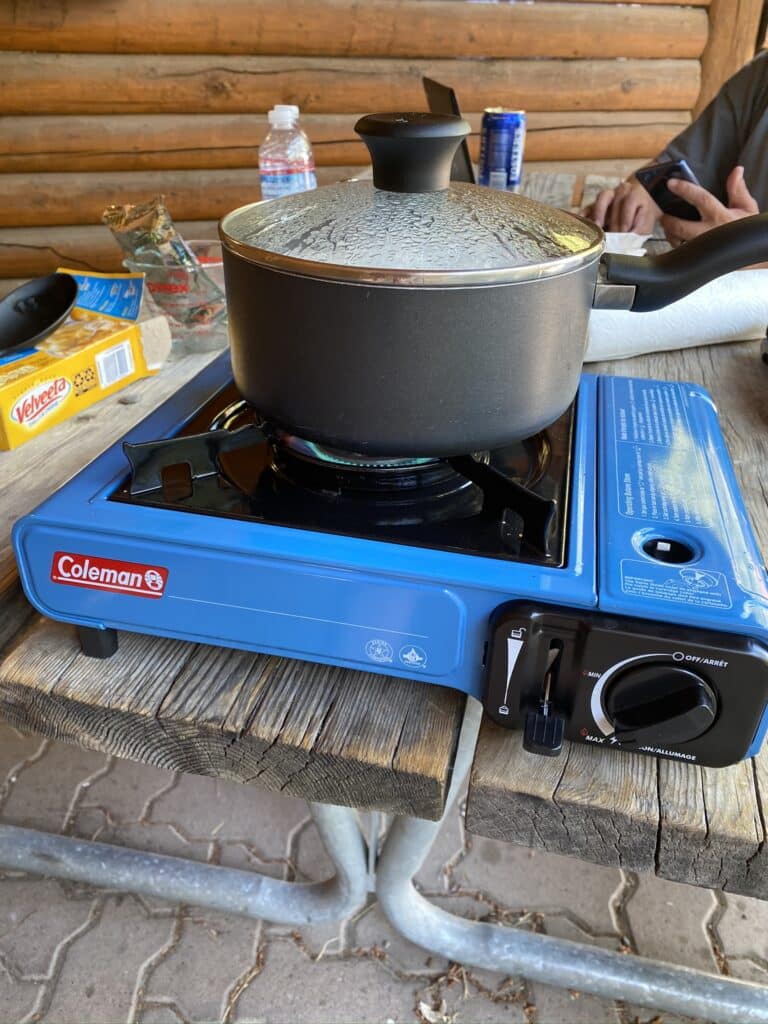
JP also knew he would be hungry by the end of the night so he fixed himself some Ramen noodles on our little Coleman stove.
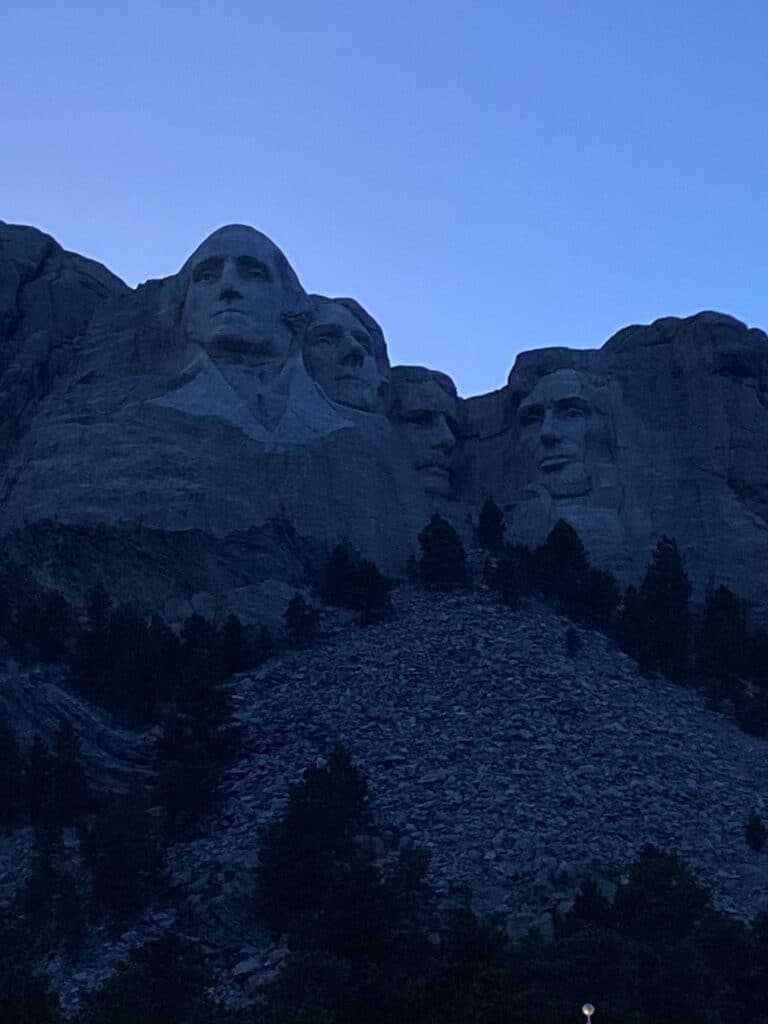
Evening Lighting Ceremony At Mt. Rushmore
I recommend arriving about 45 minutes to an hour early for the lighting ceremony to make sure you get a spot.
It is at different times depending on when sunset is and we were just on the cusp of it moving to an earlier time.
It started at 9 pm for the Summer months, then moved up to 8 pm for the Fall.
The ceremony lasts for about 45 minutes and when it’s over the exhibits are closed for the night.
We were back at our campsite around 10:30 pm that night, so it was the latest night of the trip so far.

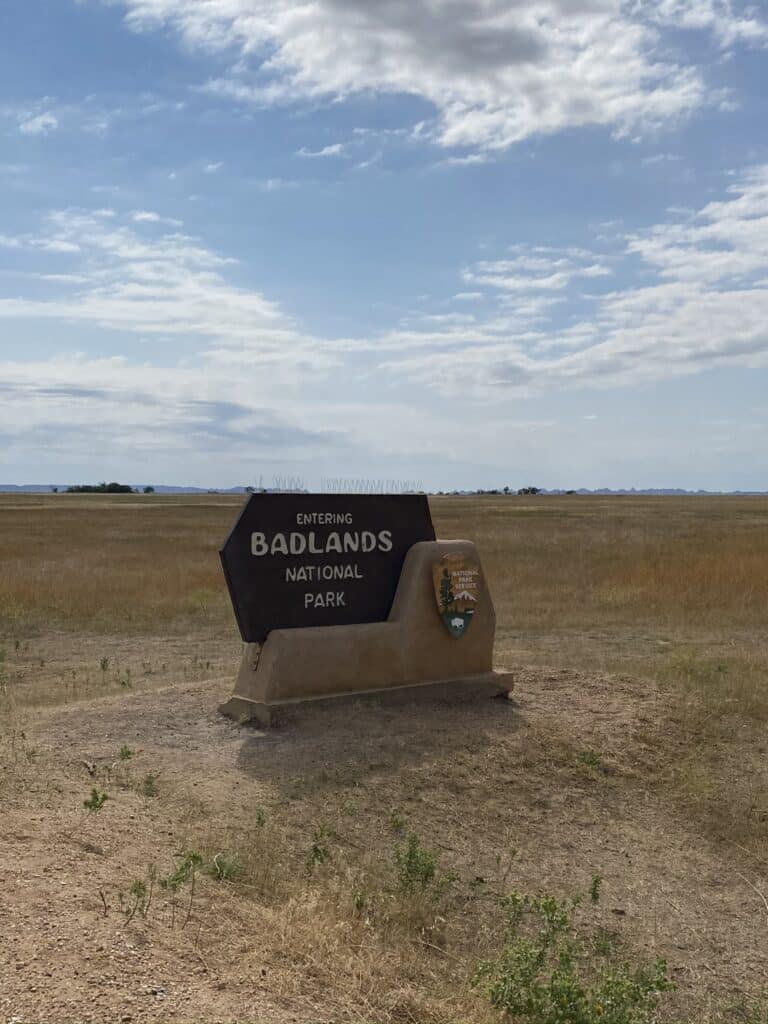
Day 7: Badlands National Park + Deadwood
Today has a little bit more driving than yesterday, but you still get to see a ton of places in a somewhat close proximity.
You can see our experience at Badlands and Deadwood in this video on our YouTube Channel.
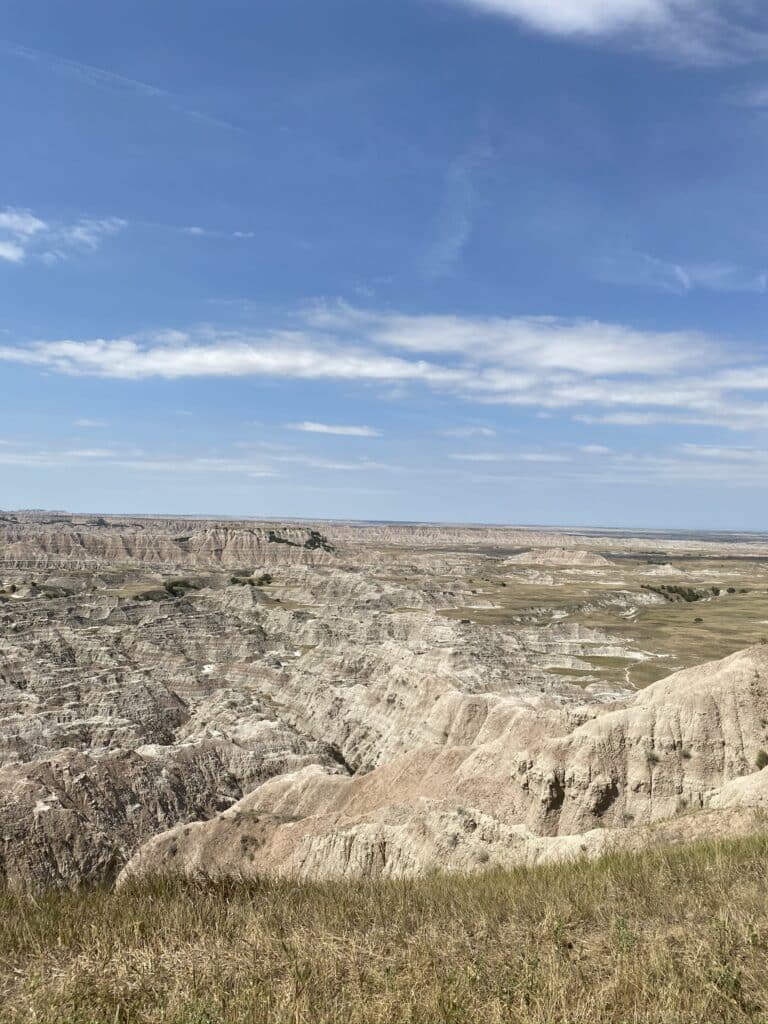
Badlands National Park
We left our campsite around 8:30 am and arrived at Badlands National Park around 10:15 am.
There are a couple different options when driving to Badlands and we opted to take the southern route and end with Notch trail, then take the main highway on the north side back out as opposed to the reverse route.
Either way is fine, there were plenty of cars doing both.
We started by taking Sage Creek Road in, which is a scenic route with lots of wildlife.
This eventually merges with Badlands Loop Road which leads to the visitor center, and eventually Notch Trail.
We saw lots of prairie dogs again and they were super active!
We got lots of pictures and videos of them playing around.

There was a little bit of traffic toward the end of the scenic drive because of construction, but it didn’t really slow us down too much.
The drive was only about 30 minutes.
We stopped at the visitor center before going out to Notch Trail.
Notch Trail
I’m not sure exactly how long this stop took, but I know we didn’t make it to Notch Trail until about noon.
By then there were a good amount of people there, but the parking lot still had plenty of space.
Going out to the trail we didn’t really come across too many people and the ladder was empty, but when we headed back down there was a bit of a wait.
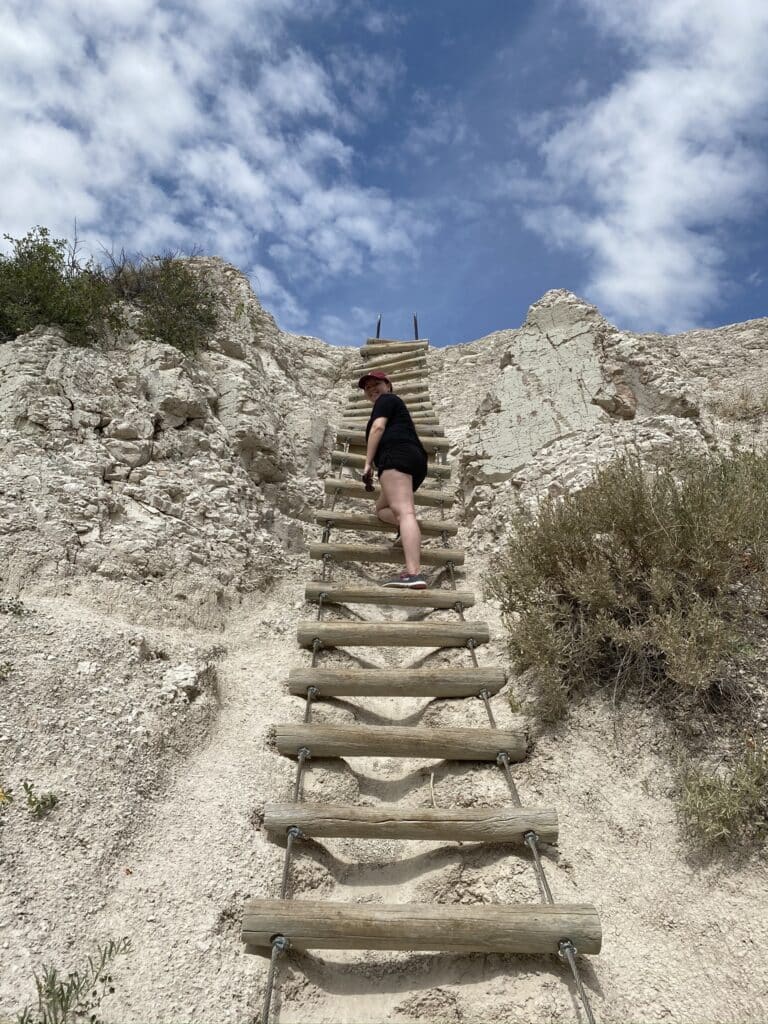
A note about this trail – it is much easier going up the ladder than going down.
The notches on the ladder are pretty spaced out, so anyone short like me will have a little bit of a harder time getting up and down the ladder just because you’ll have to reach pretty far sometimes.
Kids were able to do it though, so it’s not impossible.
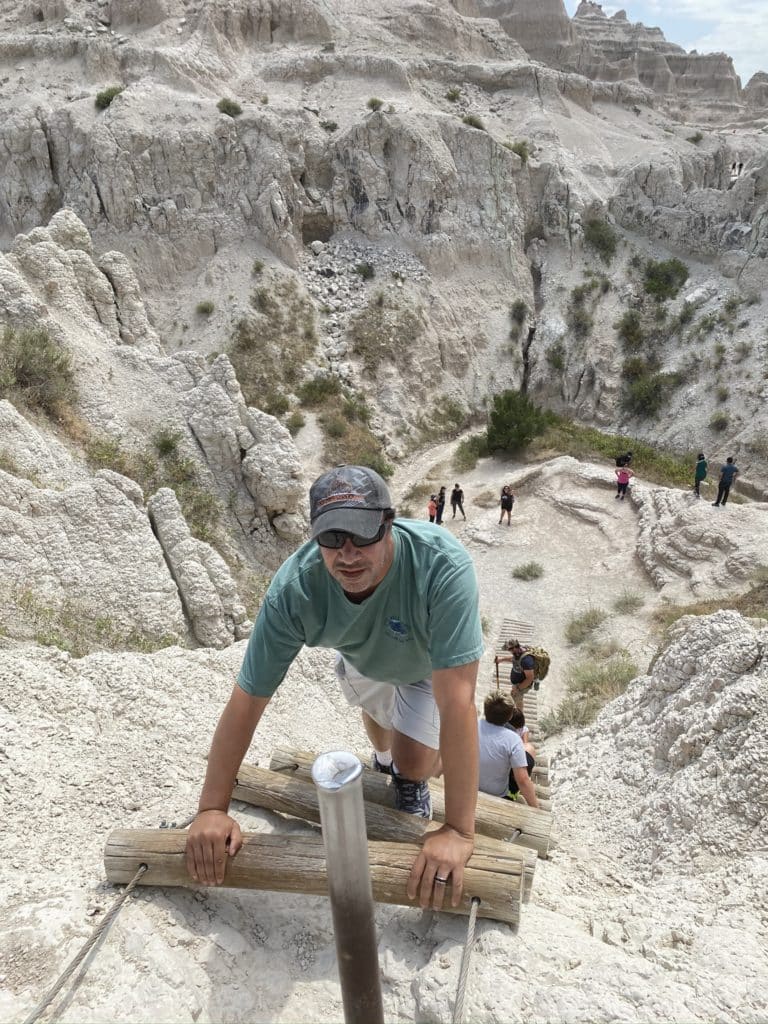
To get to this part of the trail does not take long at all.
It’s less than 5 minutes each way and we spent about 5-10 minutes up at the top, so this can be a quick stop if you’d like.
There were a lot of people walking further once they got up top, but we picked this trail specifically because of its iconic ladder and didn’t feel the need to explore further.
We also had plenty of other places to get to that day, so we didn’t want to spend all day on this trail.
We left Notch Trail at around 12:20 pm and started our drive to our next destination.
Wall Drug
If you haven’t heard of Wall Drug, don’t worry.
We hadn’t until we were planning our trip.
You will see billboards all over for this place when you’re in the area.
It started as a road side convenience store.
They became a popular stop by offering free ice water to travelers that stopped in.
Since then it was expanded to a whole district of shops and dining.
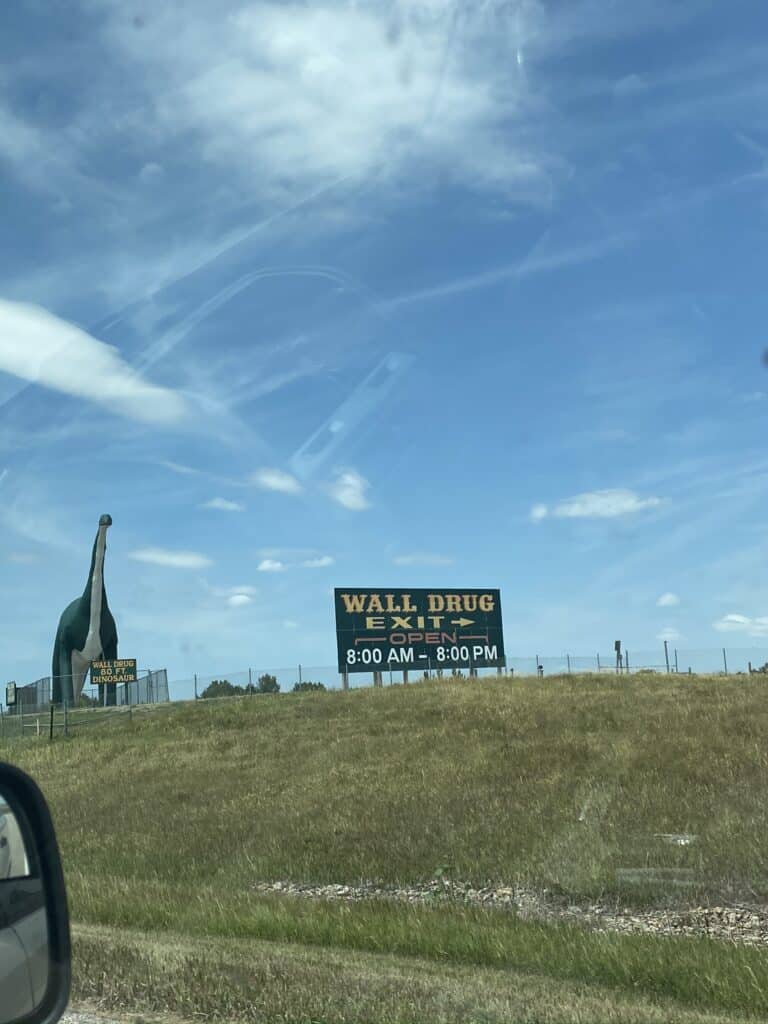
It was very busy when we stopped in, so we didn’t stay long and explore.
We stopped for lunch though and had a yummy roast beef sandwich with mashed potatoes and gravy.
They are also well known for their 5 cent coffee.


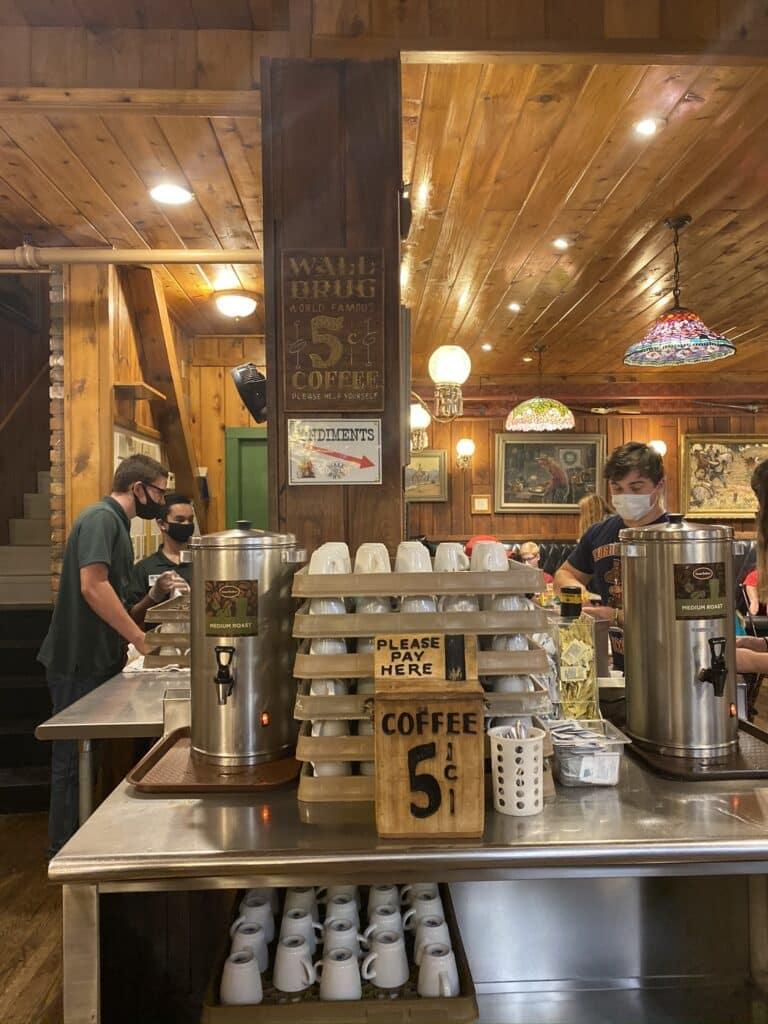
Wall Drug was only about a 30 minute drive from the Notch Trail.
We arrived around 1 pm and were back out on the road around 1:30 pm.
Deadwood
Our next stop is Deadwood.
It’s a famous old western town and it’s where we originally planned to have lunch, which is why we just shared a small meal in Wall Drug.
We got there around 3 pm, so it was about an hour and a half drive.
Again, this was the weekend before Sturgis so it was PACKED with bikers.
Every inch of the main street had parked bikes and it was so busy.


Where To Eat Lunch: Deadwood Social Club
There were lots of cool restaurants to choose from and we decided on the Deadwood Social Club.
The saloon downstairs opened in 1876.
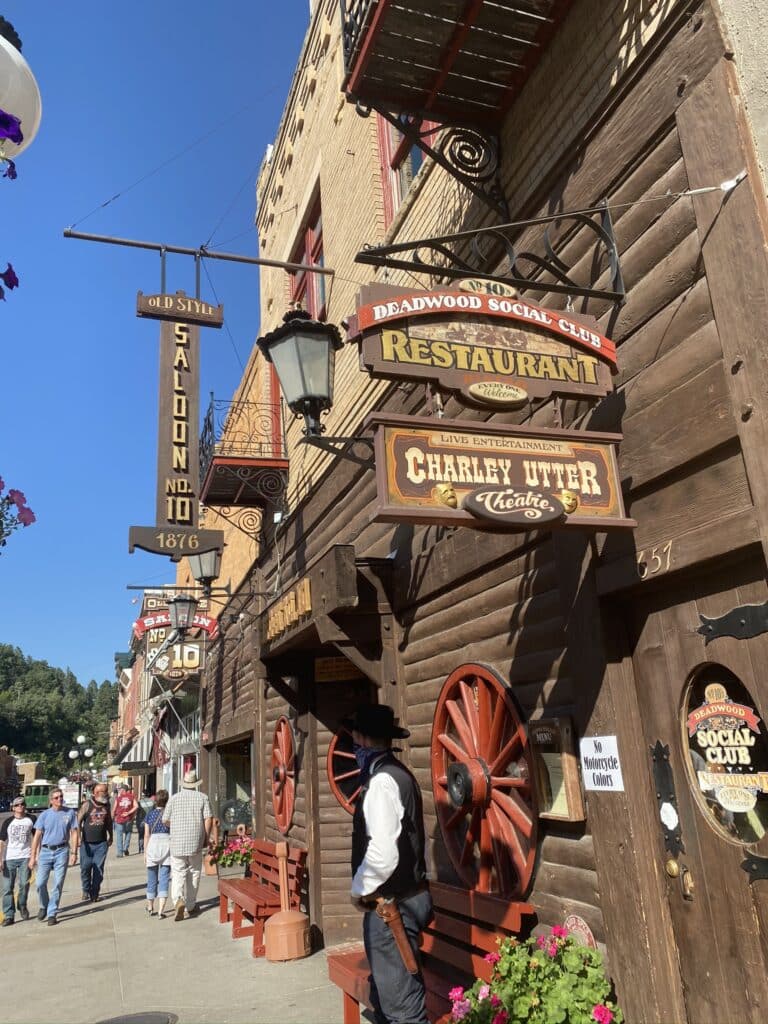
It is famous for being the site where Wild Bill Hickok was assassinated during a game of poker in August of that year.
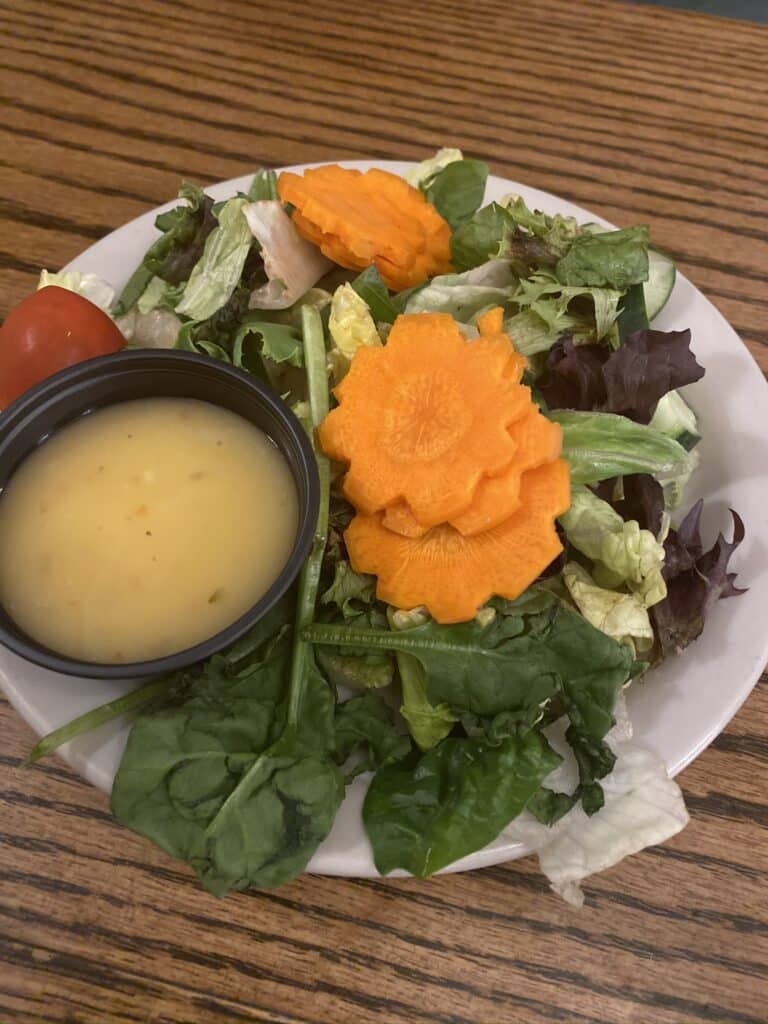
We started with a soup, salad, and bruschetta.
The bruschetta was kind of weird, but everything else was good.


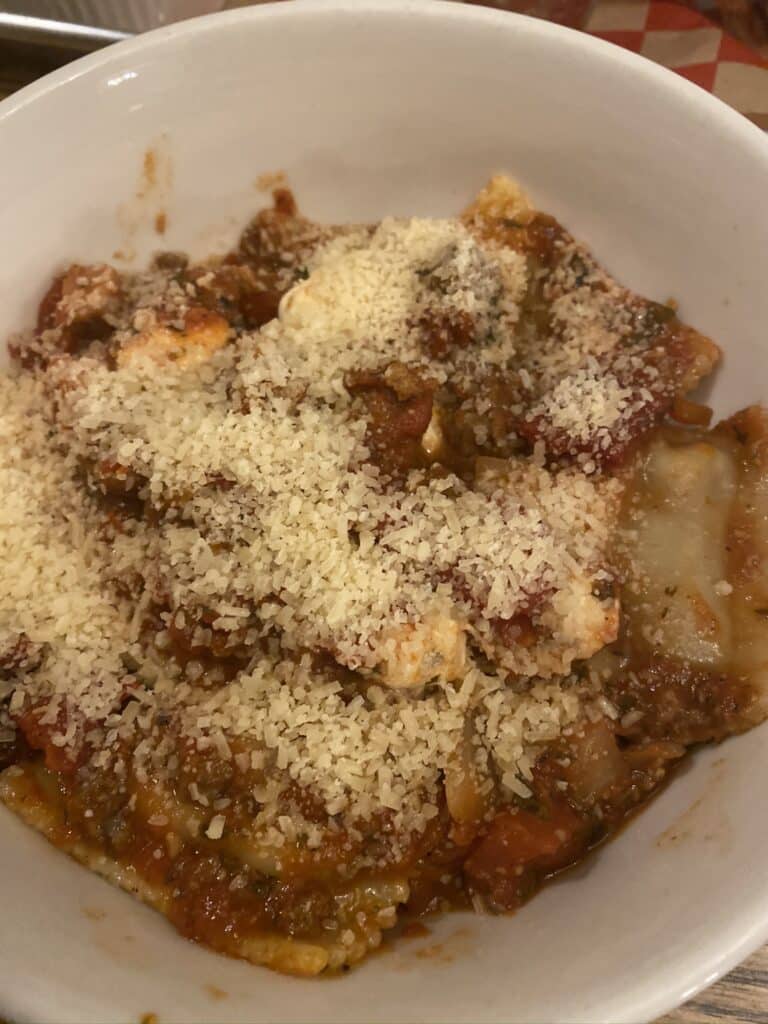
For entrees, we shared a steak with country sides like potato salad and watermelon and buffalo ravioli.

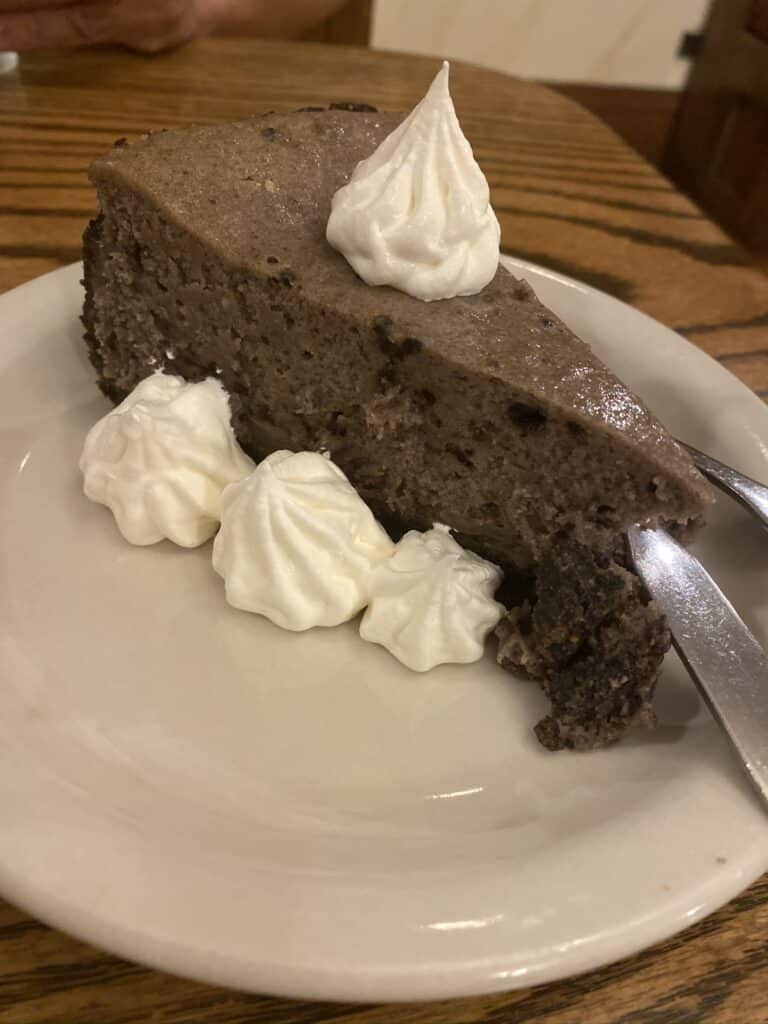
There were issues in the kitchen and staffing the day we visited so we were given a complimentary cookies and cream cheesecake for dessert.
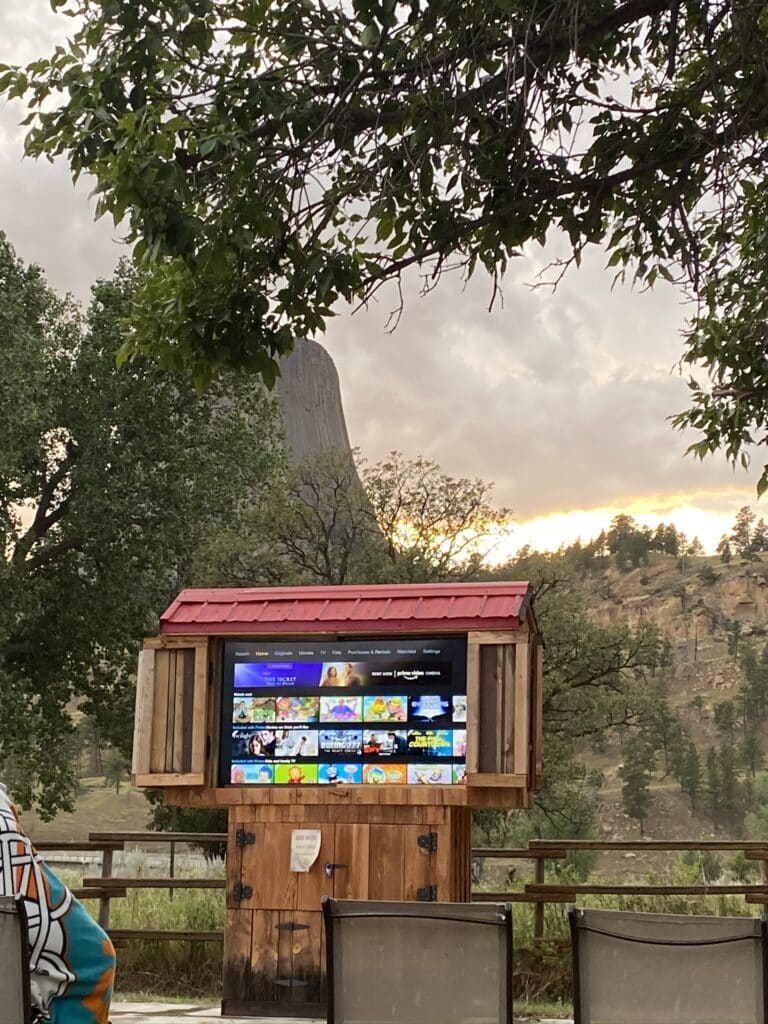
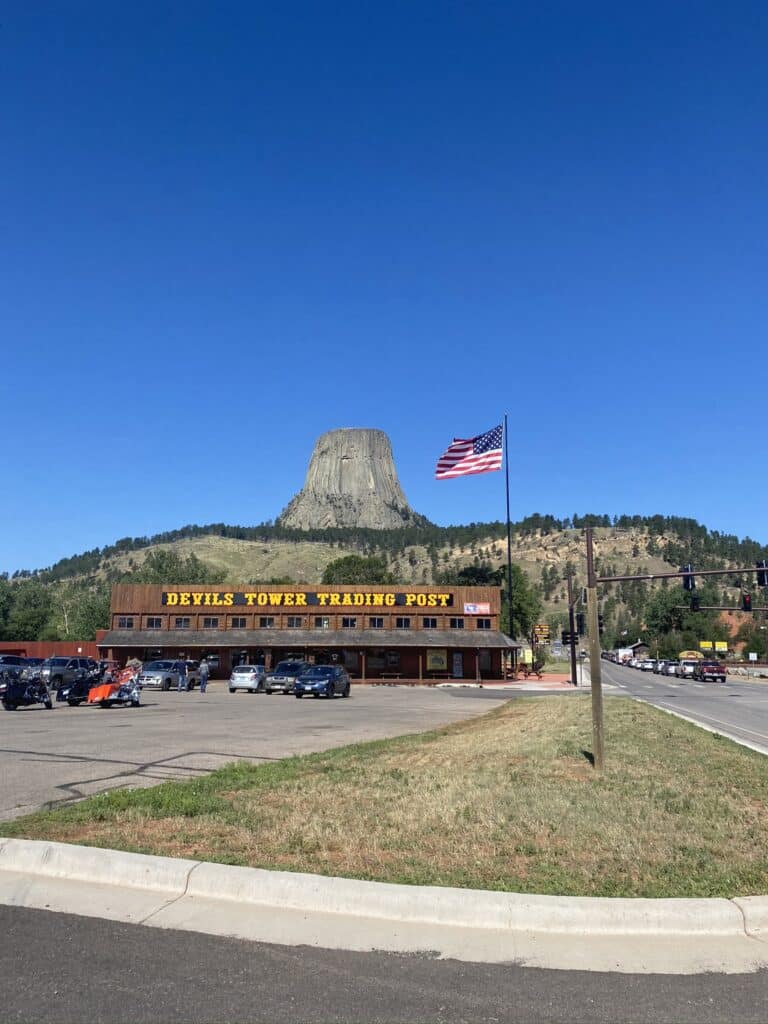
Where To Stay: Devil’s Tower/Black Hills KOA
We were back out on the road at 5 pm and our last stop of the day was Devil’s Tower.
We camped at the KOA at the foot of the monument and it was awesome!
This was easily one of my favorite camping sites and tourist attractions on the whole trip!
The KOA wasn’t too big or crowded.
There was a pretty good sized Trading Post across the street and there was nothing else in the area.
We made it to the KOA shortly after 6 pm, so it was barely an hour’s drive from Deadwood which was nice.
We got THE BEST camp site in the whole KOA because our tent had an unobstructed view of Devil’s Tower.
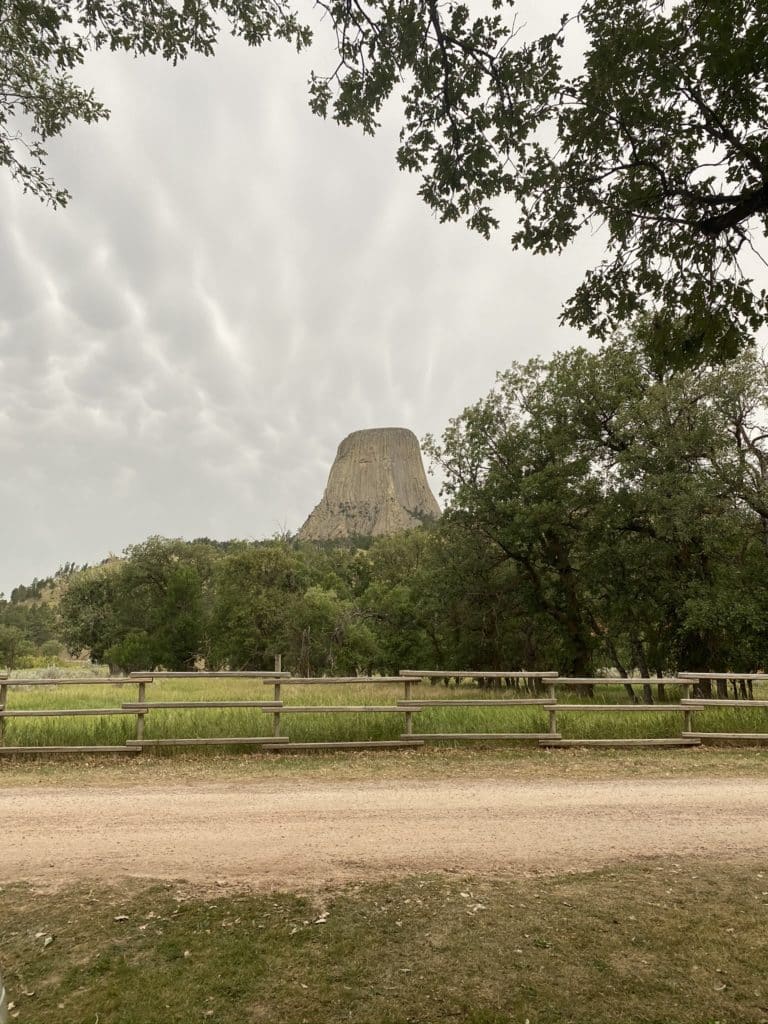
Every other site had trees in the way.
Our KOA was having a movie night, which I assume they do every night and it is probably always the same movie – Close Encounters of the Third Kind.
Day 8: Devil’s Tower + Little Bighorn + Beartooth Pass
Since our KOA was right at the foot of Devil’s Tower, we didn’t have to drive far to start our day.
We took down our campsite and had everything packed and ready to go at 8 am.
You can see our full experience from this day in this video on our YouTube Channel.
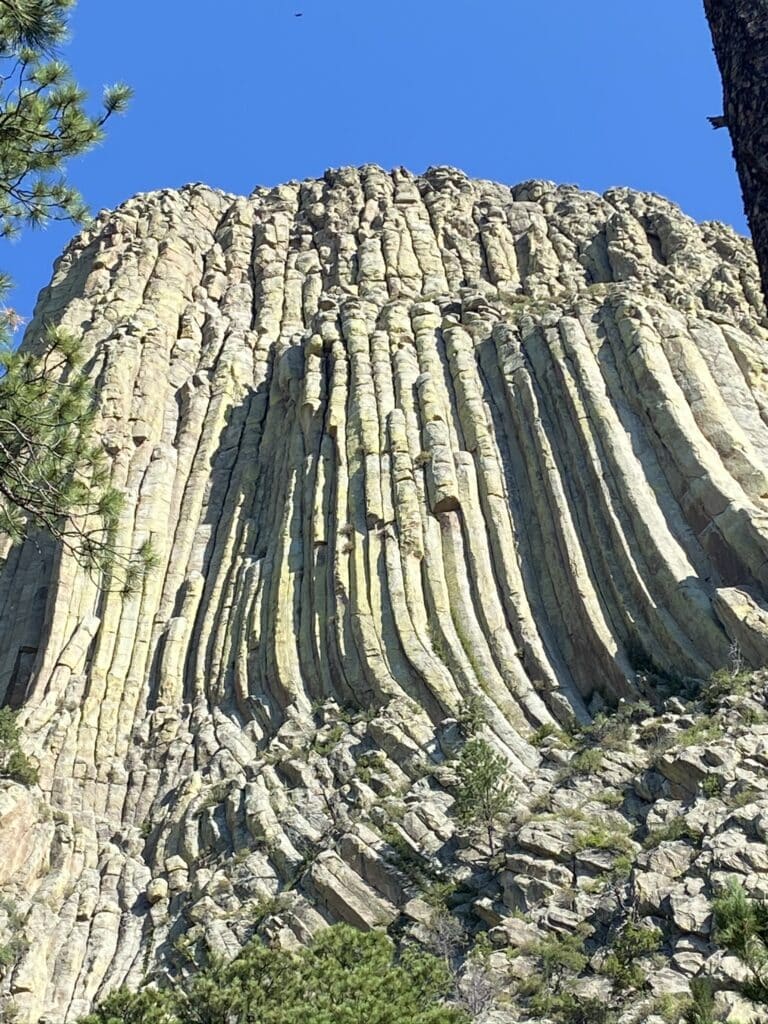
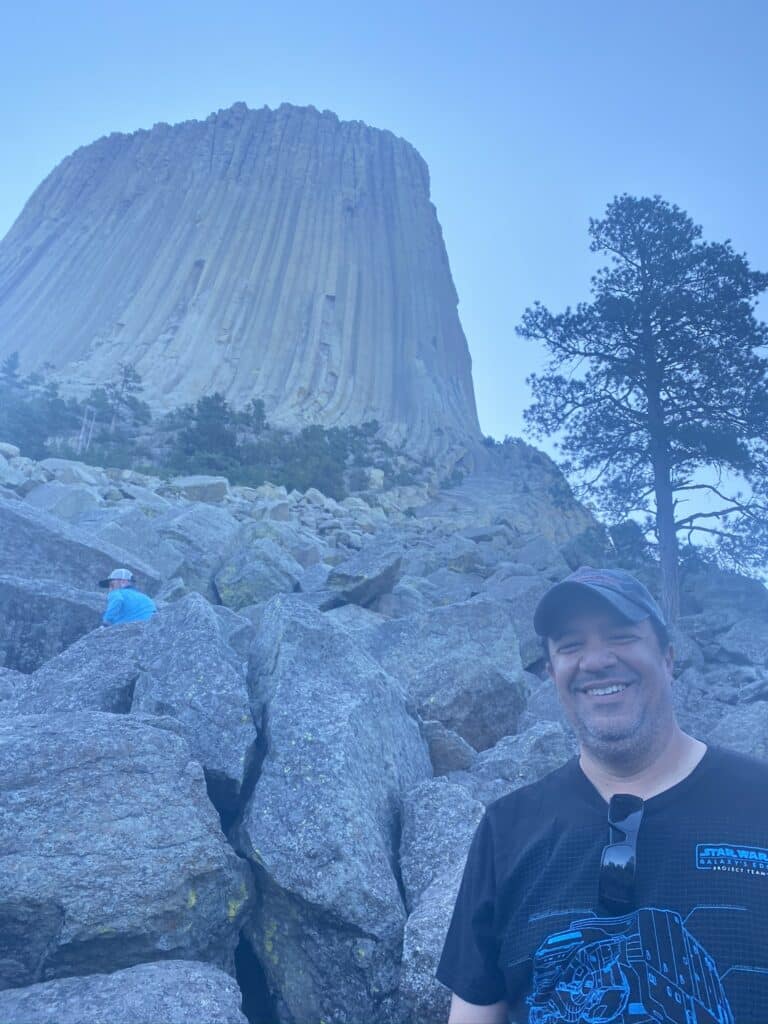
Devil’s Tower
When visiting Devil’s Tower, you just take a loop trail around the base.
You can start in either direction, but we chose to go left.
I think by going to the right you don’t have to go uphill as much.
It took us about 45 minutes to do the entire loop.

But we stopped for lots of pictures and to read various plaques.
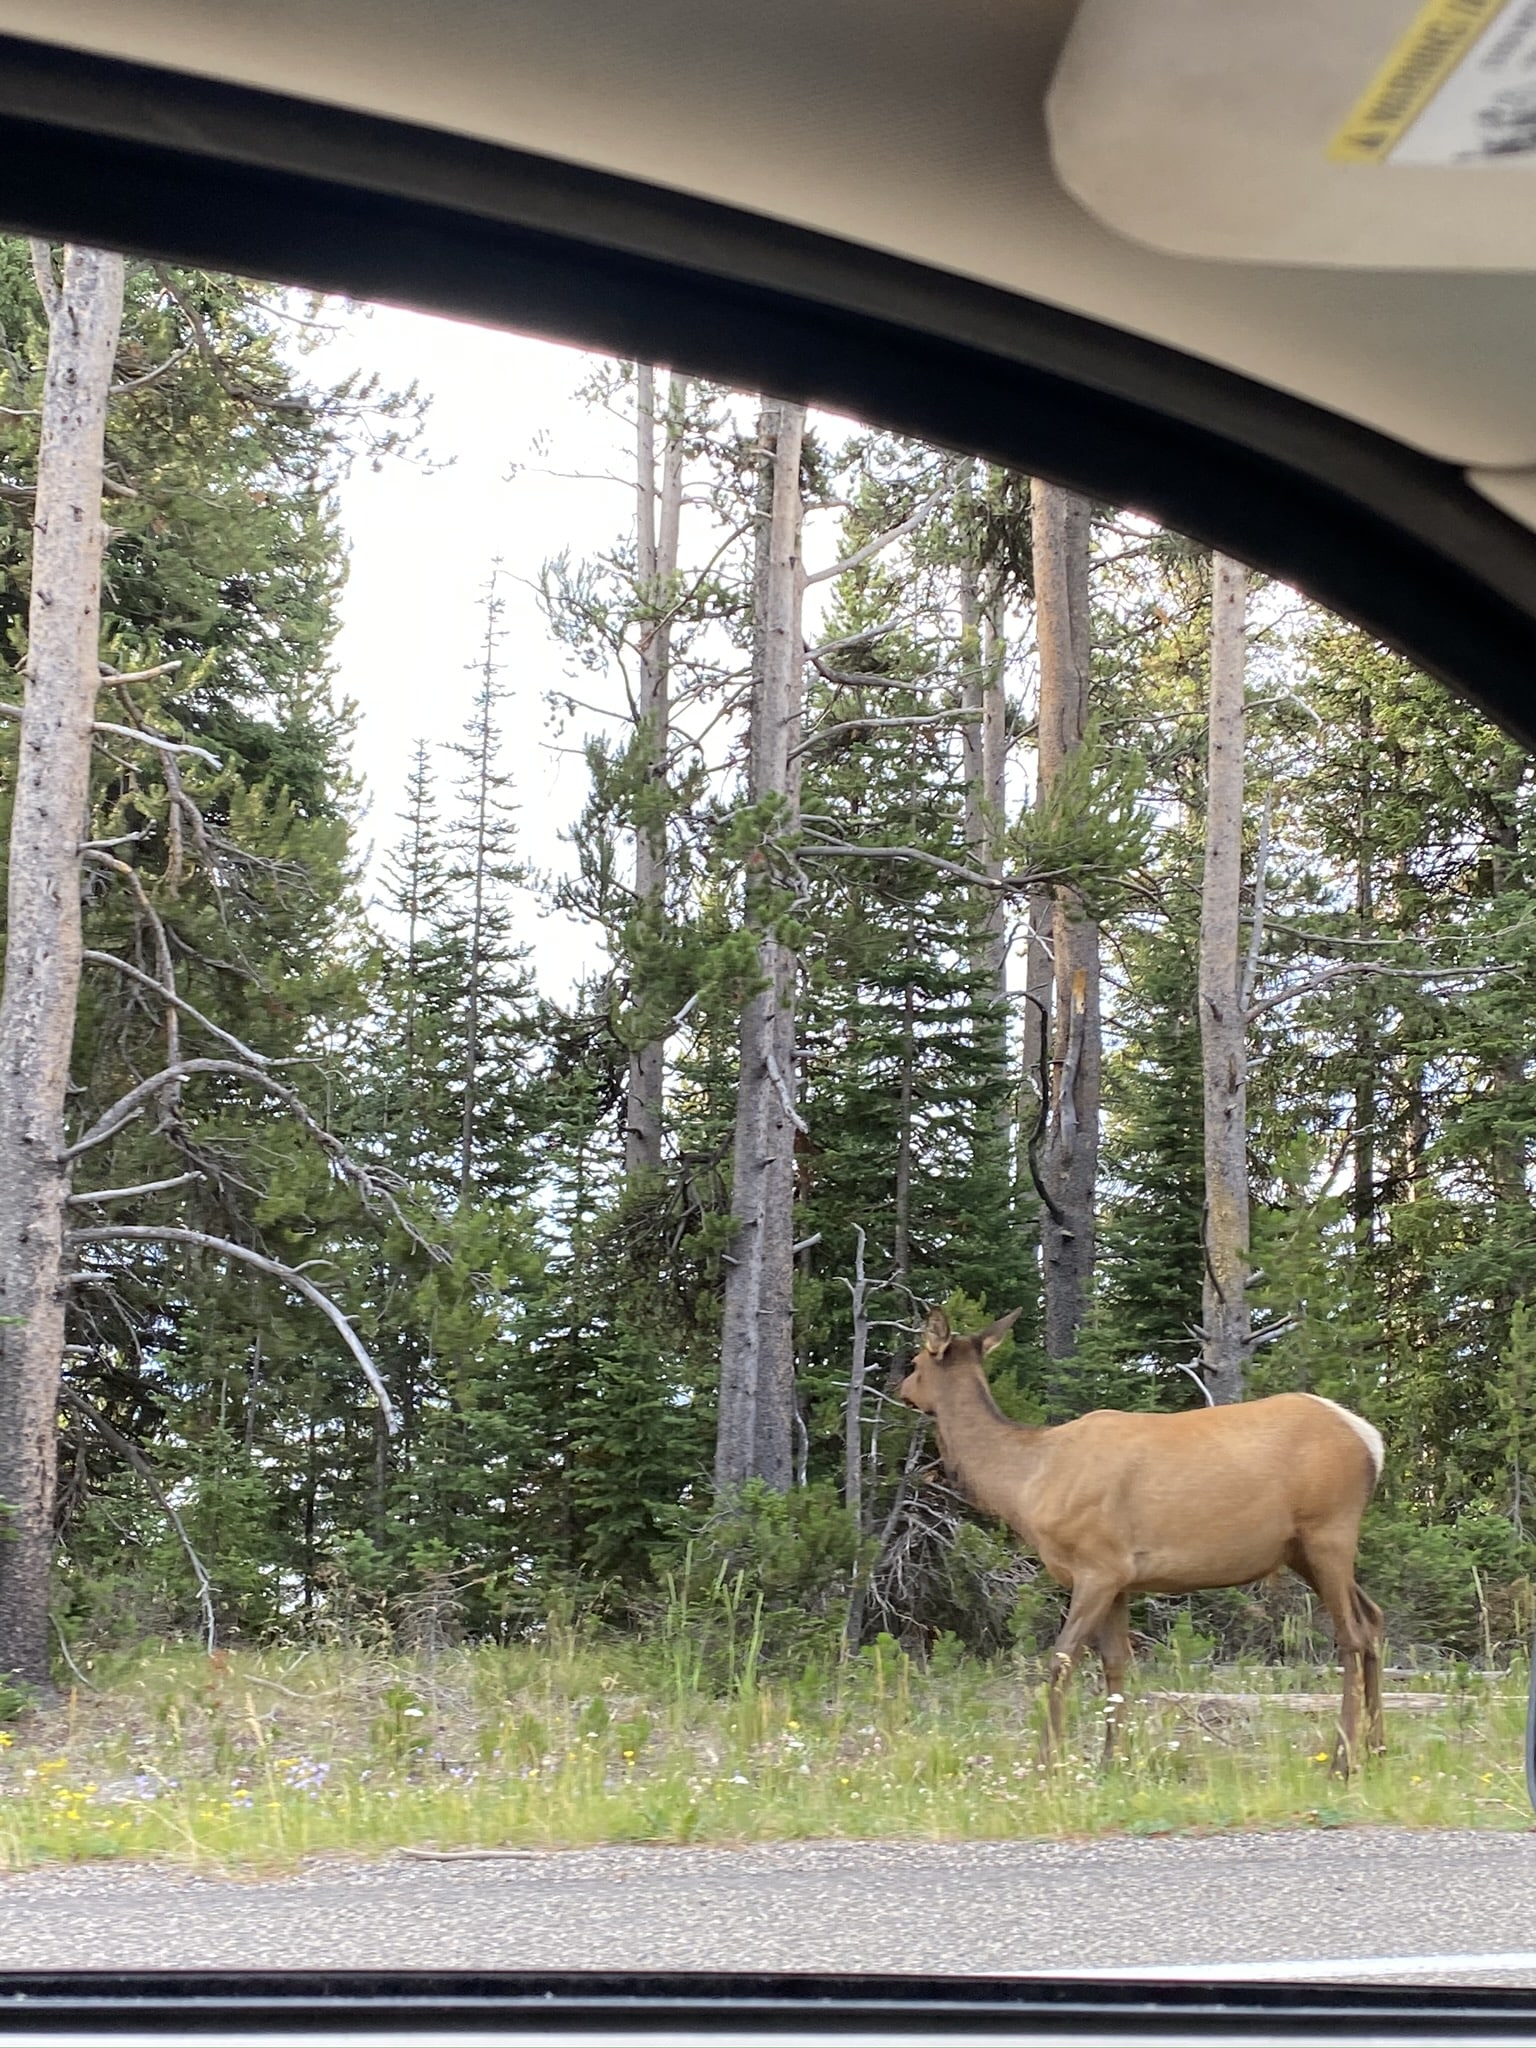
During our hike we saw a few deer, including some babies.
It was nice and cool this early in the morning and the trail was very shaded.
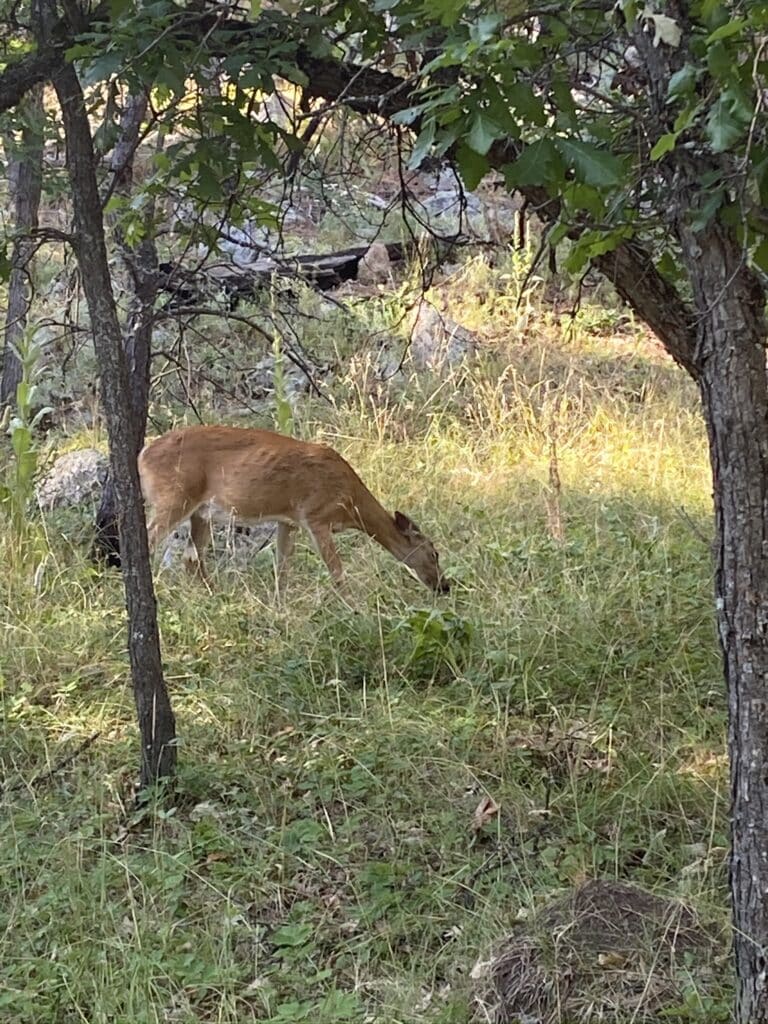
We also had our coffee and tea that we made at our campsite before leaving.
There were also a few rock climbers which was cool.
This was the only place we visited on our road trip where they had us verify our National Park Pass with an ID and they checked for the signature on the pass.

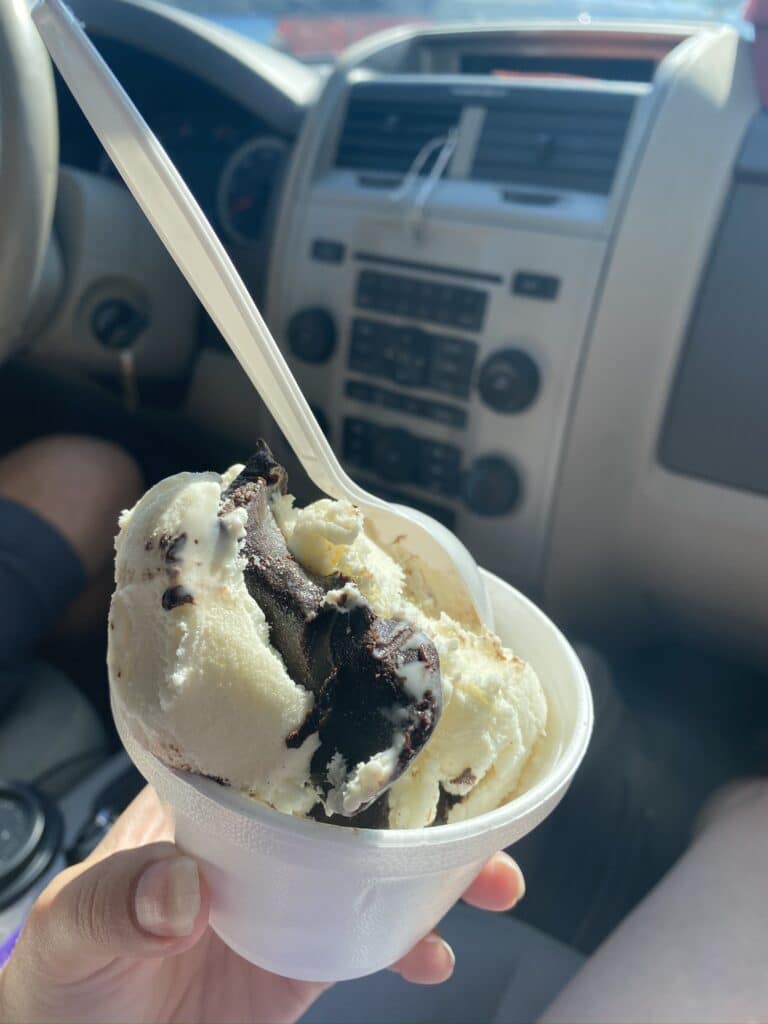
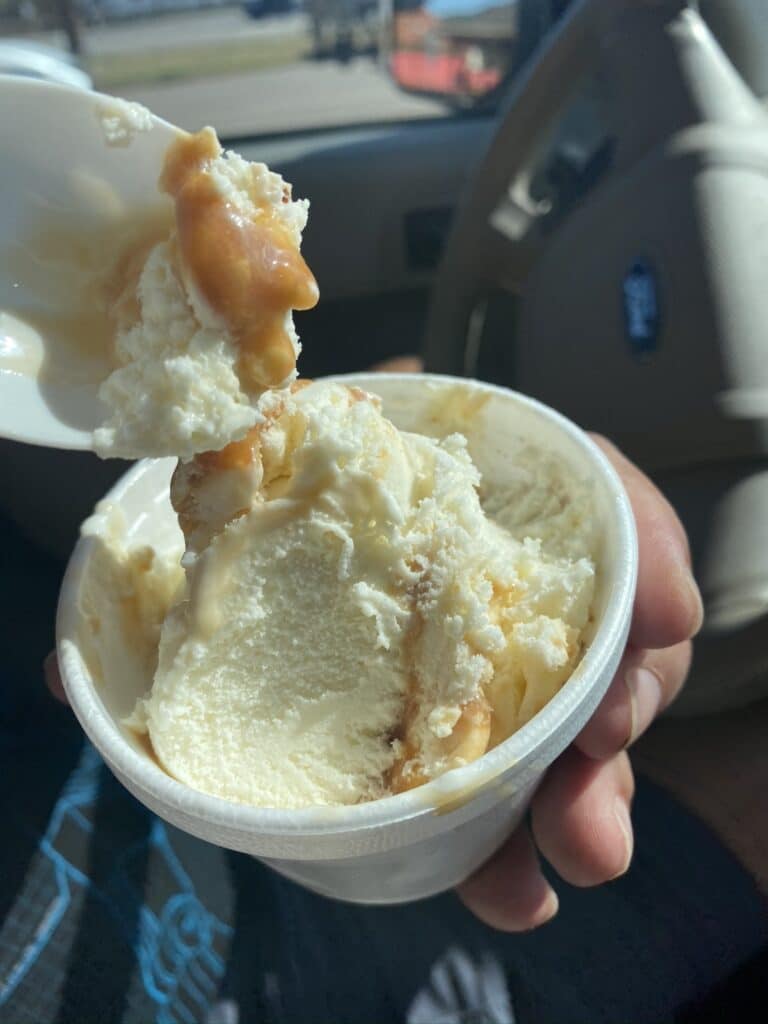
Trading Post
Right outside of Devil’s Tower is the Trading Post.
It’s a great place for souvenirs and ice cream.
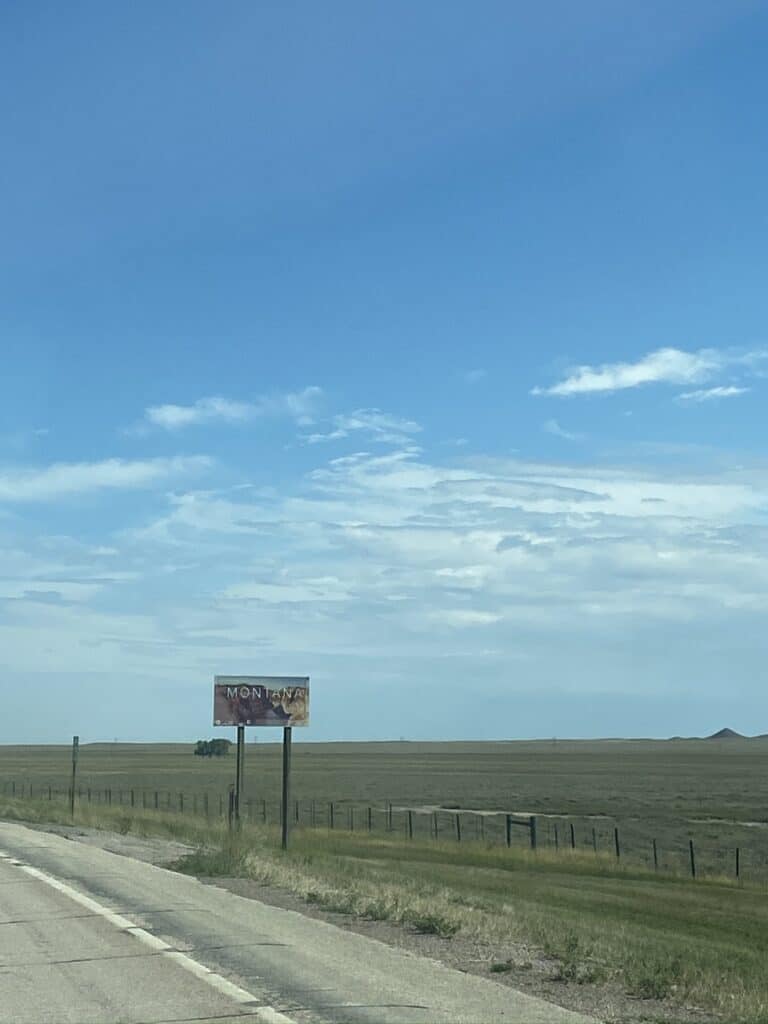
Continue Driving To Montana
After this short stop, we were on the road by 10:15 am.
About 30 minutes later we finally crossed the state line into Montana.
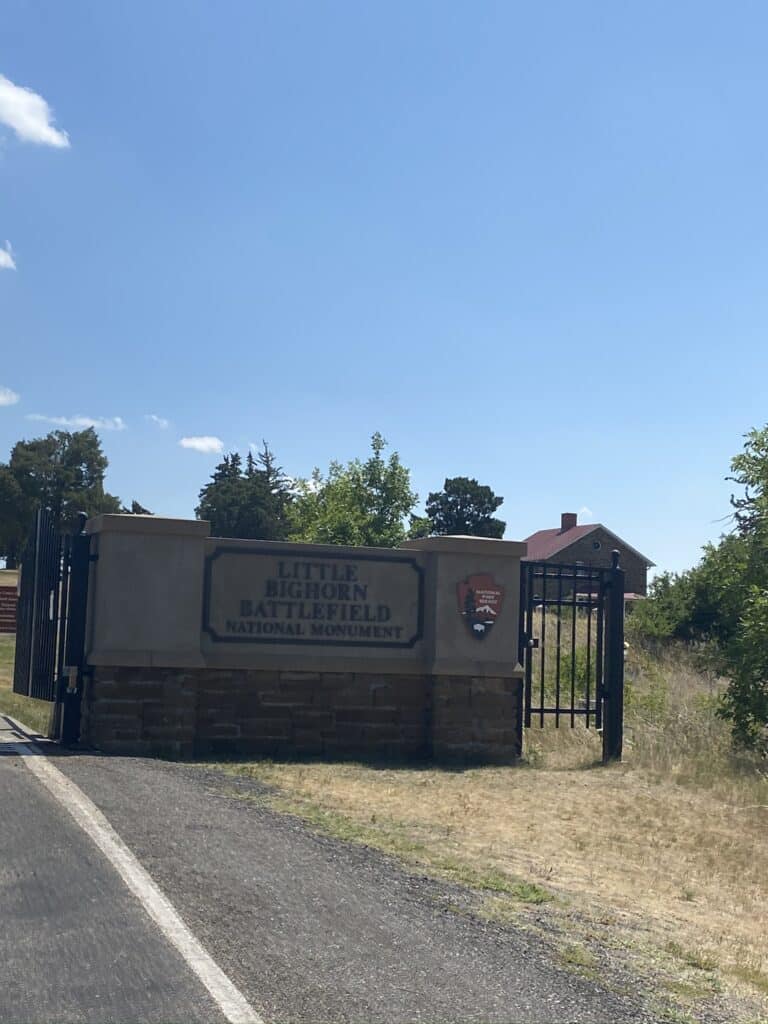
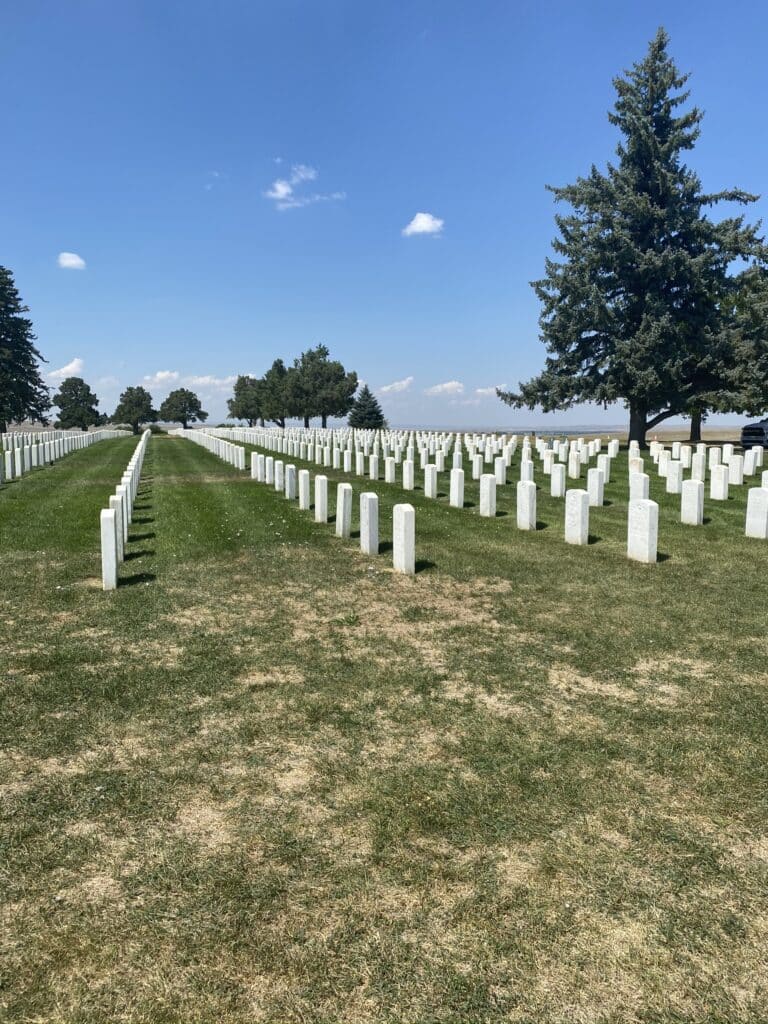
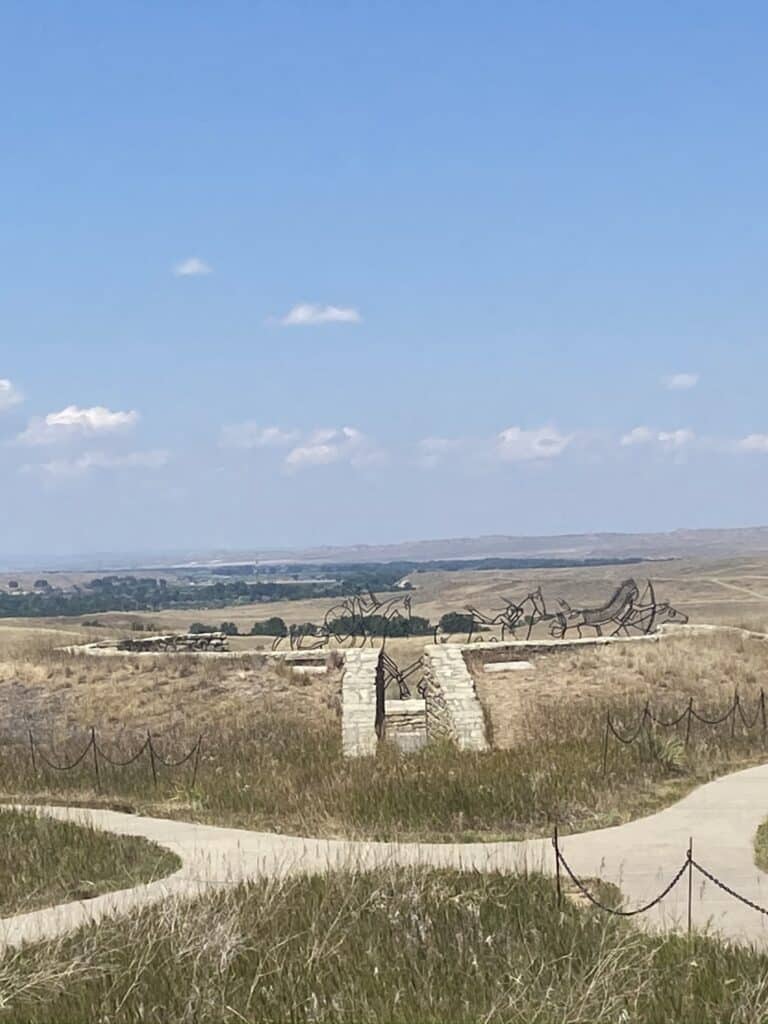
Little Bighorn Battlefield
The next stop is the Little Bighorn Battlefield National Monument.
We didn’t stay for more than 30 minutes, but we saw the main highlights.
It was a good bathroom stop and a good chance to get out of the car for a bit and get some fresh air.
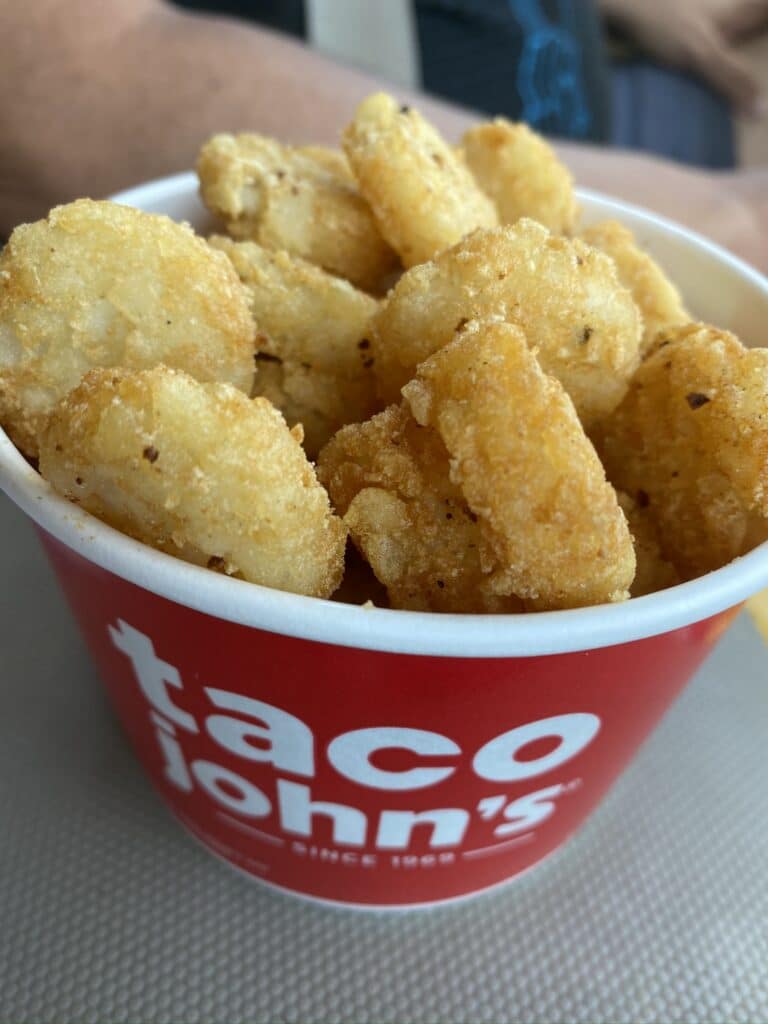
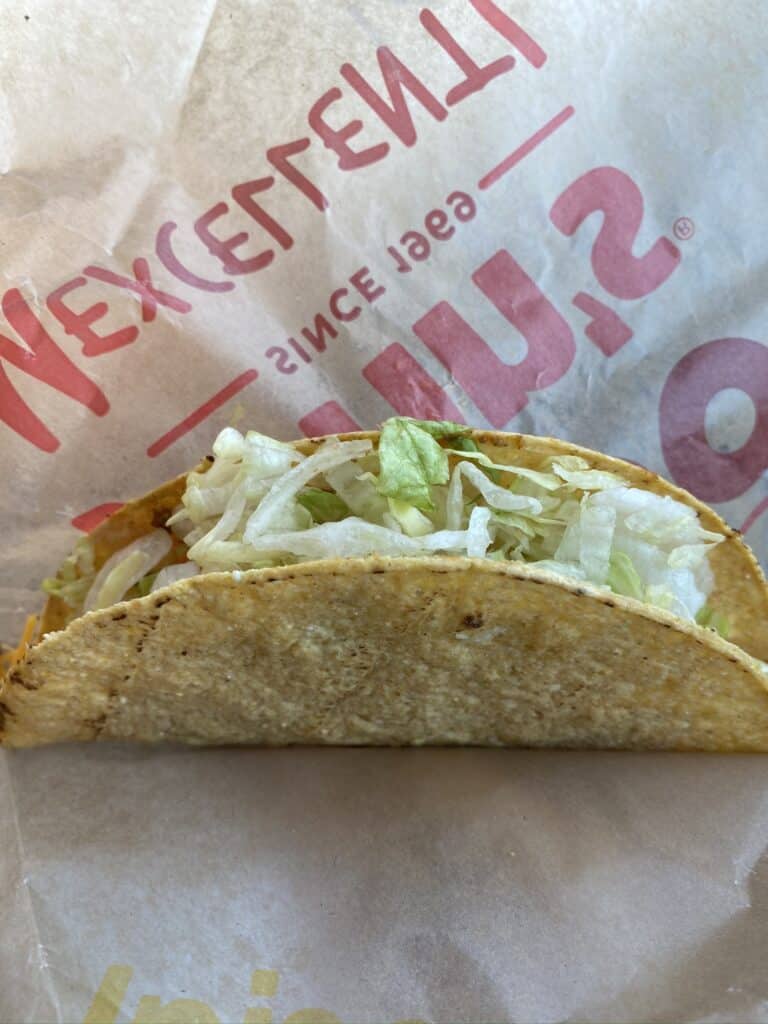
Where To Eat Lunch: Taco John’s
If you’ve never been here before, it’s a regional chain in a handful of places around the US.
It’s fast food, so you can eat it in the car as you continue your road trip or stop and eat in the restaurant to get out of the car for a bit.
My favorite thing on the menu is easily the Potato Oles.
I could probably eat a hundred of them.
We ended up sharing a Boss Burrito, Quesadilla Taco, and a Crispy Taco.
At this point in the day it was about 2:30 pm when we stopped to eat.
From here, we continued on to Red Lodge, Montana where we stopped for gas, more ice for our cooler, and a bathroom break.
It’s about 2 hours from where Taco John’s was located near Little Bighorn Battlefield.

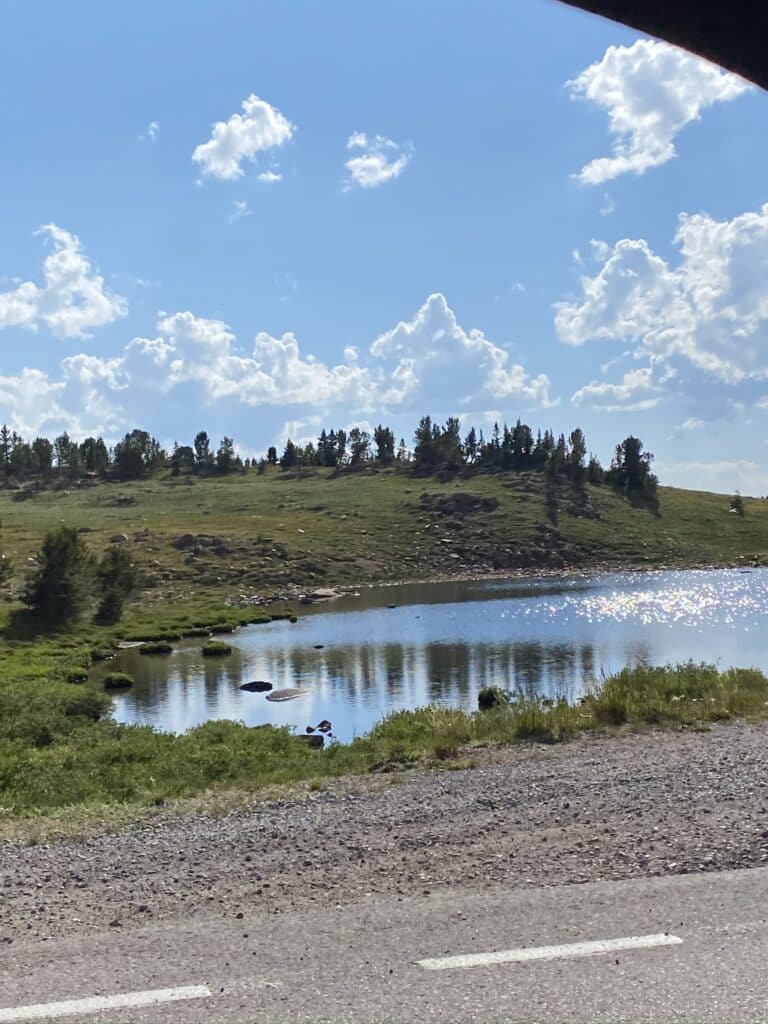
Beartooth Pass Highway
We started back out on the road at 4:30 pm and didn’t make it to the Yellowstone National Park entrance until 6:30 pm.
So this part of the drive takes about 2 hours.
The drive is SO scenic, but also very windy and steep.


The altitude change is thousands of feet and you go all the way up into an Alpine climate which is one of my favorites.
This drive is amazing and is a must-do!
Make sure you check the weather and go during the Summer because any sign of snowfall will make this drive impossible.

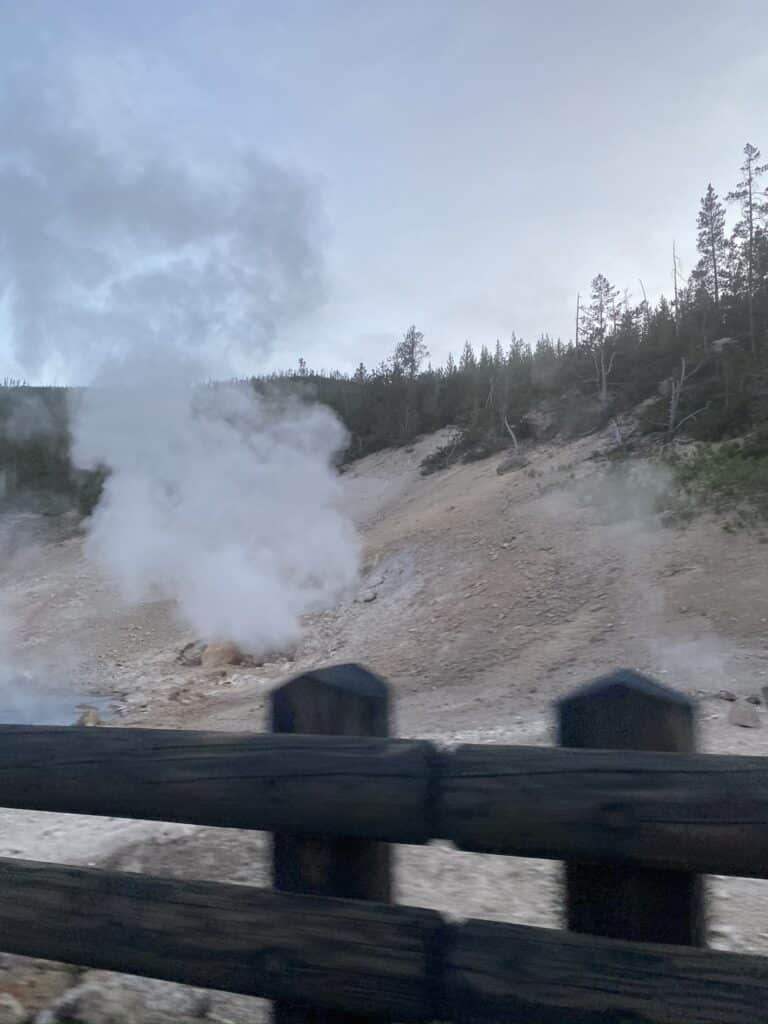
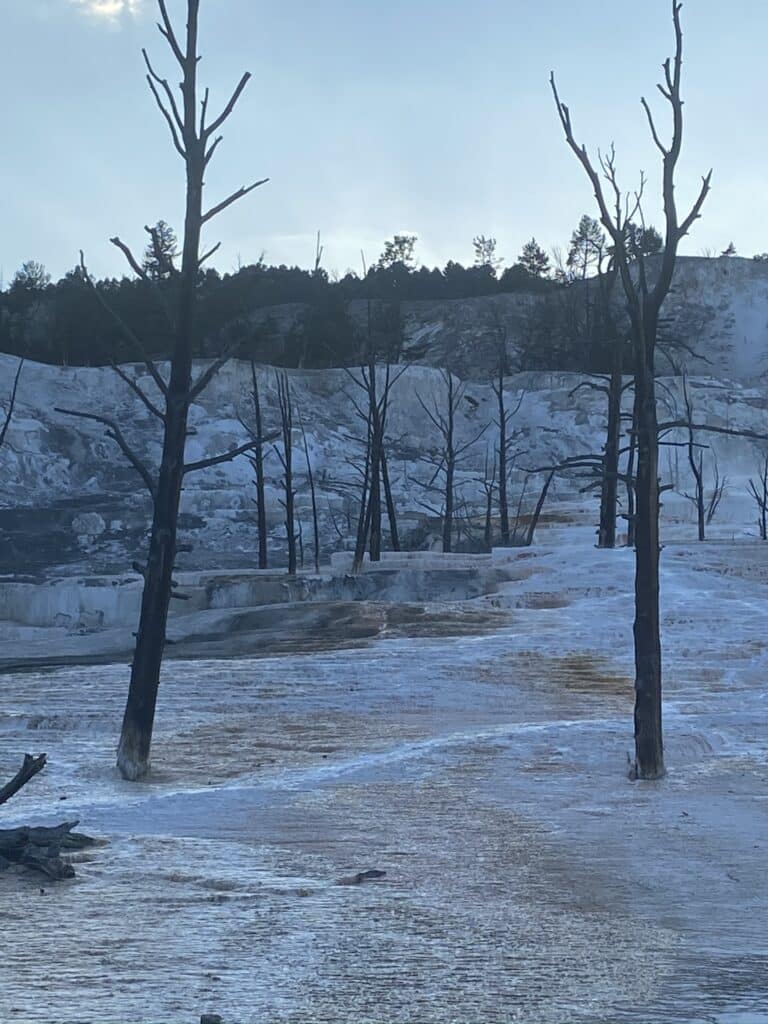
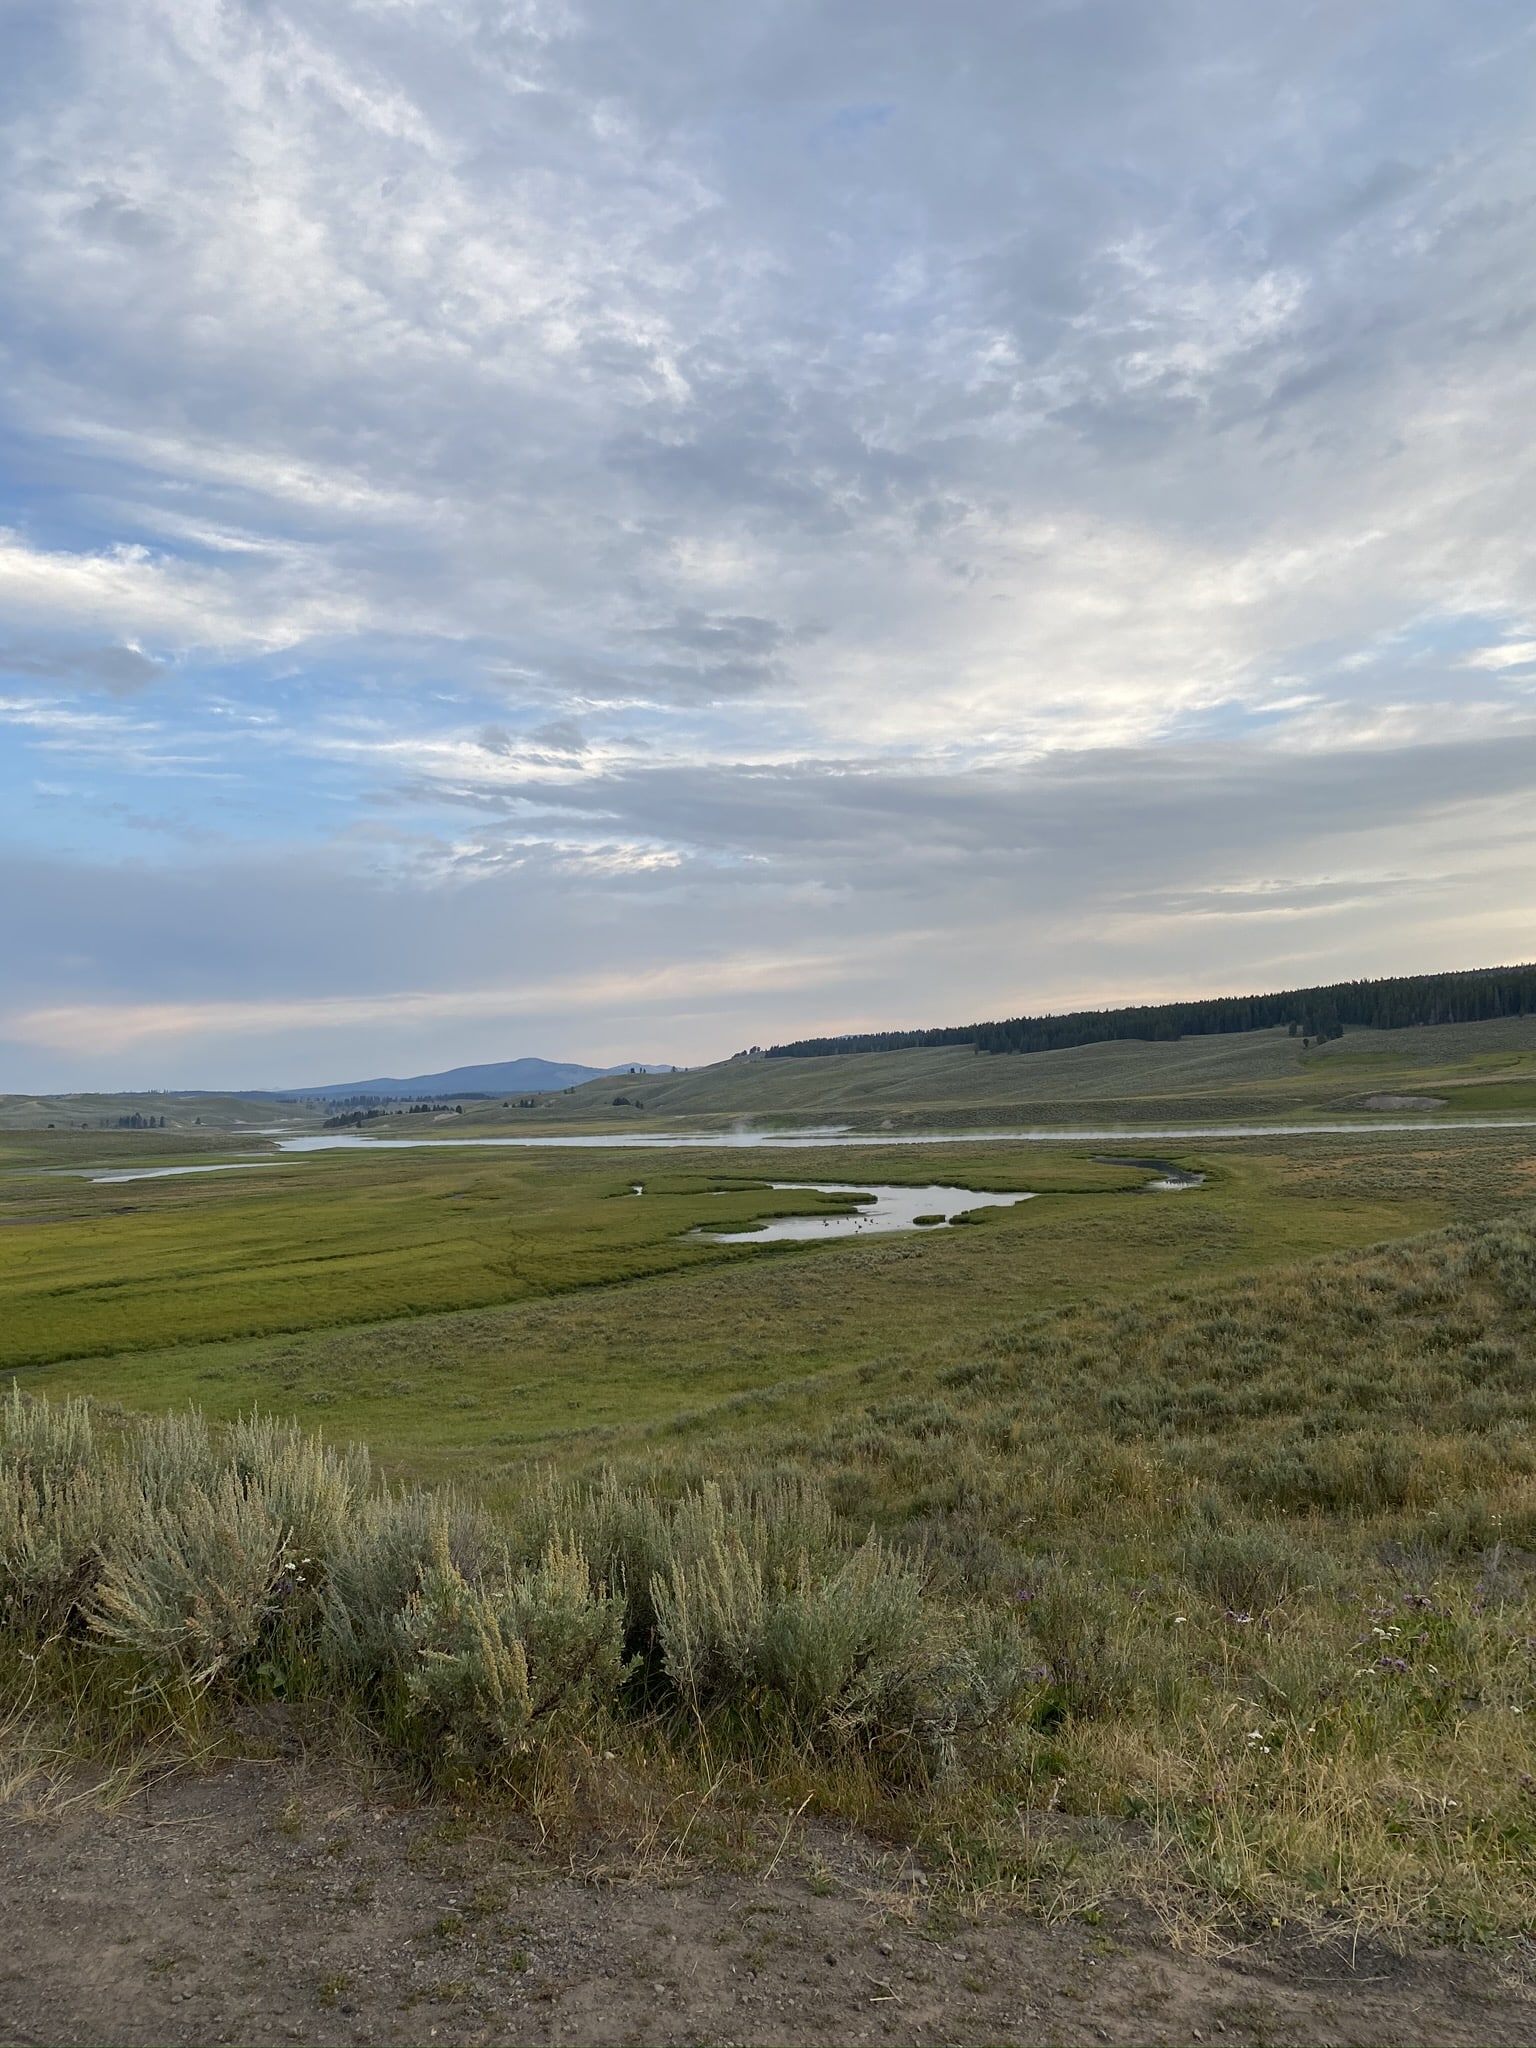
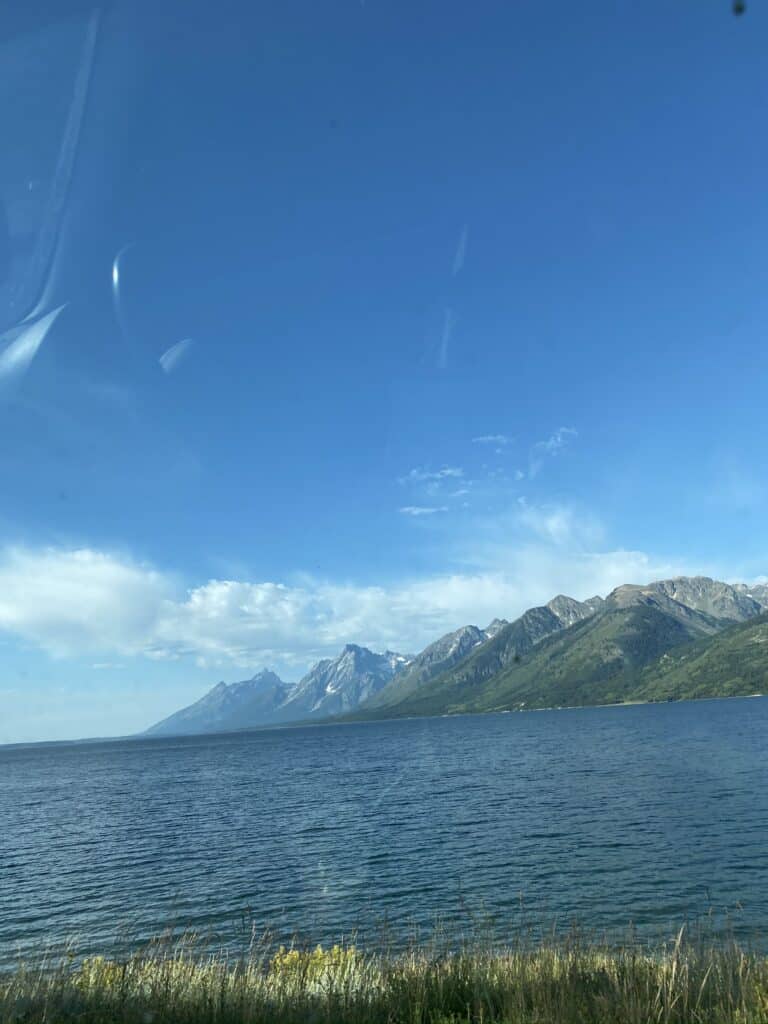
Yellowstone National Park + Hot Springs
Shortly after making it to the Yellowstone National Park entrance at 6:30 pm, we were stuck in a very long traffic jam caused by bison.
We were in a hurry to get to our campsite before dark, so we were not thrilled about it, but we got some really cool footage of the bison.
As we made our way into the park, we drove to the Hot Springs.
It was about 8 pm by the time we reached this part of Yellowstone.

Where To Stay: Yellowstone Park/West Gate KOA
By 9 pm we were finally on our way to our KOA.
The sunset was nice and we still ended up having to put our tent up in the dark, but we were able to use our headlights and a lantern to help.
This KOA was pretty big and had tons of extra amenities.
We prefer smaller, quieter places but this was the most convenient KOA to Yellowstone, so it was worth it.
We stayed in this KOA for 2 nights, which is the only time we stayed in the same place for more than 1 night the entire trip.

Road Trip Out West Itinerary Day 9: Yellowstone National Park
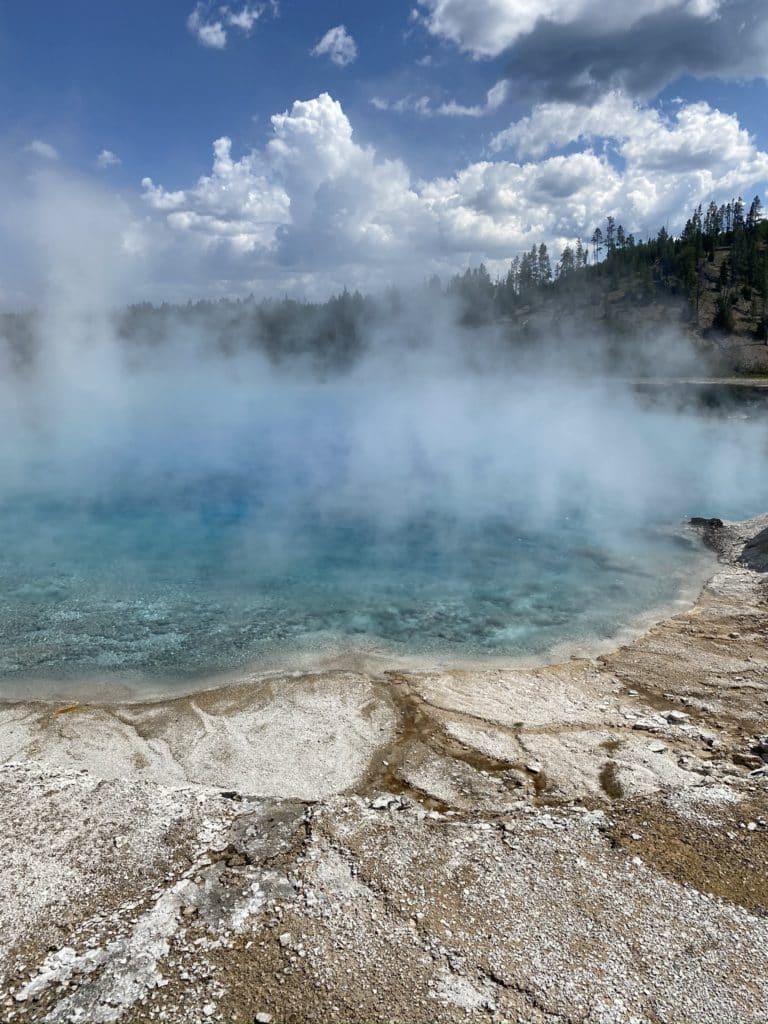
Today the highlights of visiting Yellowstone National Park include Grand Canyon of the Yellowstone, Grand Prismatic Spring, and Old Faithful.
Be forewarned, Yellowstone is very busy everywhere you go.
It takes a long time to get from point a to point b and the parking lots are pretty much always going to be full and you may need to park on the side of the road and walk to your destination.
You can check out our full Yellowstone experience in this video on our YouTube Channel.
Grand Canyon of the Yellowstone
There was quite a line to get into the park, which we knew would happen.
Our first stop was Grand Canyon of the Yellowstone.
We decided to go here first because it was the furthest point and we could work our way back from there.
Grand Canyon of the Yellowstone has a North Rim Drive and a South Rim Drive.
We did the North Rim Drive with the intention of doing both, but decided to move on to our next stop instead of also completing the South Rim Drive.


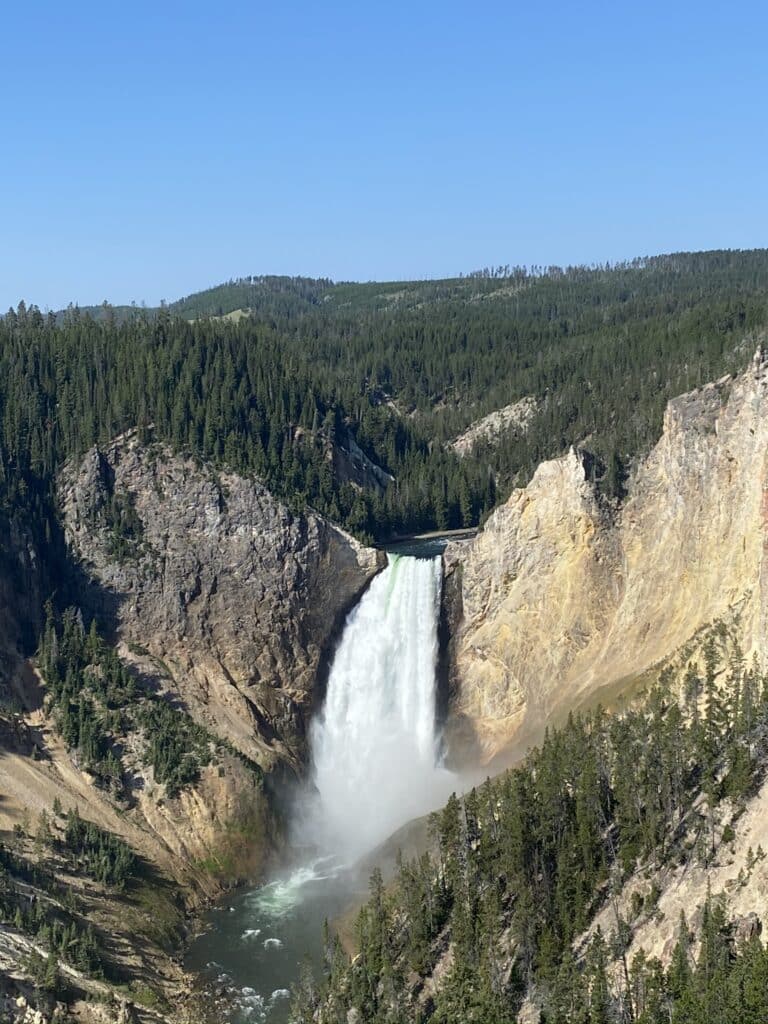
This drive was nice because there were several places to stop along the way where there was actually parking and you just have to walk out to the lookout.
It didn’t require any hiking which makes it a very accessible area.
I think we stopped at 3 different spots along the way.
It took us about 30 minutes total to do the whole drive.

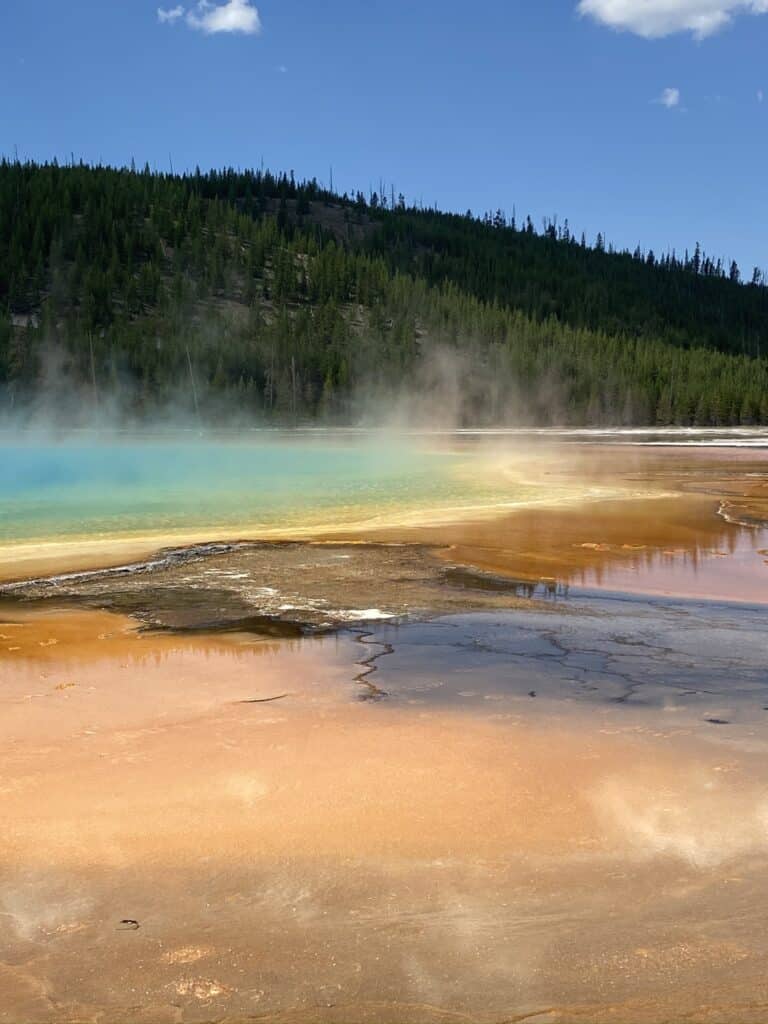
Grand Prismatic Spring
At 10:30 am we were on our way to Grand Prismatic Spring.
We arrived just before 11:30 am and noticed there was no parking up ahead.
All of the cars were just parking on the side of the road.
We drove until we saw an empty spot and took about a 10 minute walk on the side of the road until we reached the actual Grand Prismatic Spring parking lot.

The traffic in this area was crazy because of this and I’m so glad I was not the one driving.
This place was super awesome though.
I didn’t know that there would be other springs there.
The Blue Spring was so pretty and I swear had every shade of blue humanly possible.
We didn’t get back to our car until about 12:15 pm.


Where To Eat Lunch: Lodge At Old Faithful
This is the perfect place to get lunch or eat a picnic lunch.
You can sit outside while you wait for the next time the Old Faithful Geyser erupts.
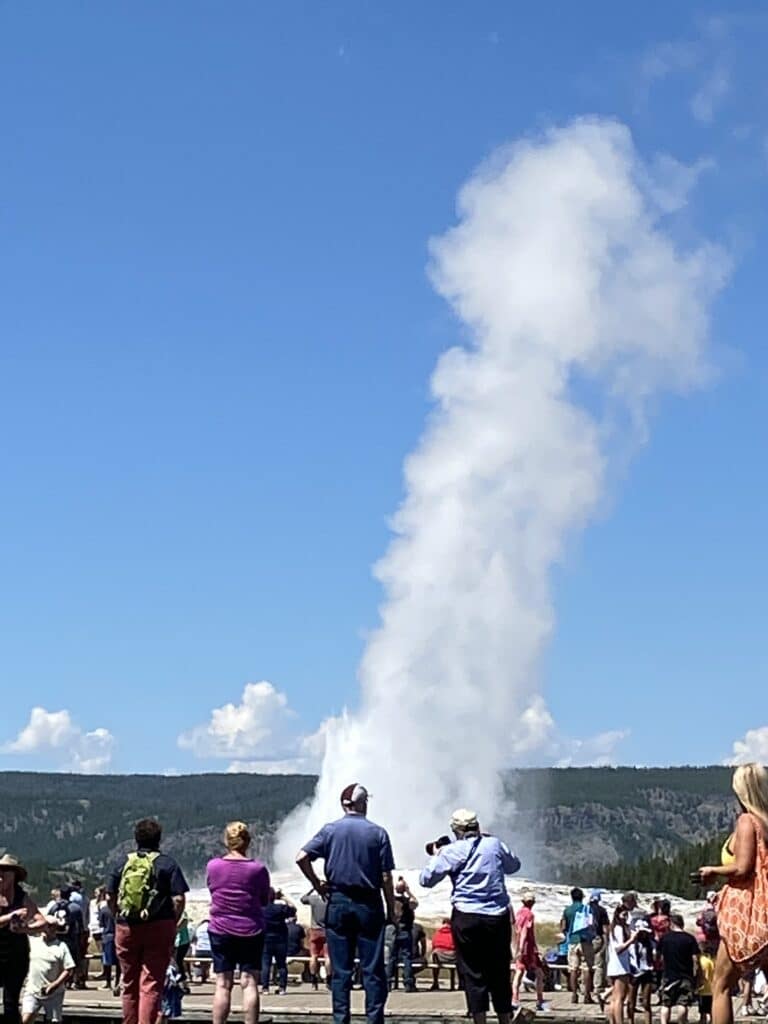
Old Faithful Geyser
When you get here, there will be a ranger that will tell you the next predicted time that Old Faithful will erupt.
For us, just after 1:30 pm Old Faithful started to erupt and it was really cool to watch.
It was kinda funny that once it started to die down everyone just left.
They didn’t even wait for it to stop completely, they just left after it peaked.
We decided to wait it out for awhile after, but be forewarned, the traffic to get out of here after an eruption is horrendous.
It took us over 30 minutes to get out of the parking lot.
Where To Stay: Yellowstone Park/West Gate KOA
Once again, we stayed at the same KOA.
There was so much traffic this day that we decided to go back to the KOA early because we had seen all the highlights.
It took us almost 3 hours to get back to the campground with the traffic.
Around 5:30 pm we started cooking dinner on our one burner stove and we played card games until it got dark.
Another great one pot non-perishable dinner to take on a road trip is Velveeta shells and cheese.
The KOA had a small gift shop that had cookies, so we picked up some for dessert.
We went to bed early because we decided to get up early and try to see a bear in Yellowstone before moving on to our next destination.


Day 10: Grand Teton National Park
Today, get up early to try to see some bears if you didn’t see any yesterday.
Some of the most common places to see bears are in Lamar Valley and Hayden Valley.
Lamar Valley was the area we drove into from the Beartooth Pass Highway, so I recommend driving to Hayden Valley instead.
Sunrise at Yellowstone National Park
We spent 6 am – 8 am looking for bears in Hayden Valley and never saw any.
But we did get to enjoy a peaceful and beautiful sunrise.
A tip for looking for bears or enjoying the sunrise is to go where you see other people.
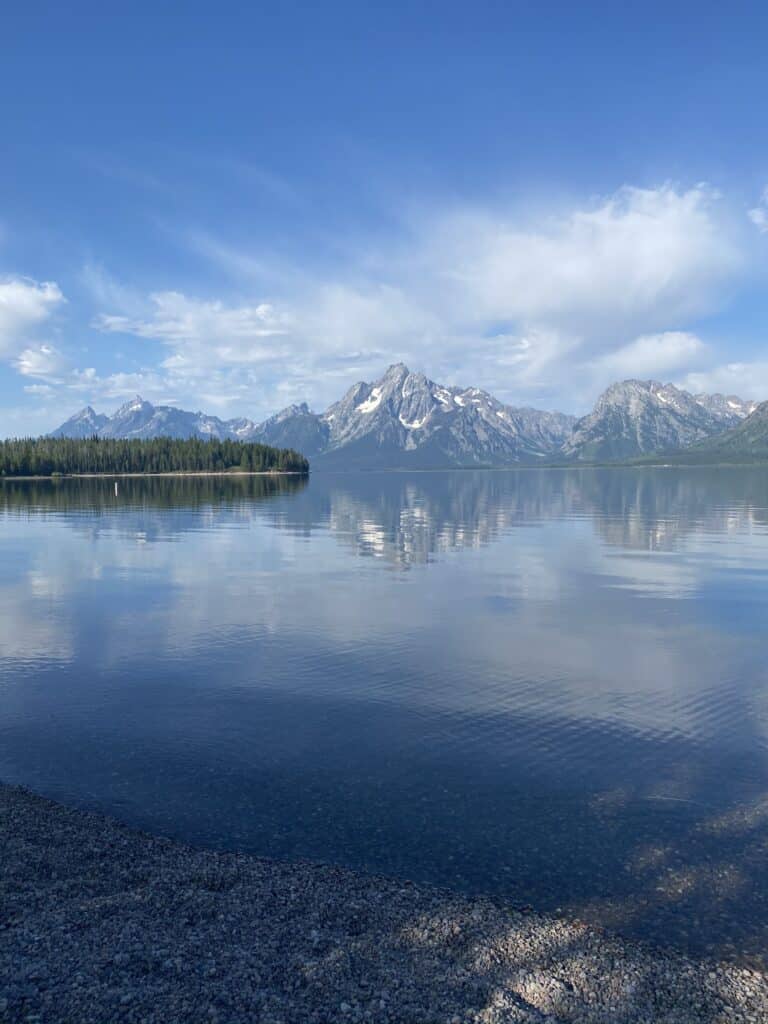
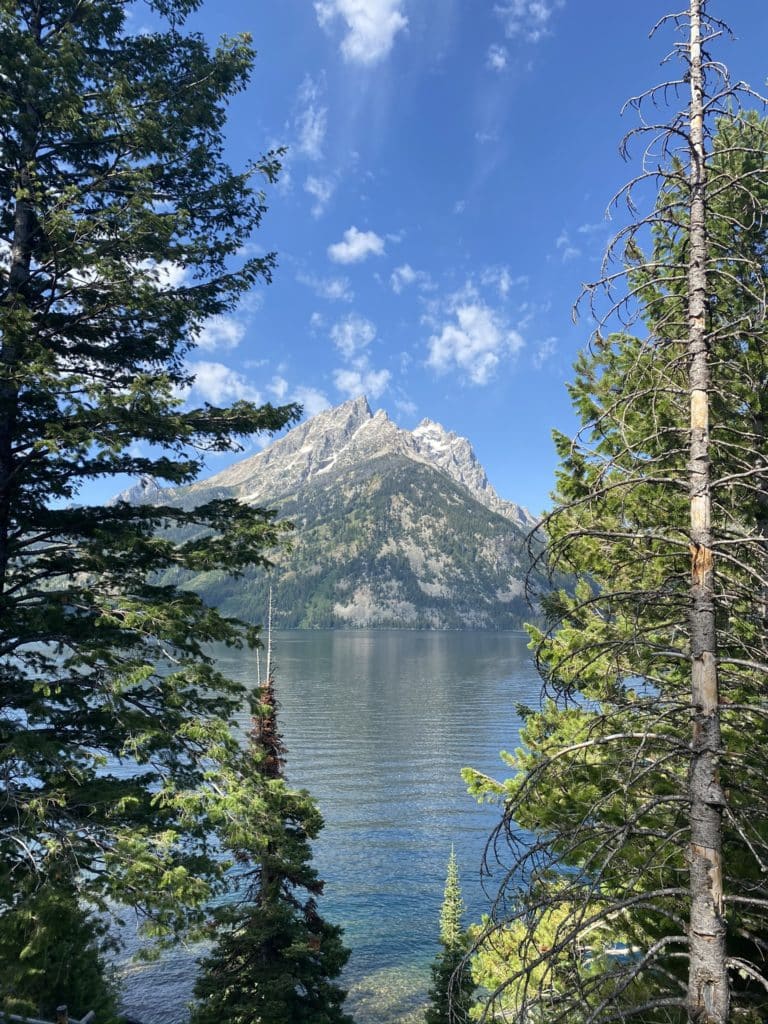
Grand Teton National Park
You can see our full experience at Grand Teton National Park in this video on our YouTube Channel.
We made it to the entrance of Grand Teton National Park at exactly 8:30 am.
We needed to stop for a bathroom break so we pulled in to the first visitor center area we found which was Colter Bay.
Cell service is pretty spotty and non-existent in some areas, so I recommend picking up a park map here to help you navigate if needed.
We were also able to stop by the marina and get a nice view of the lake.

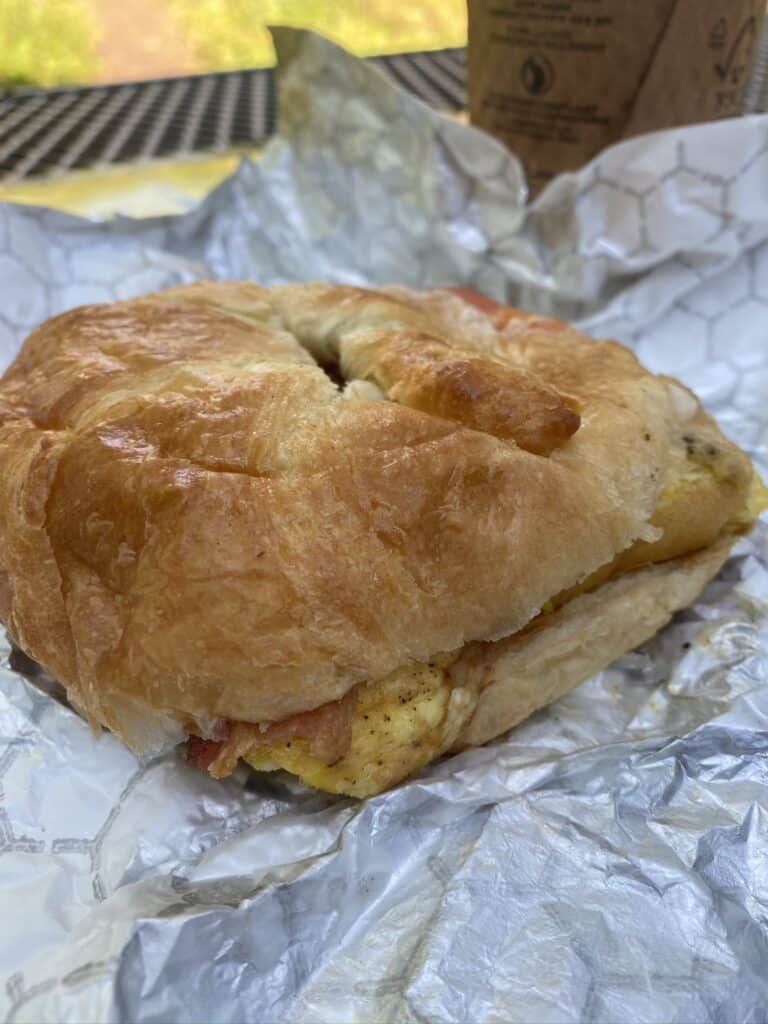
There is a restaurant here where you can get a quick breakfast like croissant sandwiches and breakfast burritos.
After breakfast, we started driving around 9:45 am, arrived at the lookout just before 10:15 am, and we were back out on the road by 10:30 am.
I’m not certain what the lookout trail was called but it was on the way to Jenny Lake from Colter Bay and went along a lake.

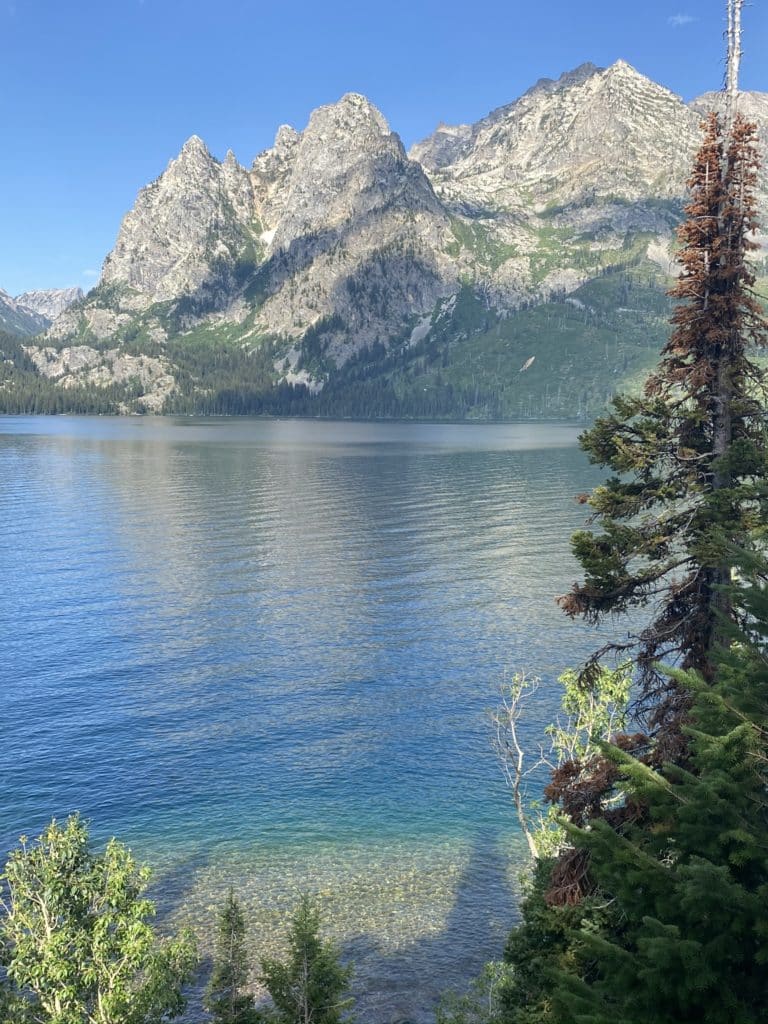
Jenny Lake
Jenny Lake was our next stop and we arrived around 11 am.
The parking lot was pretty full, so it may take some time to find parking.
We used this time to lather up our sunscreen, grab our hats and sunglasses, and stock up on water and snacks.
From there, follow the crowd to the marina to get tickets for the boat across Jenny Lake.
The boat runs back and forth across Jenny Lake continuously and goes from the marina to the Inspiration Point hike.
A boat leaves about every 15 minutes or so.
Shuttle tickets are $18 round trip for adults and it saves you a 2 mile walk each way, so I highly recommend it.
The breeze on the water is great and it’s a short trip across the lake.
A fun fact we learned there was that you can’t even see the Grand Teton peak from the most popular park view points.
Though it is taller, it is farther back, so it is blocked by the peaks that are closer to the main areas of the park.
Once you start driving farther South in the park you can actually see it though.


Hidden Falls Hike
We were on the boat by 11:15 am and off by 11:30 am.
The first part of the hike is to Hidden Falls.
It’s about a half mile each way, but if you continue, the trail will lead you to Inspiration Point which is about a mile each way.
I’ve heard from so many others that it is worth it to go all the way up to Inspiration Point.


The trail up to Hidden Falls is scenic enough (and uphill enough) if you can’t make the walk all the way up to Inspiration Point.
We started the Hidden Falls hike at 11:30 am and finished just after noon.
There was a bit of a line to take the boat back, so we had to wait for a couple boats, but we were back at the boat dock at 12:30 pm.


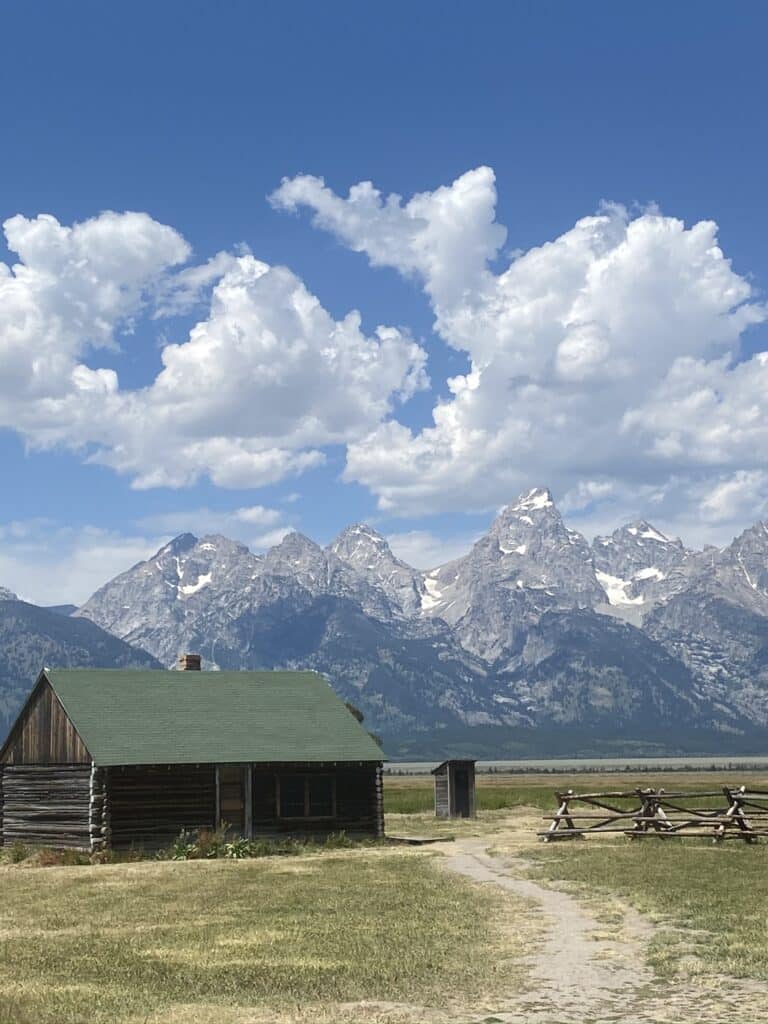
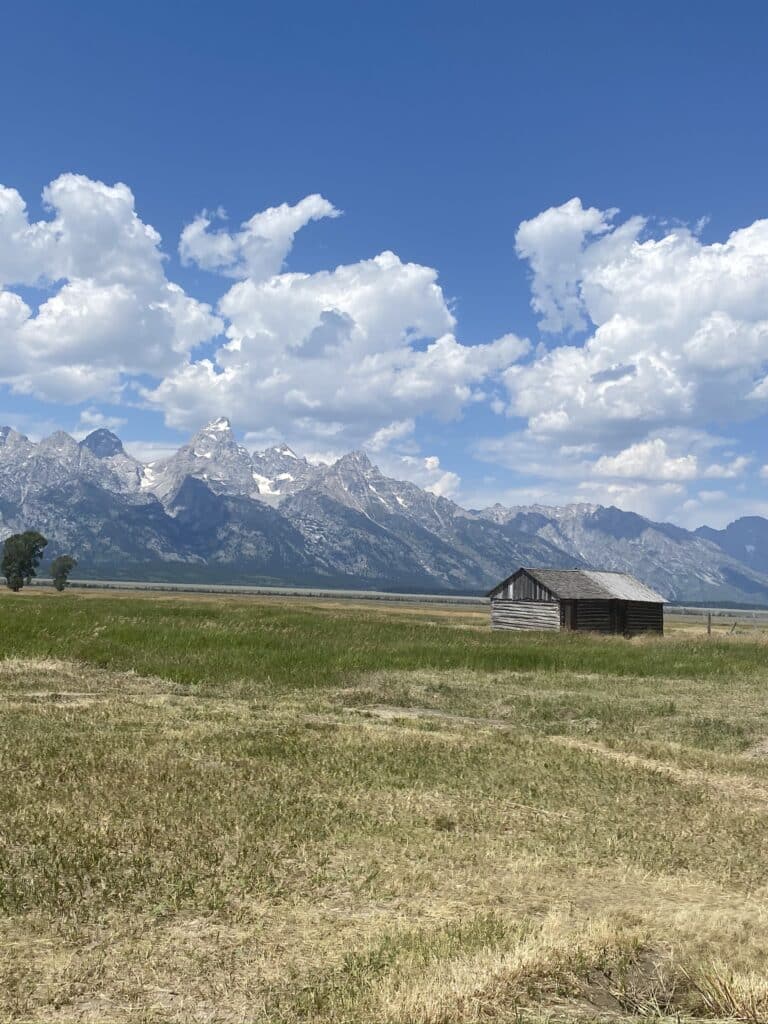
Mormon Row
It took us about 45 minutes to get to Mormon Row after we got off the boat from Jenny Lake.
When we got there only a couple cars were there and they were leaving.
By the time we left, a handful of cars were there and more were coming.
It seems like we got there at the perfect time.

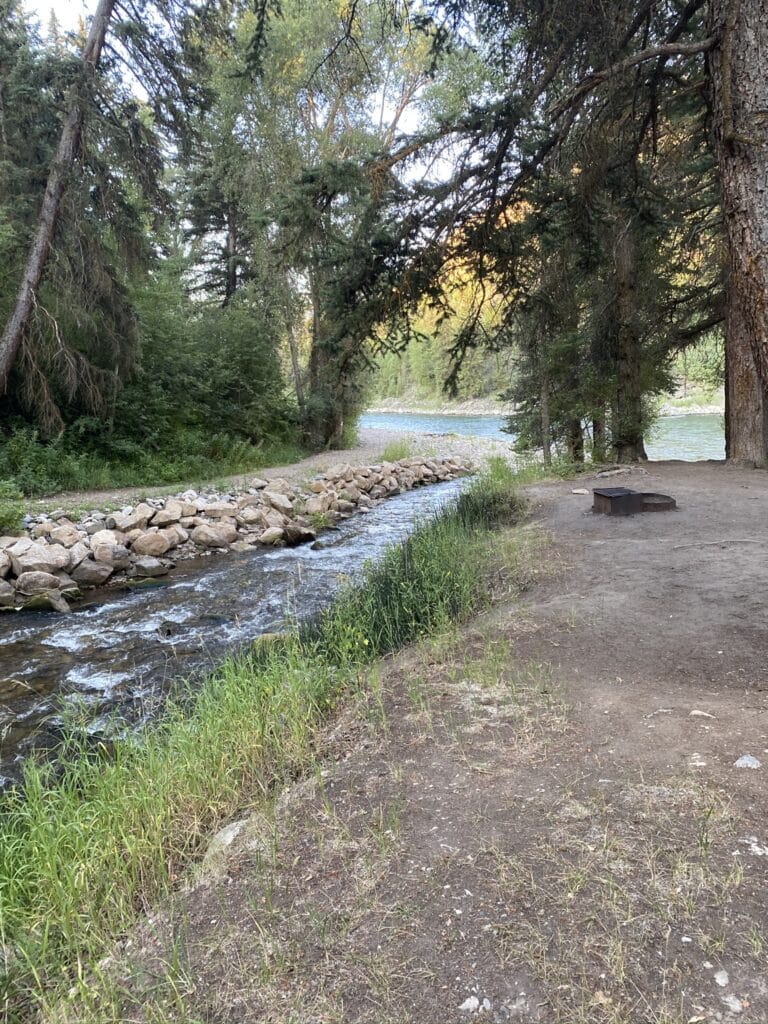
Where To Stay: Jackson Hole/Snake River KOA
By the time we were finished at Mormon Row it was about 1:30 pm.
It took about an hour to get to the Jackson Hole/Snake River KOA we were staying at and this was by far one of my favorites we’ve ever stayed at.
Our campsite was right on the corner where a creek flows into the Snake River and we were able to hear the water all night.
It was so secluded and scenic.
I highly recommend this place.
We had a couple hours to kill before heading to dinner so we set up our tent, had a glass of wine by the river and decided to shower and dress up a little more for dinner.


Where To Eat Dinner: Bar T5 Chuckwagon Dinner
I highly recommend this one whether you’re just going as a couple or a family.
This experience is $49 per person.
They do 2 dinners a night and we chose the later one just because we weren’t sure how much time we would need at Grand Teton.
They had a 4:45 pm and a 6:00 pm check in option in the Summer.
The experience lasts for about 3 hours from check in time to the time the wagon returns to check in.

To start the Bar T5 Chuckwagon Dinner, there were a row of benches near the check in where they shared the back story of the Jackson Hole area and the people who started and maintained the Bar T5 Chuckwagon Dinner.
After hearing the back story, they explained how the rest of the night was going to go and then we all got into our chuckwagons.


Once we made it up to our dinner spot, we were all seated at our own picnic tables.
Dinner is buffet style.
There was salad with ranch dressing, secret recipe baked beans, slow roasted bbq chicken, roast beef smothered in homemade gravy, corn on the rob, a dinner roll, and for dessert a blondie.
For drinks you can choose from lemonade, water, coffee, and hot chocolate.
At the gift shop before hopping on the chuckwagon, you can get a cold sarsaparilla to have with your dinner if you prefer a different drink.
Once everyone was settled with their meals, the show started.
After dinner we rode the chuckwagons back to the parking lot.
We got back just after 9 pm.
It was completely dark by the time we were done.
We made it back to our KOA around 9:45 pm and went straight to bed.
Day 11: White Water Rafting + Craters Of The Moon
When we booked our KOA in Jackson Hole we were told that if we wanted to book it more than 2 weeks in advance we had to also book white water rafting.
We had time in our trip and had never been before, so we thought why not!
We were picked up from the KOA around 8:30 am and we were out at the river around 9 am.
You can see our full experience from this day in this video on our YouTube Channel.
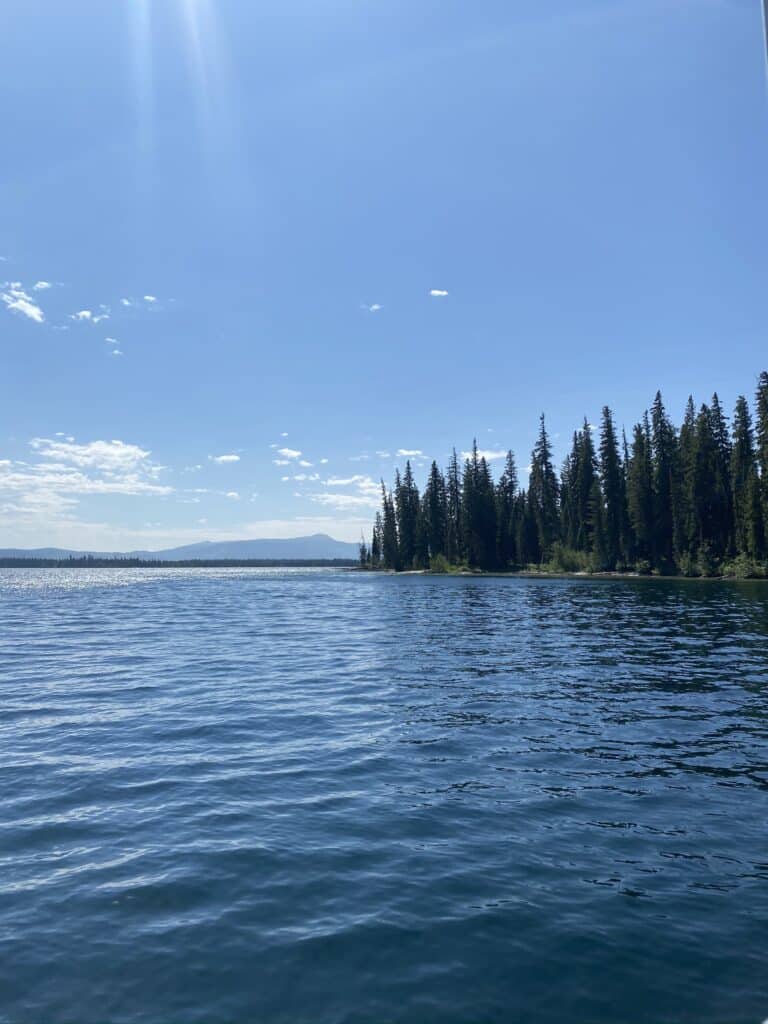
White Water Rafting On The Snake River
We spent about 2 hours on the river and we were mostly in the sun which felt great, but the water was still pretty cold and my fingers and toes were numb majority of the time.
They had a couple professional photography businesses take photos since we had no way of taking them, but the photos were crazy expensive (as to be expected), so we just downloaded them with the watermarks.


After we were done rafting, we had maybe a quarter or half mile uphill walk back to the busses.
By about 11:30 am we were dropped back off at the KOA.
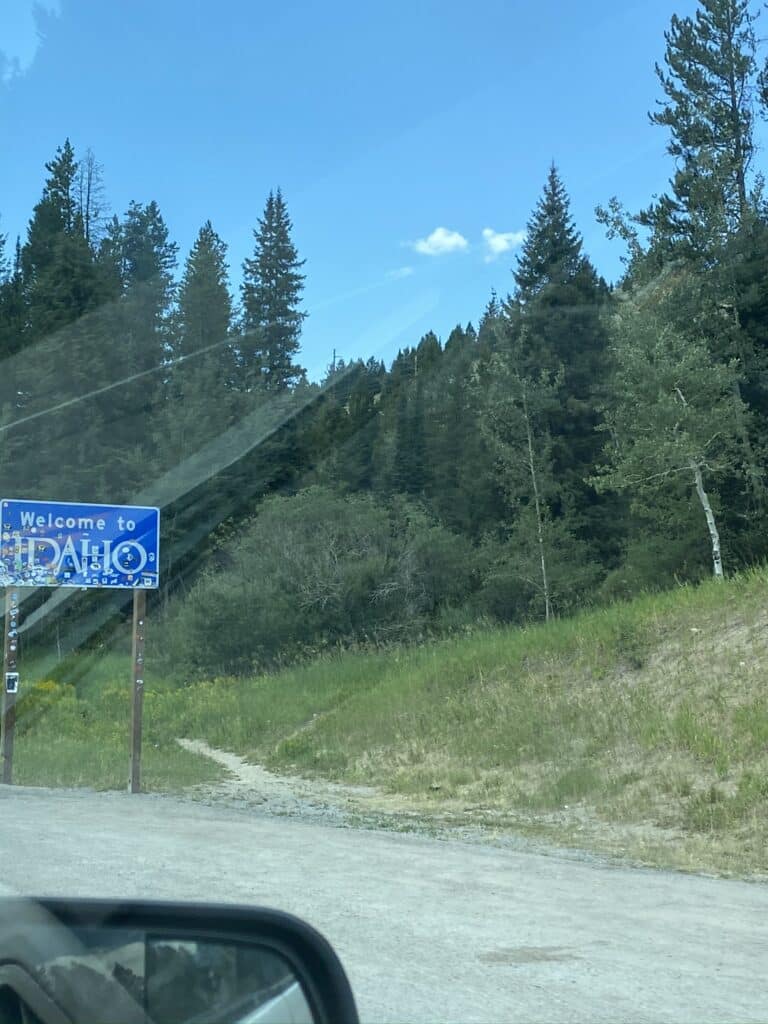
Drive To Idaho
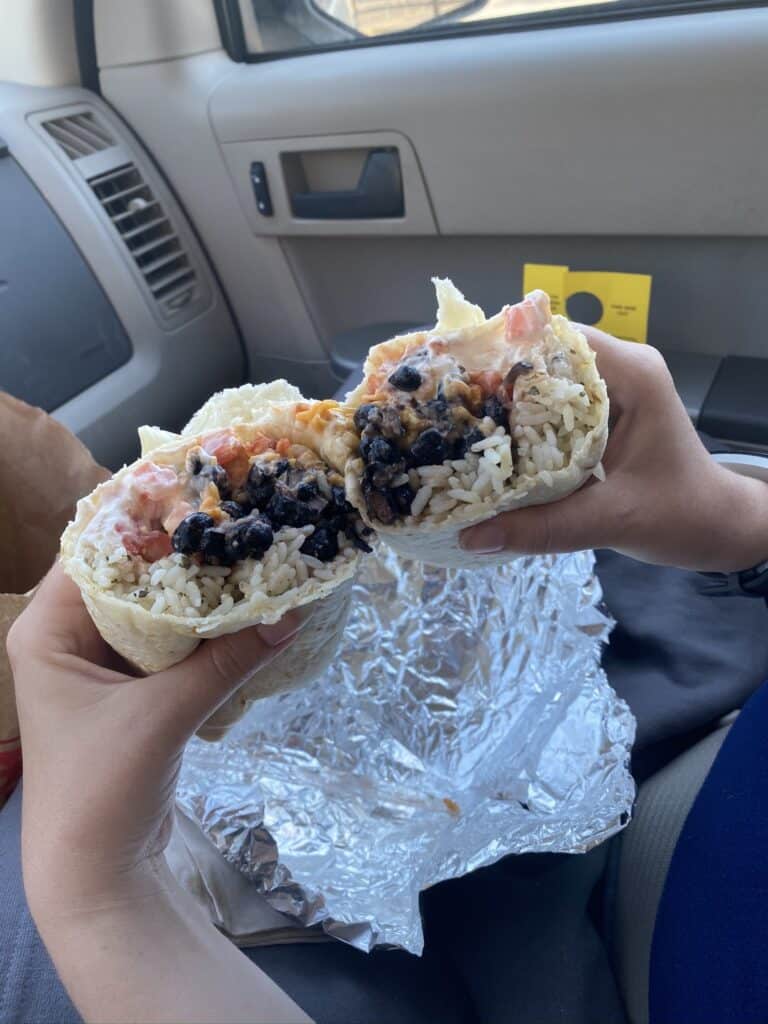
From here, we stopped in Jackson Hole for lunch and to top off our gas.
Around 1:30 pm is when we crossed the state line into Idaho.
Idaho Falls is a great spot to stop for gas again and to get another snack if you’re still hungry.
From here, we continued on to Craters of the Moon.
Overall, from Jackson Hole to Craters of the Moon is a little over a 3 hour drive.
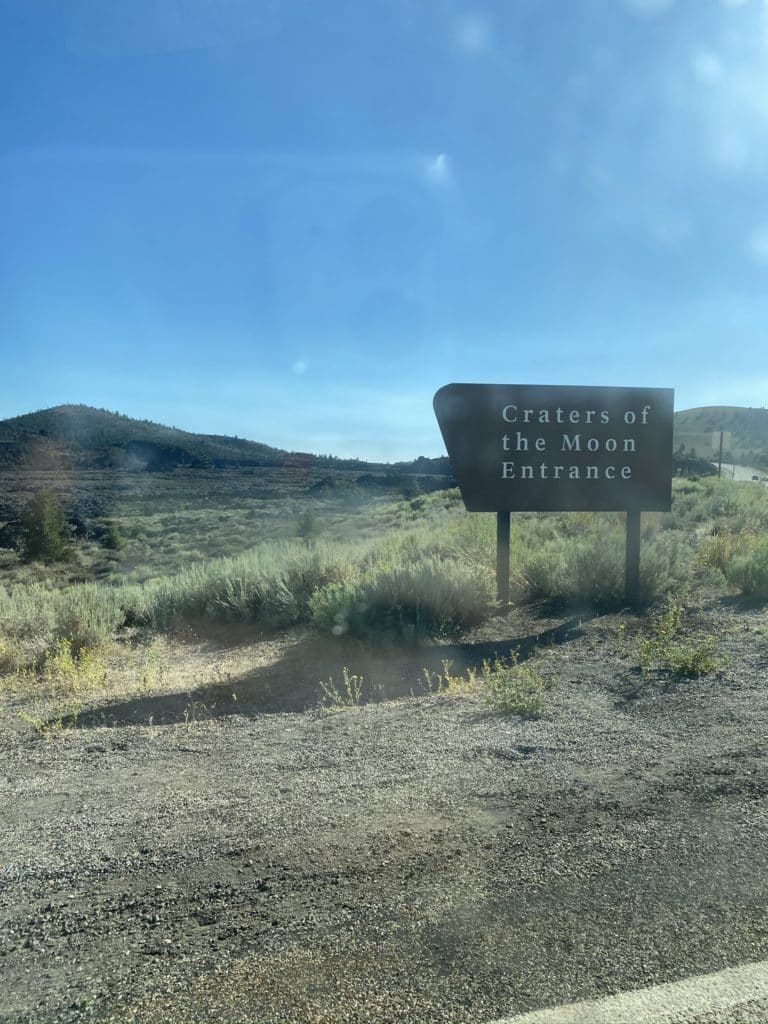
Craters Of The Moon
This place was so cool and is so under-rated.
It was about 5:45 pm by the time we arrived, so this itinerary is best done in the Summer when the sun sets much later.
The best way to see the whole park is to take the scenic loop drive.
Along the loop are several pull out spots with short trails.
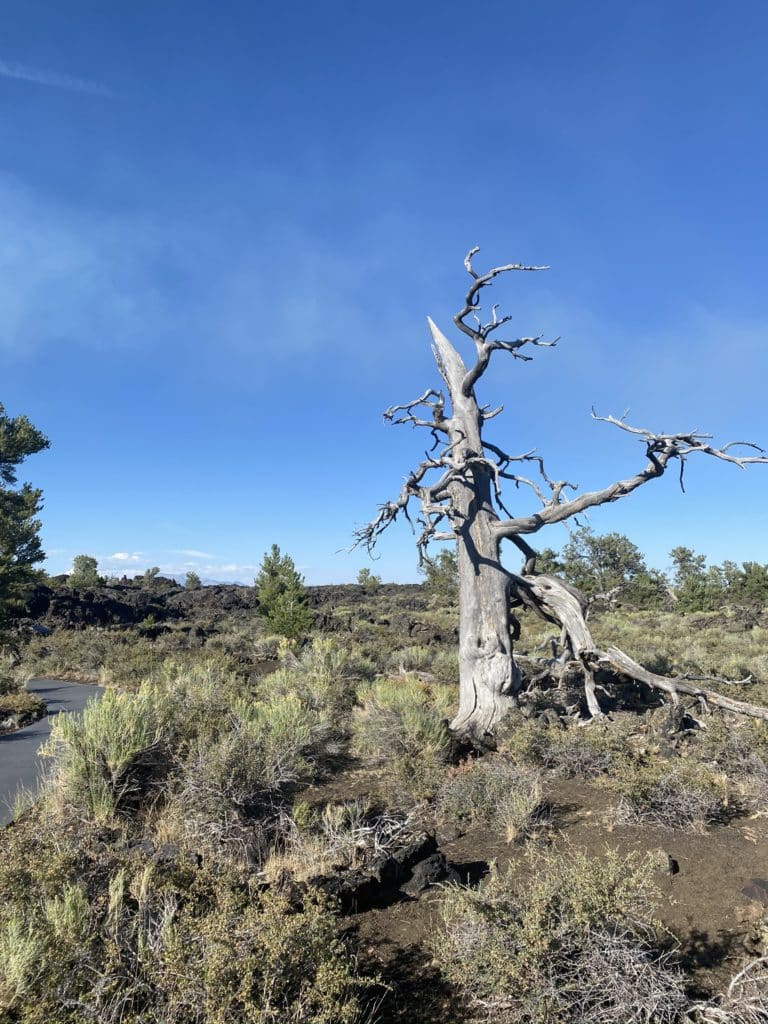
Devil’s Orchard Trail
Along the way we stopped at Devil’s Orchard Trail and Inferno Cone.
In total there are 7 stops along the loop.
We stopped at Devil’s Orchard Trail first which was a super cool paved loop.
They have a small campground that I wish we would’ve had the time to camp in.
I highly recommend checking this place out.

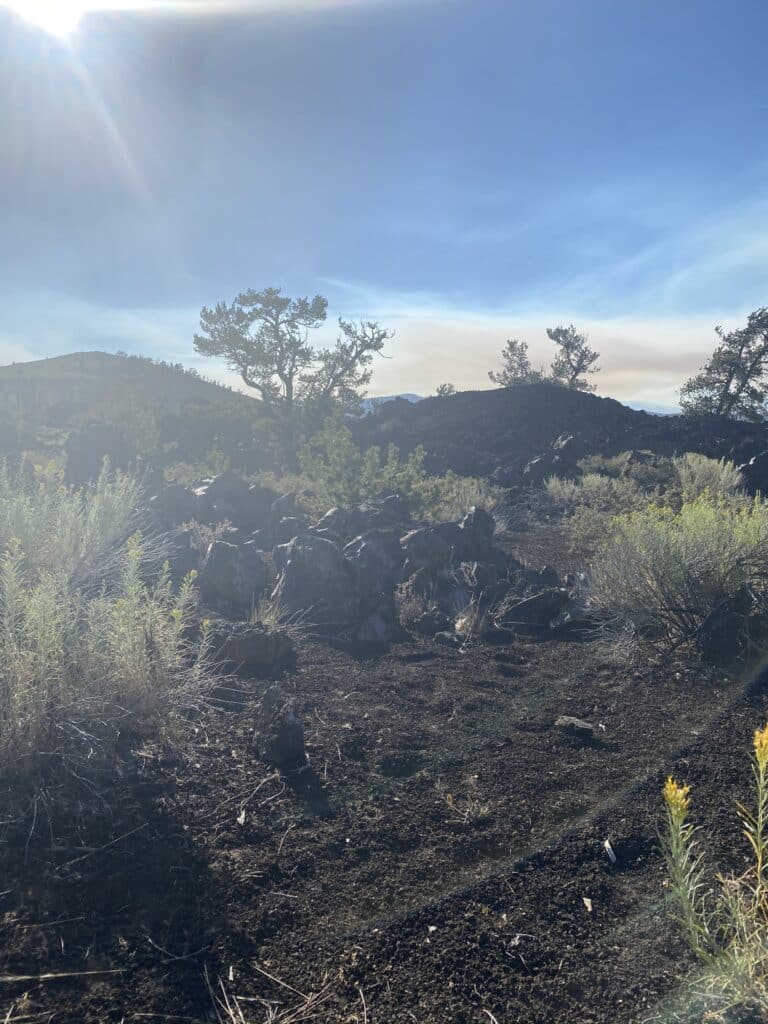
Inferno Cone
Inferno Cone was our next stop on the loop.
It was basically like hiking up the side of a volcano.
The rocks looked so cool.
They were very light and practically hollow, but very porous and shiny.
They didn’t even look real.
I wish I could’ve taken one home, but that is super illegal.
So don’t do it!


Overall, it took about an hour to finish this loop.
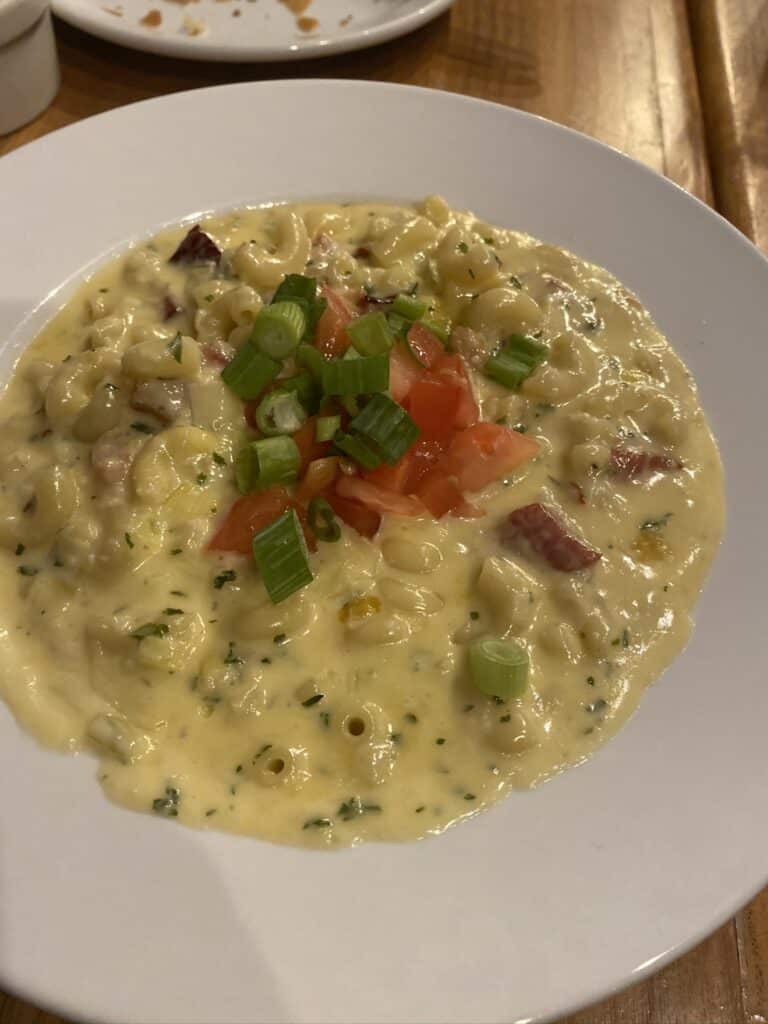
Where To Eat Dinner: Canyon Crest In Twin Falls
We didn’t get to dinner until about 8:30 pm and it was still light outside.
It ended up being perfect timing because by the time we were seated we were able to watch the sunset over the canyon while we had dinner.
We were also there long enough for all of the string lights to be turned on on the patio.
Their dinner rolls come with a huge slab of flavored butter and they have several good appetizer choices.

For dinner, we enjoyed the mac n cheese, a burger, and some sweet potato fries.

Where To Stay: Hilton Garden Inn Twin Falls
Since there weren’t any KOA campgrounds in this area and it was the last full day of the trip, we decided to book a hotel for the night.
We enjoy Hilton brand hotels on road trips, especially Hampton Inn and Hilton Garden Inn because they’re affordable and always conveniently located.
Day 12: Shoshone Falls + Great Basin National Park
Today is the final day of the road trip.
By the end of the day we will have circled back to Las Vegas.
You can check out our full experience this day in this video on our YouTube Channel.
Shoshone Falls
Shoshone Falls has been referred to as the “Niagara Falls of the West”.
It is significantly smaller and depending on when you go the water flow may be at different levels, but it is still cool to see if you’re in the area.
We arrived just after 9 am and stayed for about 15 minutes to get pictures and video.
It costs $5 to park since it’s located inside of a state park.

Drive To Nevada
After Shoshone Falls, we set out for the last stop on our road trip.
We crossed the Nevada state line around 10:15 am.
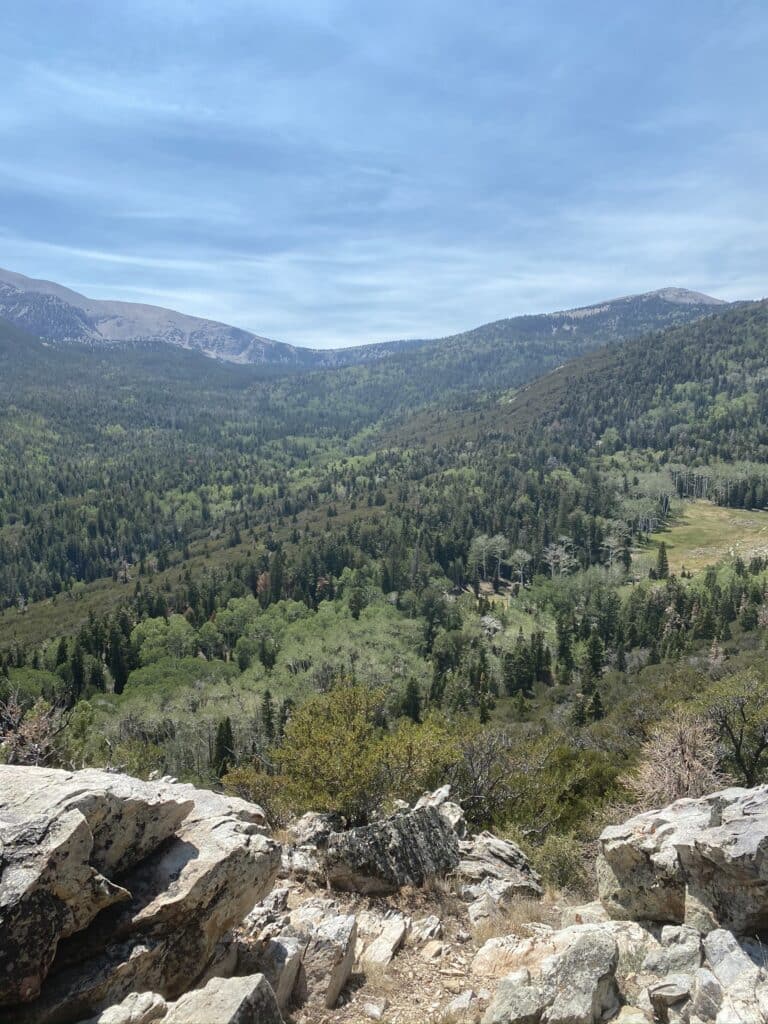
Great Basin National Park
It takes about 4 1/2 hours to get to Great Basin National Park from Shoshone Falls.
There are a couple different things to do once you get here.
They are known for their caves, but they also have a scenic loop drive that goes up into the mountains.
If you have time for both, I definitely recommend both.
We were only able to do the scenic loop drive on our trip because the caves were temporarily closed.
The scenic loop drive takes about an hour round trip.
As you gain elevation, the temperature cools and there is a campground up at the top that is perfect for camping in the Summer because it’s 70+ degrees there, whereas it’s 100+ degrees in the basin.

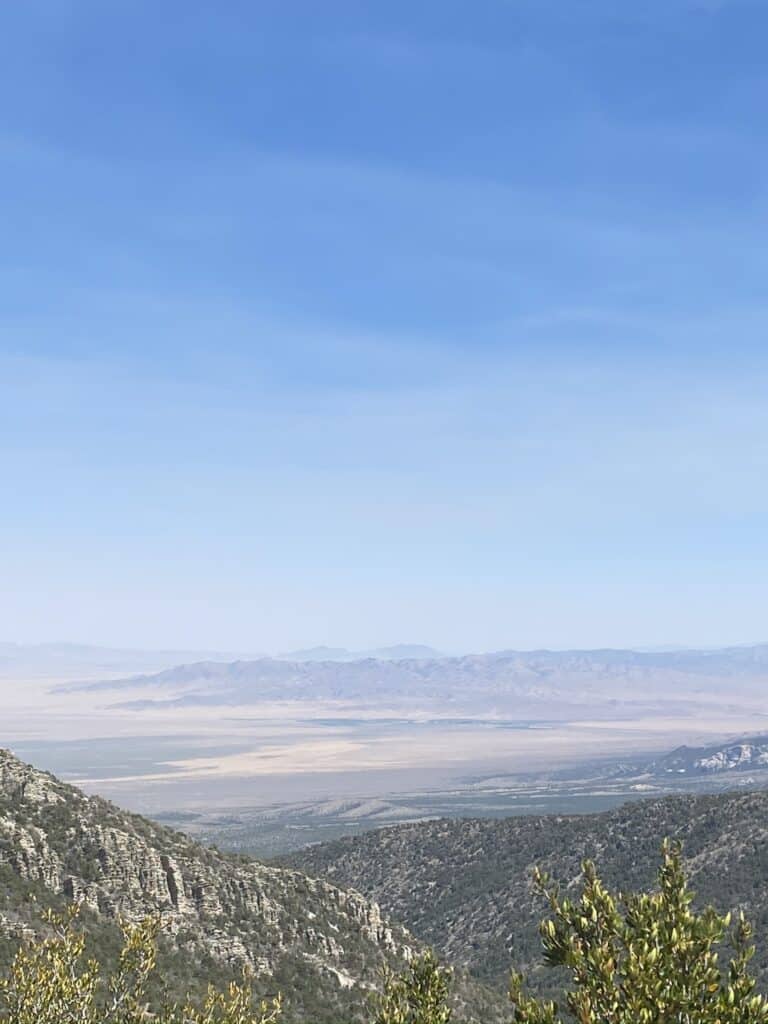
I recommend taking your time while you’re here because it’s another 4 hour drive to Las Vegas after leaving Great Basin National Park.
We left around 3:45 pm to continue our drive to Las Vegas.
Where To Stay In Las Vegas
There are a ton of great places to stay in Las Vegas for all interests.
We’ve covered a ton of properties on and off the strip that you can check out and find the best option for you.
Check out our favorite Las Vegas hotels and resorts.
How Much Does This Road Trip Out West Itinerary Cost?
We want to be completely transparent and show how inexpensive this kind of trip can be.
I wasn’t too strict with our budget and we did splurge on a few meals and activities like the Chuckwagon Dinner and the River Rafting.
We also picked up an ornament as our souvenir from each place we visited, which added up after awhile.
My point is that this trip can easily be done even cheaper.
Spending less than $100 a day per person is simple.
For this entire trip for 2 adults, we spent $2,679.49 over 12 days.
Here’s the breakdown of the biggest expenses:
Road Trip Out West Food Costs
Food: $692.35
About $60 of this was breakfast, snacks, and dinner groceries we brought with us for the campsite.
About $170 of this was for the Chuckwagon Dinner and the rest was lunches and some ice cream.
So we ended up spending $28.84 per person per day on food.
Which isn’t bad, considering we also tipped 20% on any table service meals.
If we had stuck with regular quick service and casual dining for our meals it would have easily been less than $20 a day per person.
Road Trip Out West Lodging Costs
Lodging: $631.28
This doesn’t include the 12th night which is when we arrived in Vegas and used a timeshare stay for another week after our road trip.
This is just the 11 nights we were camping.
If we stayed in hotels, this number would be at least $1200, most likely more.
We averaged $57.38 a night for each campsite.
If you break it down per person, we averaged $28.69 a night per person.
Almost all of them had electric, though we rarely used it since we were able to charge our phones in the car during the day.
The camping prices were all over the place though.
The KOA near Yellowstone was $80 a night, Mt Rushmore was $70, Devil’s Tower was $50, but camping inside Capitol Reef was only $20 and our first 4 campsites were only about $35 a night.
Road Trip Out West Gas Costs
Gas: $236.91
The road trip was almost 4,000 miles and we started with a full tank of gas, which isn’t factored into this price because I don’t know how much it was and it was full before we even started our trip.
My car usually says I can go about 330 miles between fill ups, but once we get out on the road it is much closer to about 400 miles.
Gas prices were generally lower than in California, so under $3.00 a gallon almost everywhere we went.
I think majority of the time it was always under $1.50 a gallon.
Road Trip Out West Souvenir Costs
Souvenirs: $263.81
Most of this was for our ornaments from each place we visited, but we did pick up a few souvenirs for family.
Not getting souvenirs can really help bring down the price of the trip.
This would have saved us $20 a day if we didn’t buy souvenirs.
But we budgeted for it, so we were okay spending this much.
Road Trip Out West Activity Costs
Activities: $144.09
We already owned the National Park annual pass, so that price isn’t incorporated into this one, which is $80.
The activity costs in our calculations consists of Zion National Park Shuttle tickets, Mammoth Site, Custer State Park, Crazy Horse Memorial, the Jenny Lake boat, and Shoshone Falls.
So basically we were able to entertain ourselves for $12 a day, or $6 per person per day.
This is also why we like to visit National Parks and more outdoorsy destinations.
It is way more affordable than a trip like 12 days at Disney World.
Road Trip Out West Miscellaneous Expenses
Miscellaneous: $711.05
This seems like a high number for “miscellaneous” type spending, but about $200 of it was for an oil change and to fix the air conditioning in the car while we were on the road.
The other $500 was extra tent stakes and a mallet, parking at a few different places, hyrdocortisone, a birthday gift JP bought me, and some charges that I don’t remember exactly what they were for, so I decided to put them here.
Conclusion: The Perfect Road Trip Out West Itinerary
The perfect road trip out West itinerary takes you to some of America’s most iconic National Parks and monuments all in just a couple of weeks.